KLR Top-End Overhaul
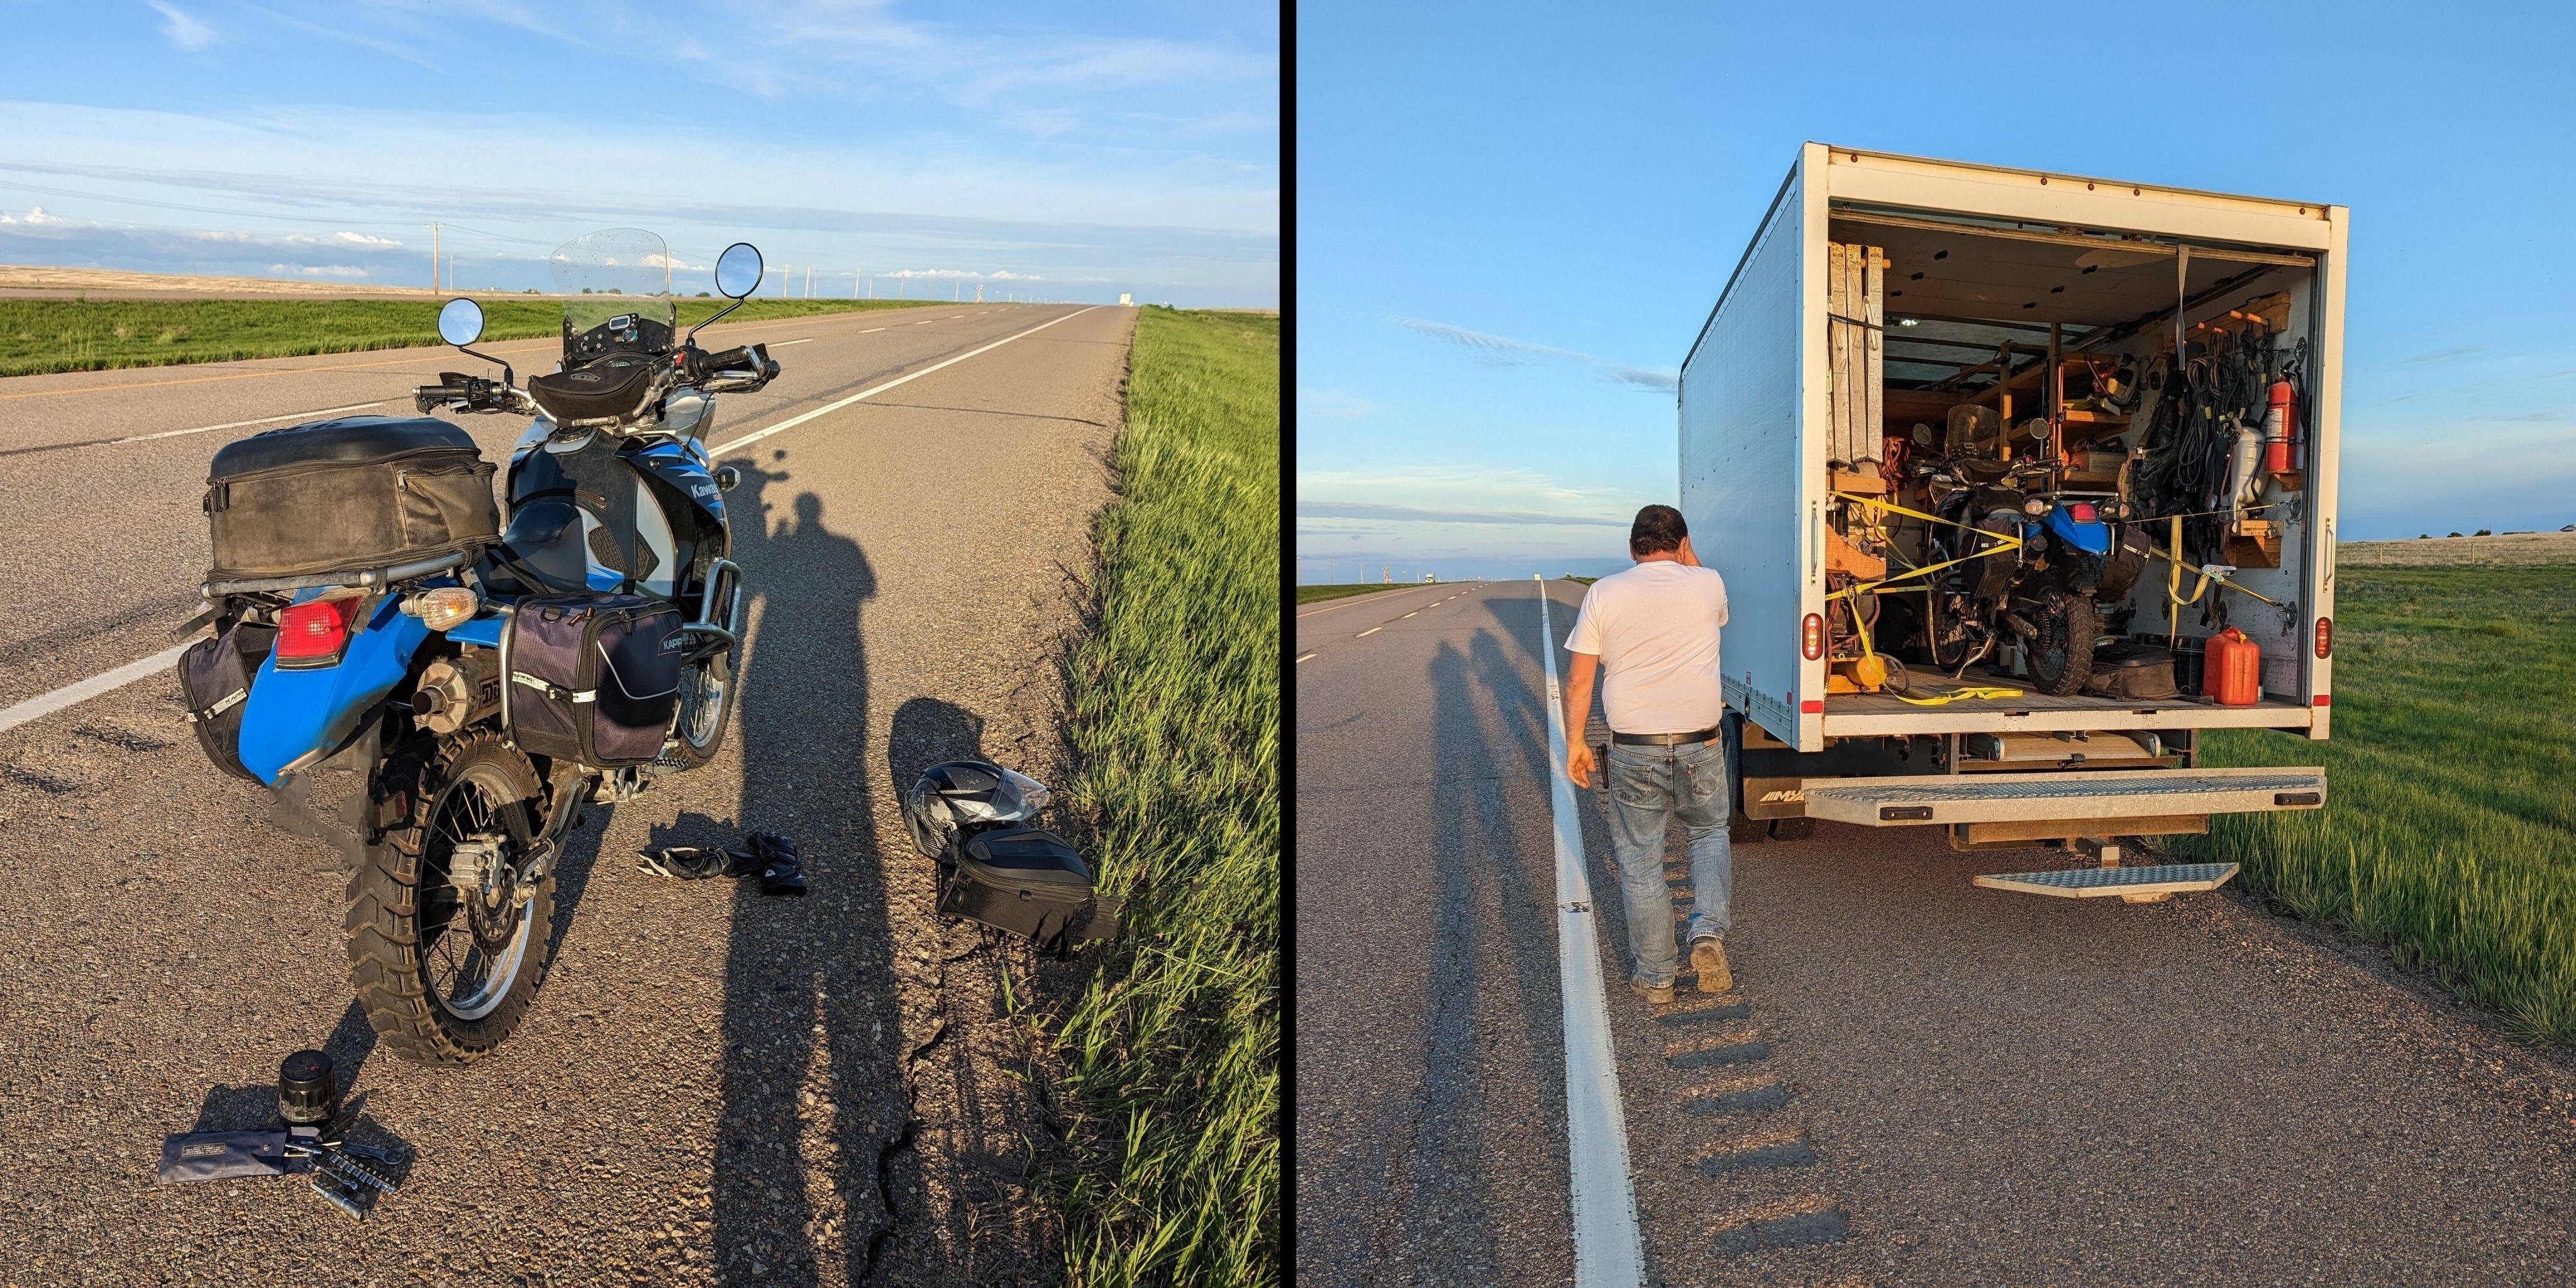
Less than 30 minutes away from completing my longest motorcycle trip to date, disaster. My 2008 KLR 650 motorcycle quit on me. It stopped abruptly without notice, and the engine was rolling over but no start.
Repairing this engine was quite the learning journey
Diagnosing
Diagnosing issues with a motorcycle engine requires careful examination to pinpoint potential problems. Before jumping to conclusions about engine failure, it’s essential to follow basic diagnosis for a non-start engine as follows.
Fuel
The engine requires a proper fuel supply to mix with air for combustion.
Hoses
Disconecting the fuel hoses and blowing air through them verifies that they are clear of obstruction.
Petcock
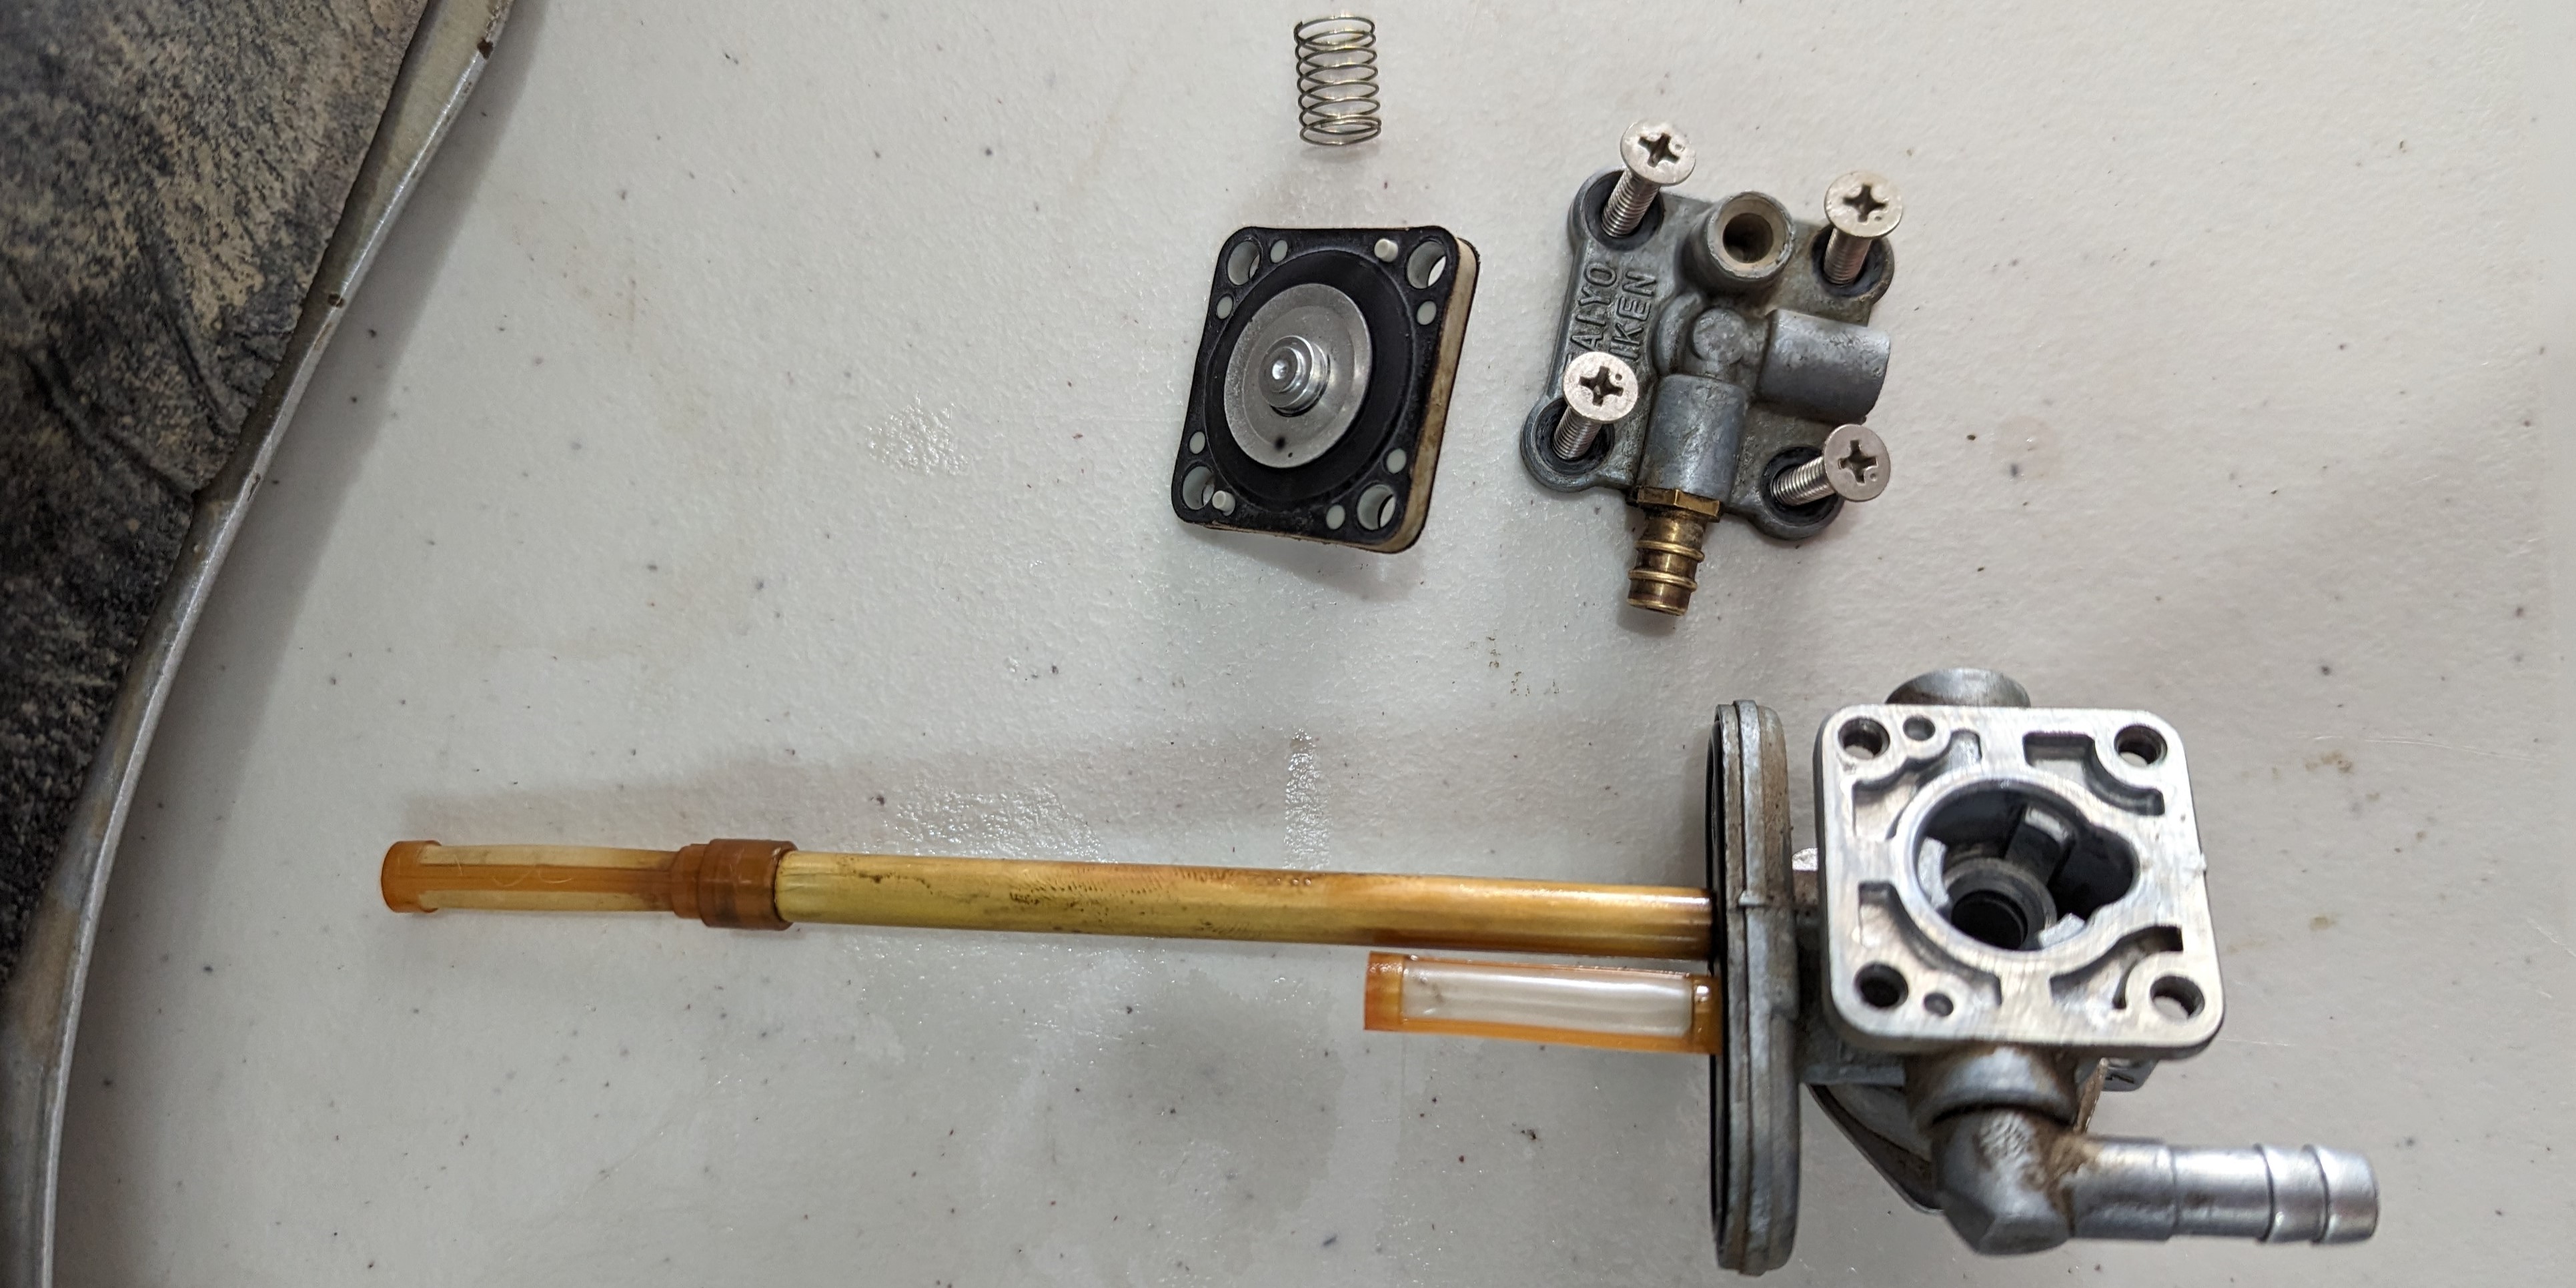 A clogged petcock valve can impede fuel flow from the tank to the carburetor, resulting in inadequate fuel delivery to the engine.
In the case of a vacuum-operated petcock like mine shown here, simple fuel dripping when the line is pulled isn’t enough to verify function. This type relies on engine vacuum to control fuel flow, allowing it only when the engine is running. To prove this system a ‘suction’ can be applied to the vaccuum line to allow for fuel flow, or the petcock can be disassembled to inspect for blockages as shown above.
Carburetor
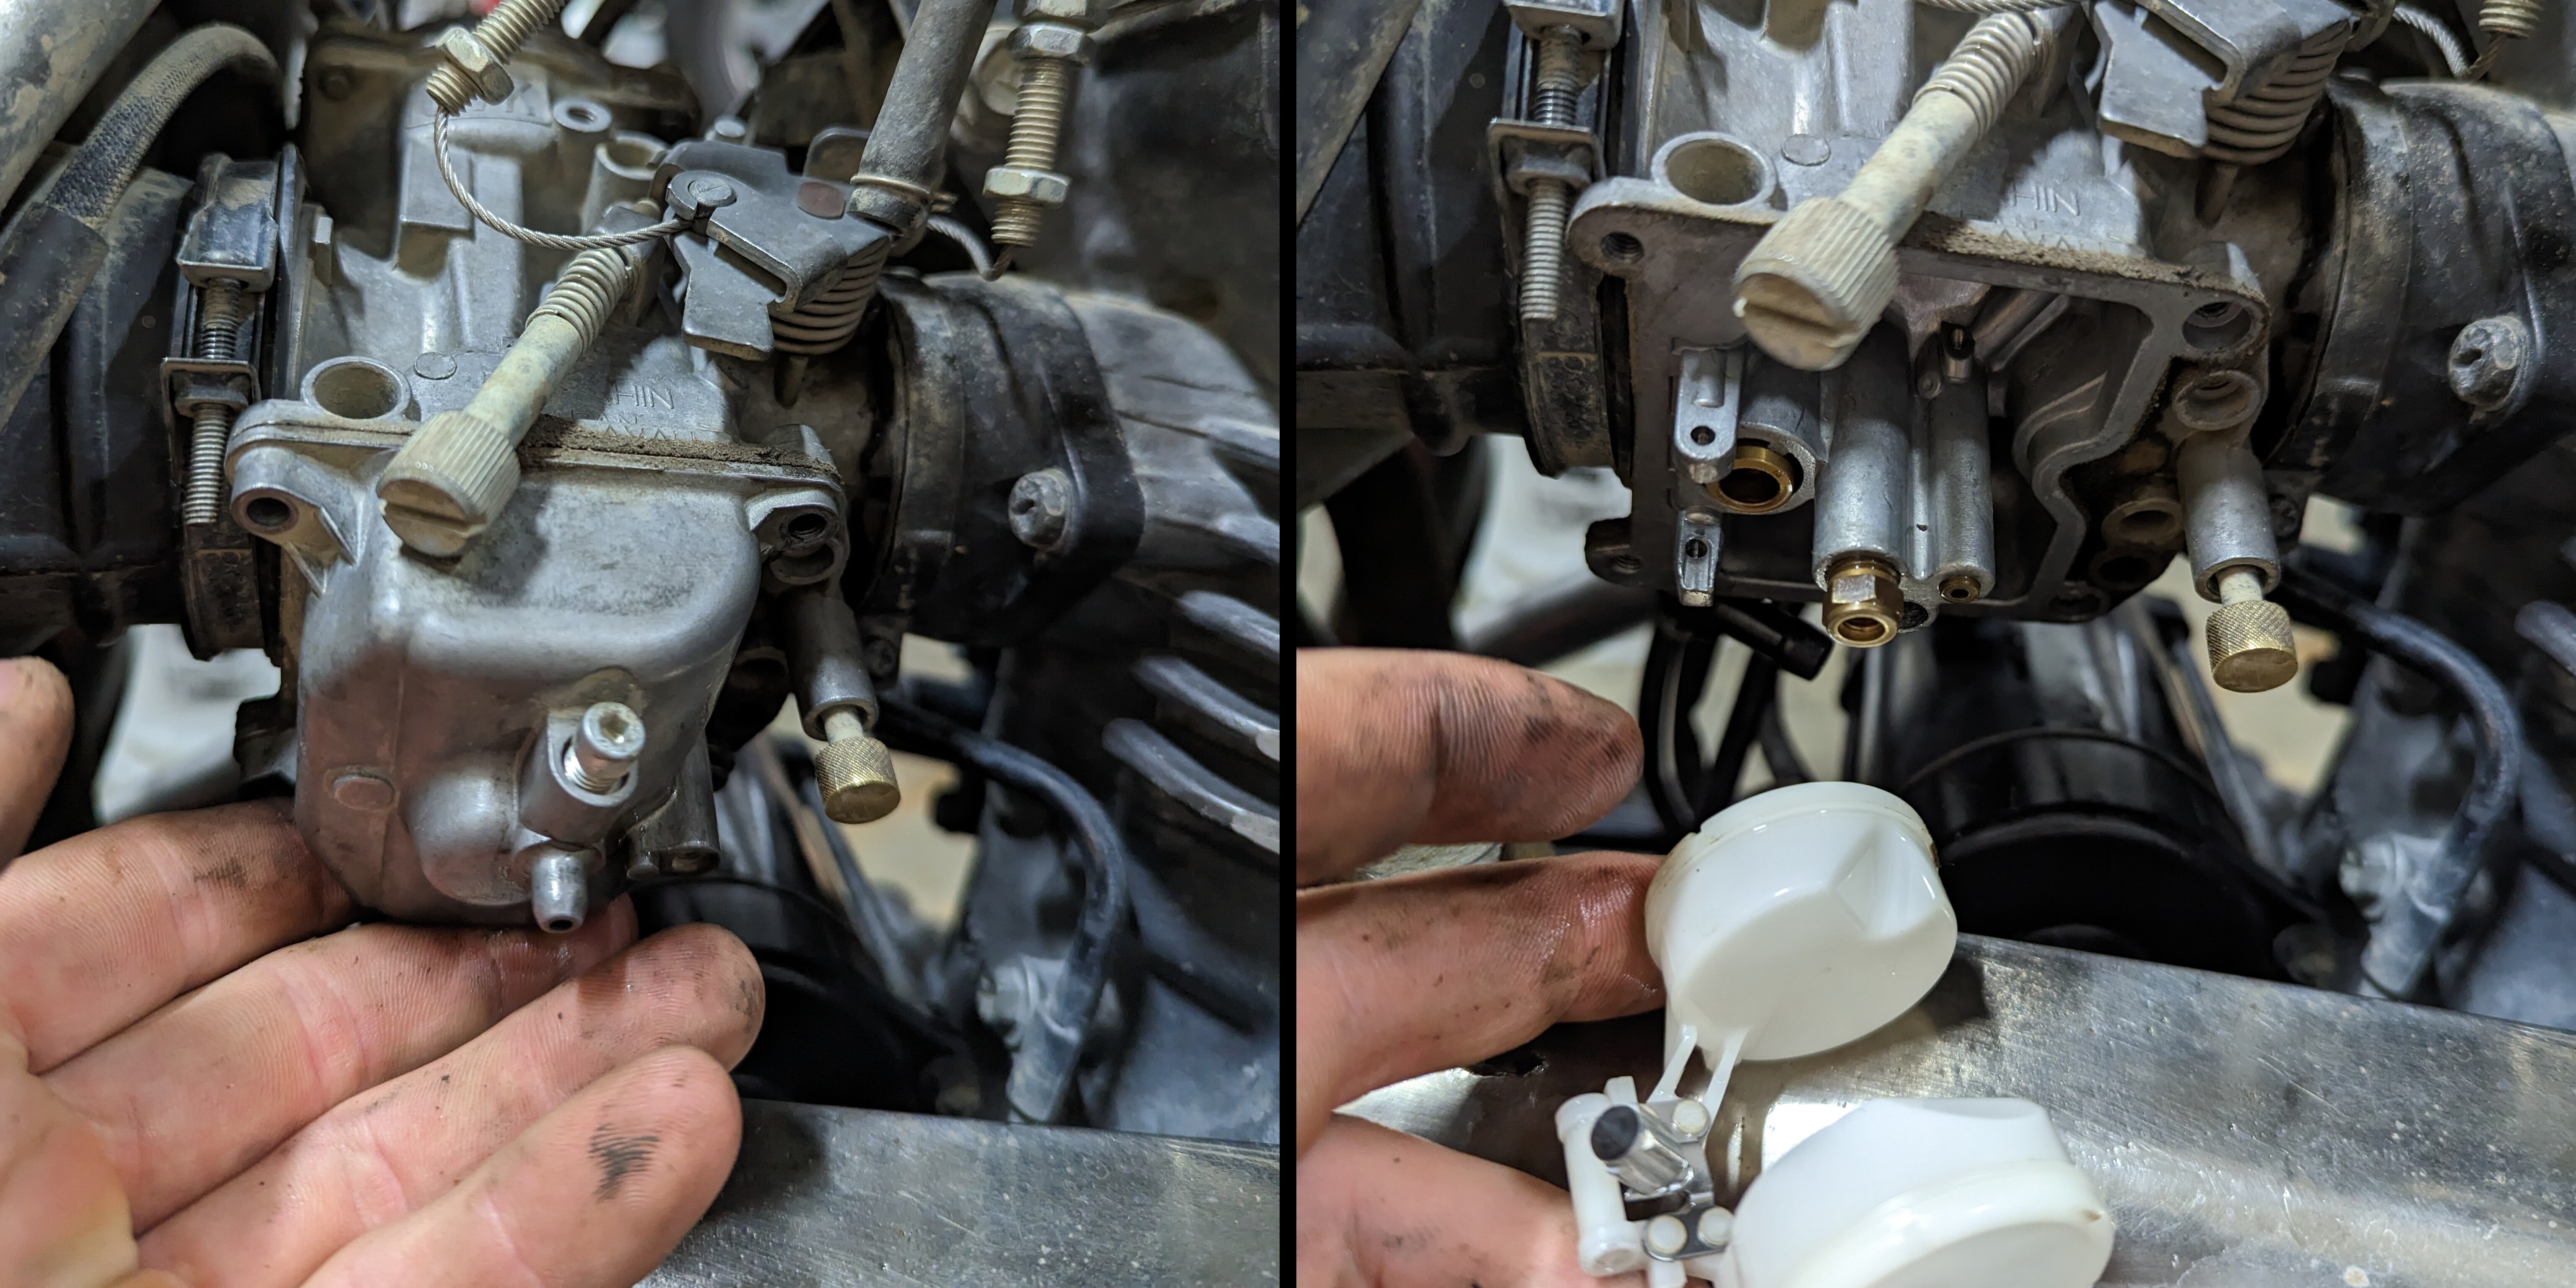
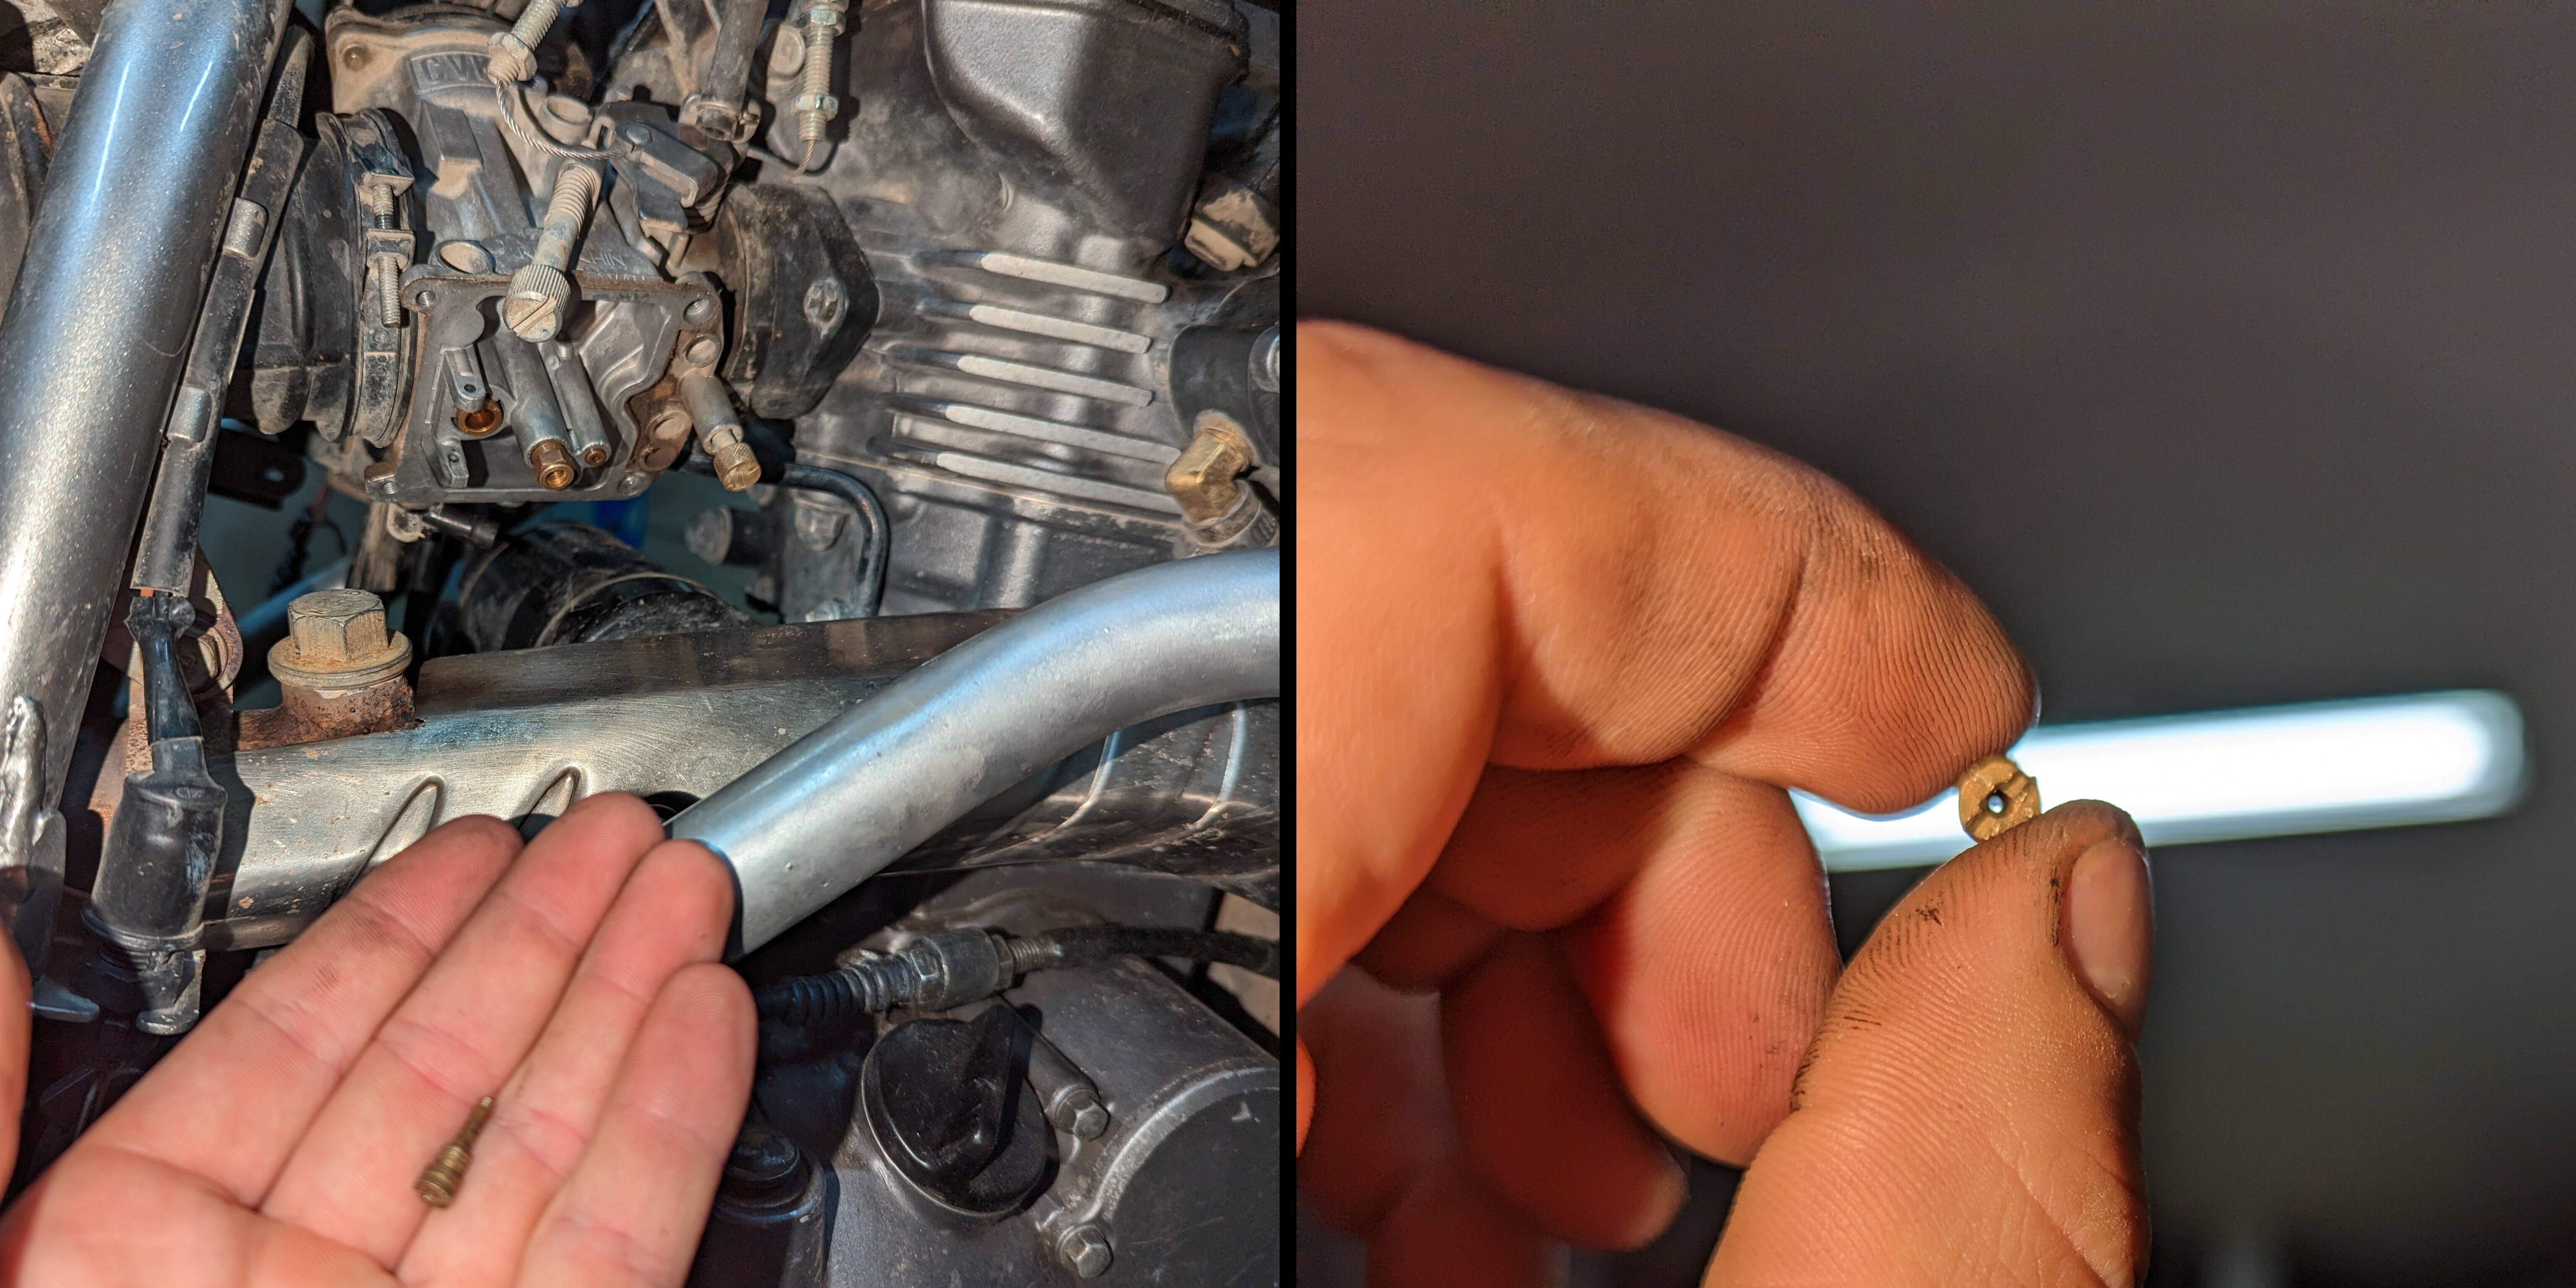 Similar to the petcock valve, if debris becomes lodged in the carburetor jets, it prevents the engine from receiving fuel. As shown here, the jets can actually be accessed and proven clear without removing the carburetor completely from the engine.
Compression
The engine’s cylinders must compress the fuel-air mixture to create the necessary pressure for combustion. With the use of a compression gauge the exact cylinder pressure can be measured and compared to manufacturers specifications, however simply feeling that air is expelled out of the exhaust in puffs while the engine is rolling over does indicate that compression exists in the cylinder.
Ignition
The ignition system must rapidly turn the engine to initiate its start, while also producing a spark precisely when needed to ignite the fuel-air mixture.
Battery / Starter
If the starter is heard spinning when the ignition key is turned, the battery, starter, and wiring, are in working condition. The starter’s speed directly affects the engine’s ability to roll over swiftly and start, which is dictated by the power that is deliverd from the battery. Using a multimeter or battery tester can further clarify the condition of a battery.
Spark Plug
 Testing a spark plug without a spark plug tester is done by positioning the plug so the lower metal body is touching a metallic part of the engine cylinder head, and then turning the engine over to watch for spark across the gap. If a spark is seen as expected then the other electrical units, like the battery and CDI are proven working as intended.
Mechanical Failure
After verifying fuel, spark, and compression, mechanical failure within the engine becomes a consideration. If the engine is turning over but not starting, the timing may be off. However, even with incorrect timing, a single-cylinder engine such as this one should still run, albeit poorly. Further diagnosis may require engine disassembly.
Final Diagnosis
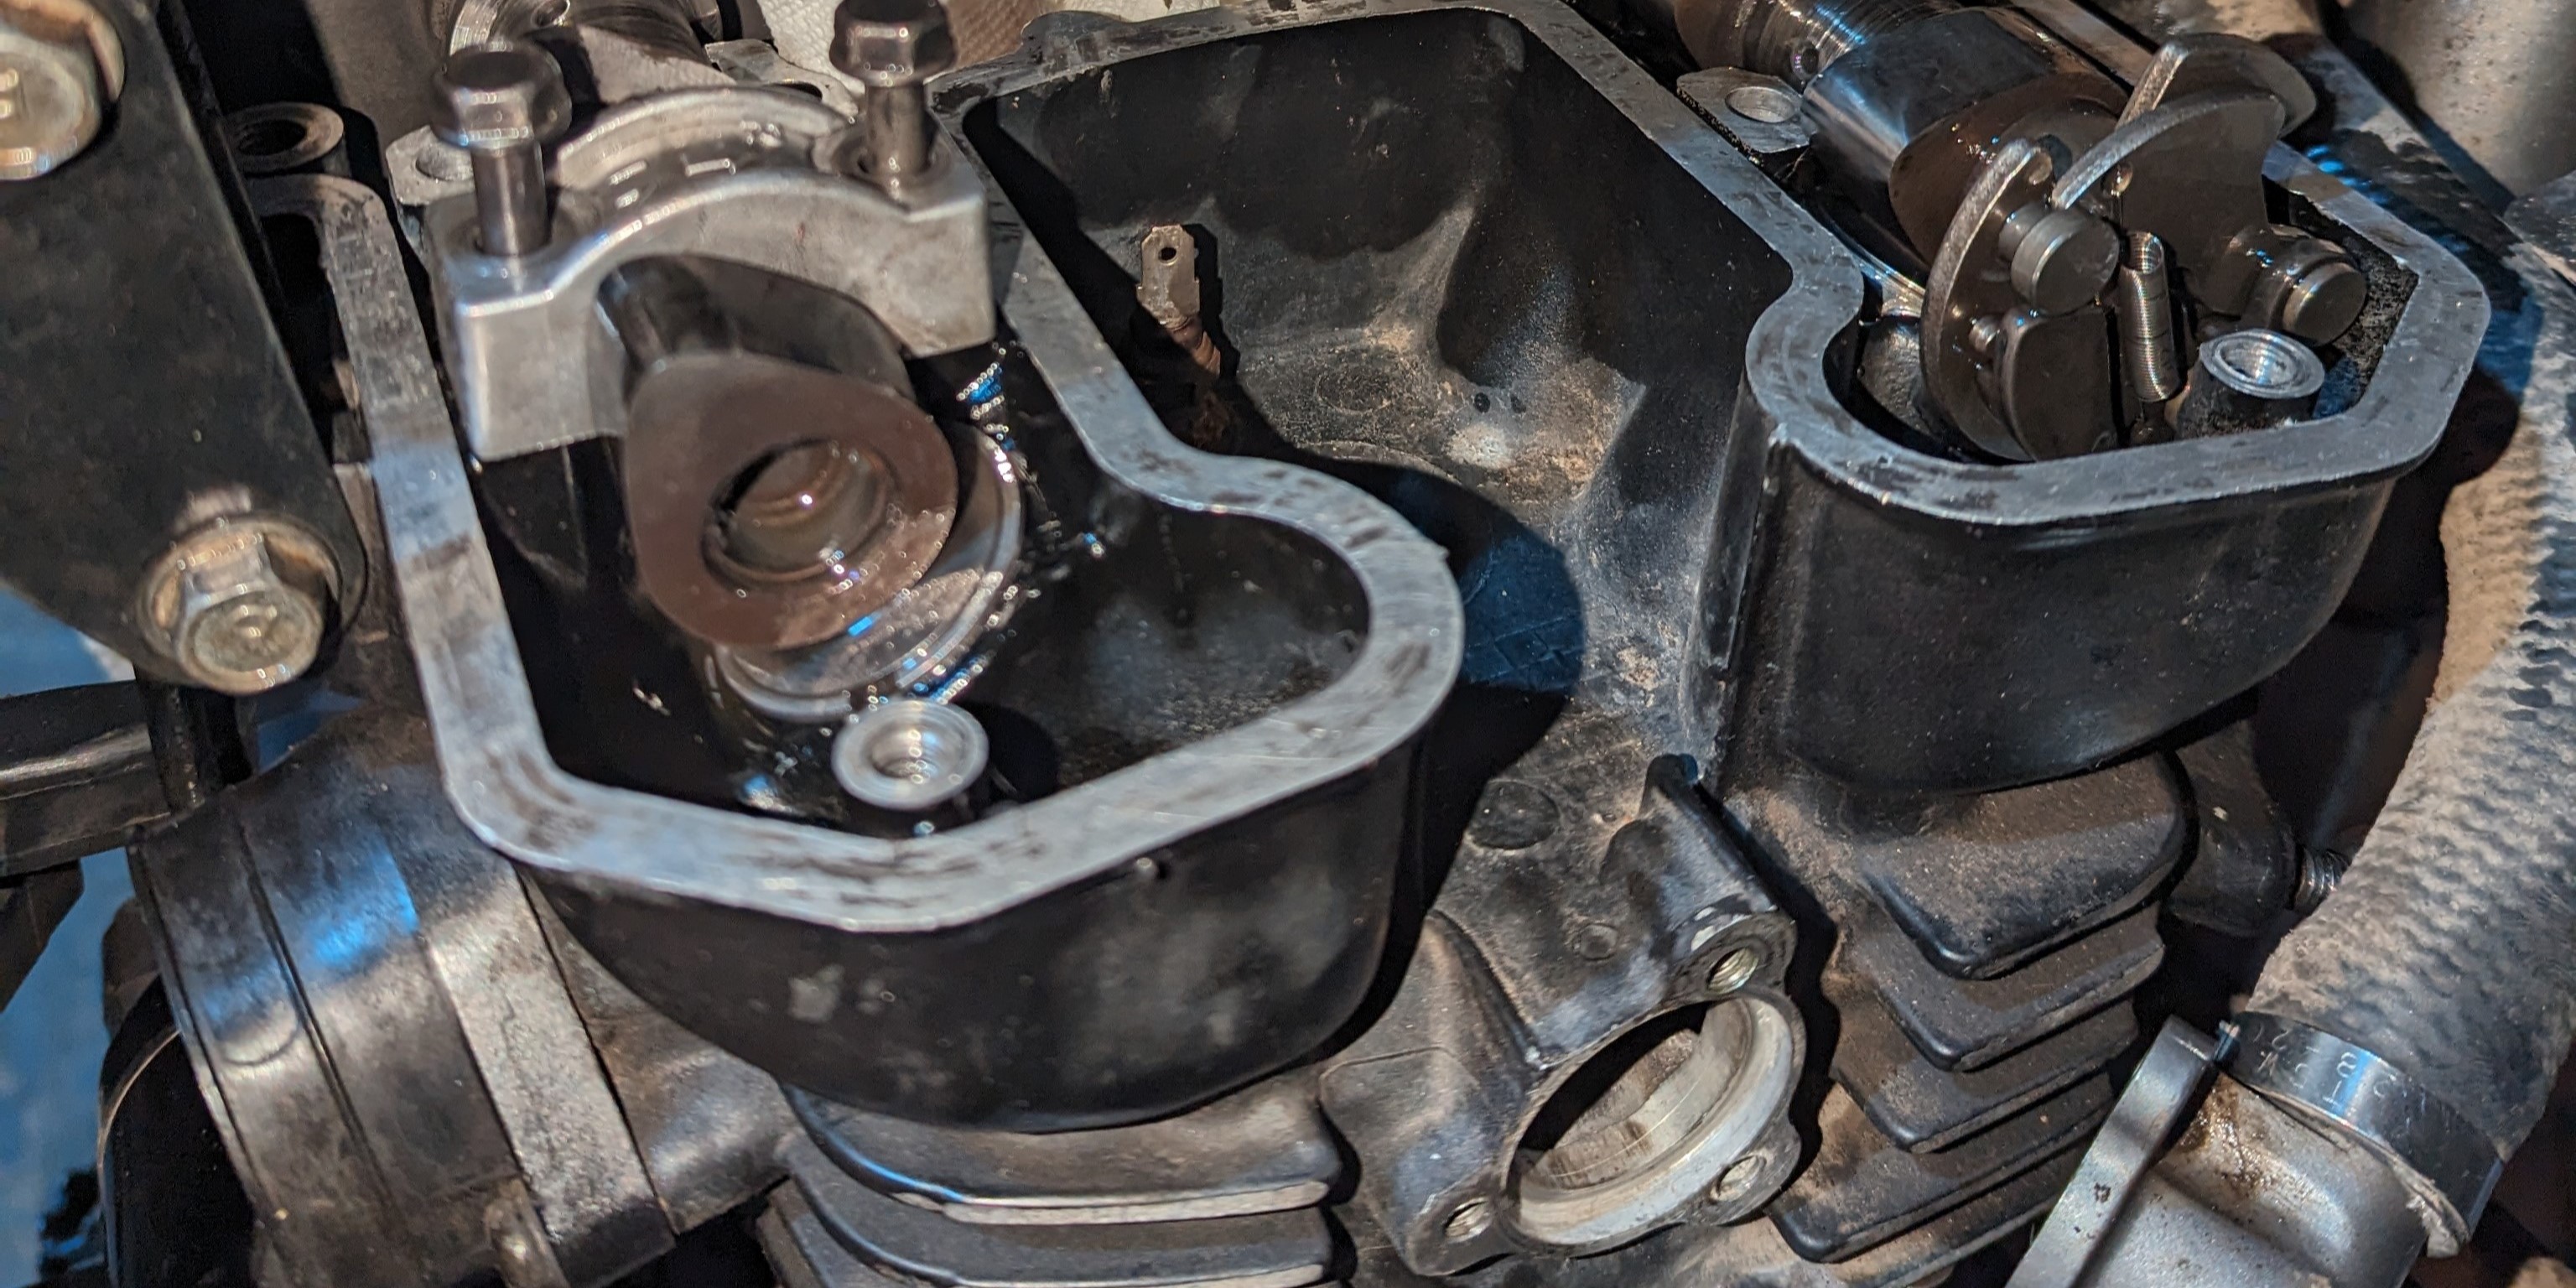
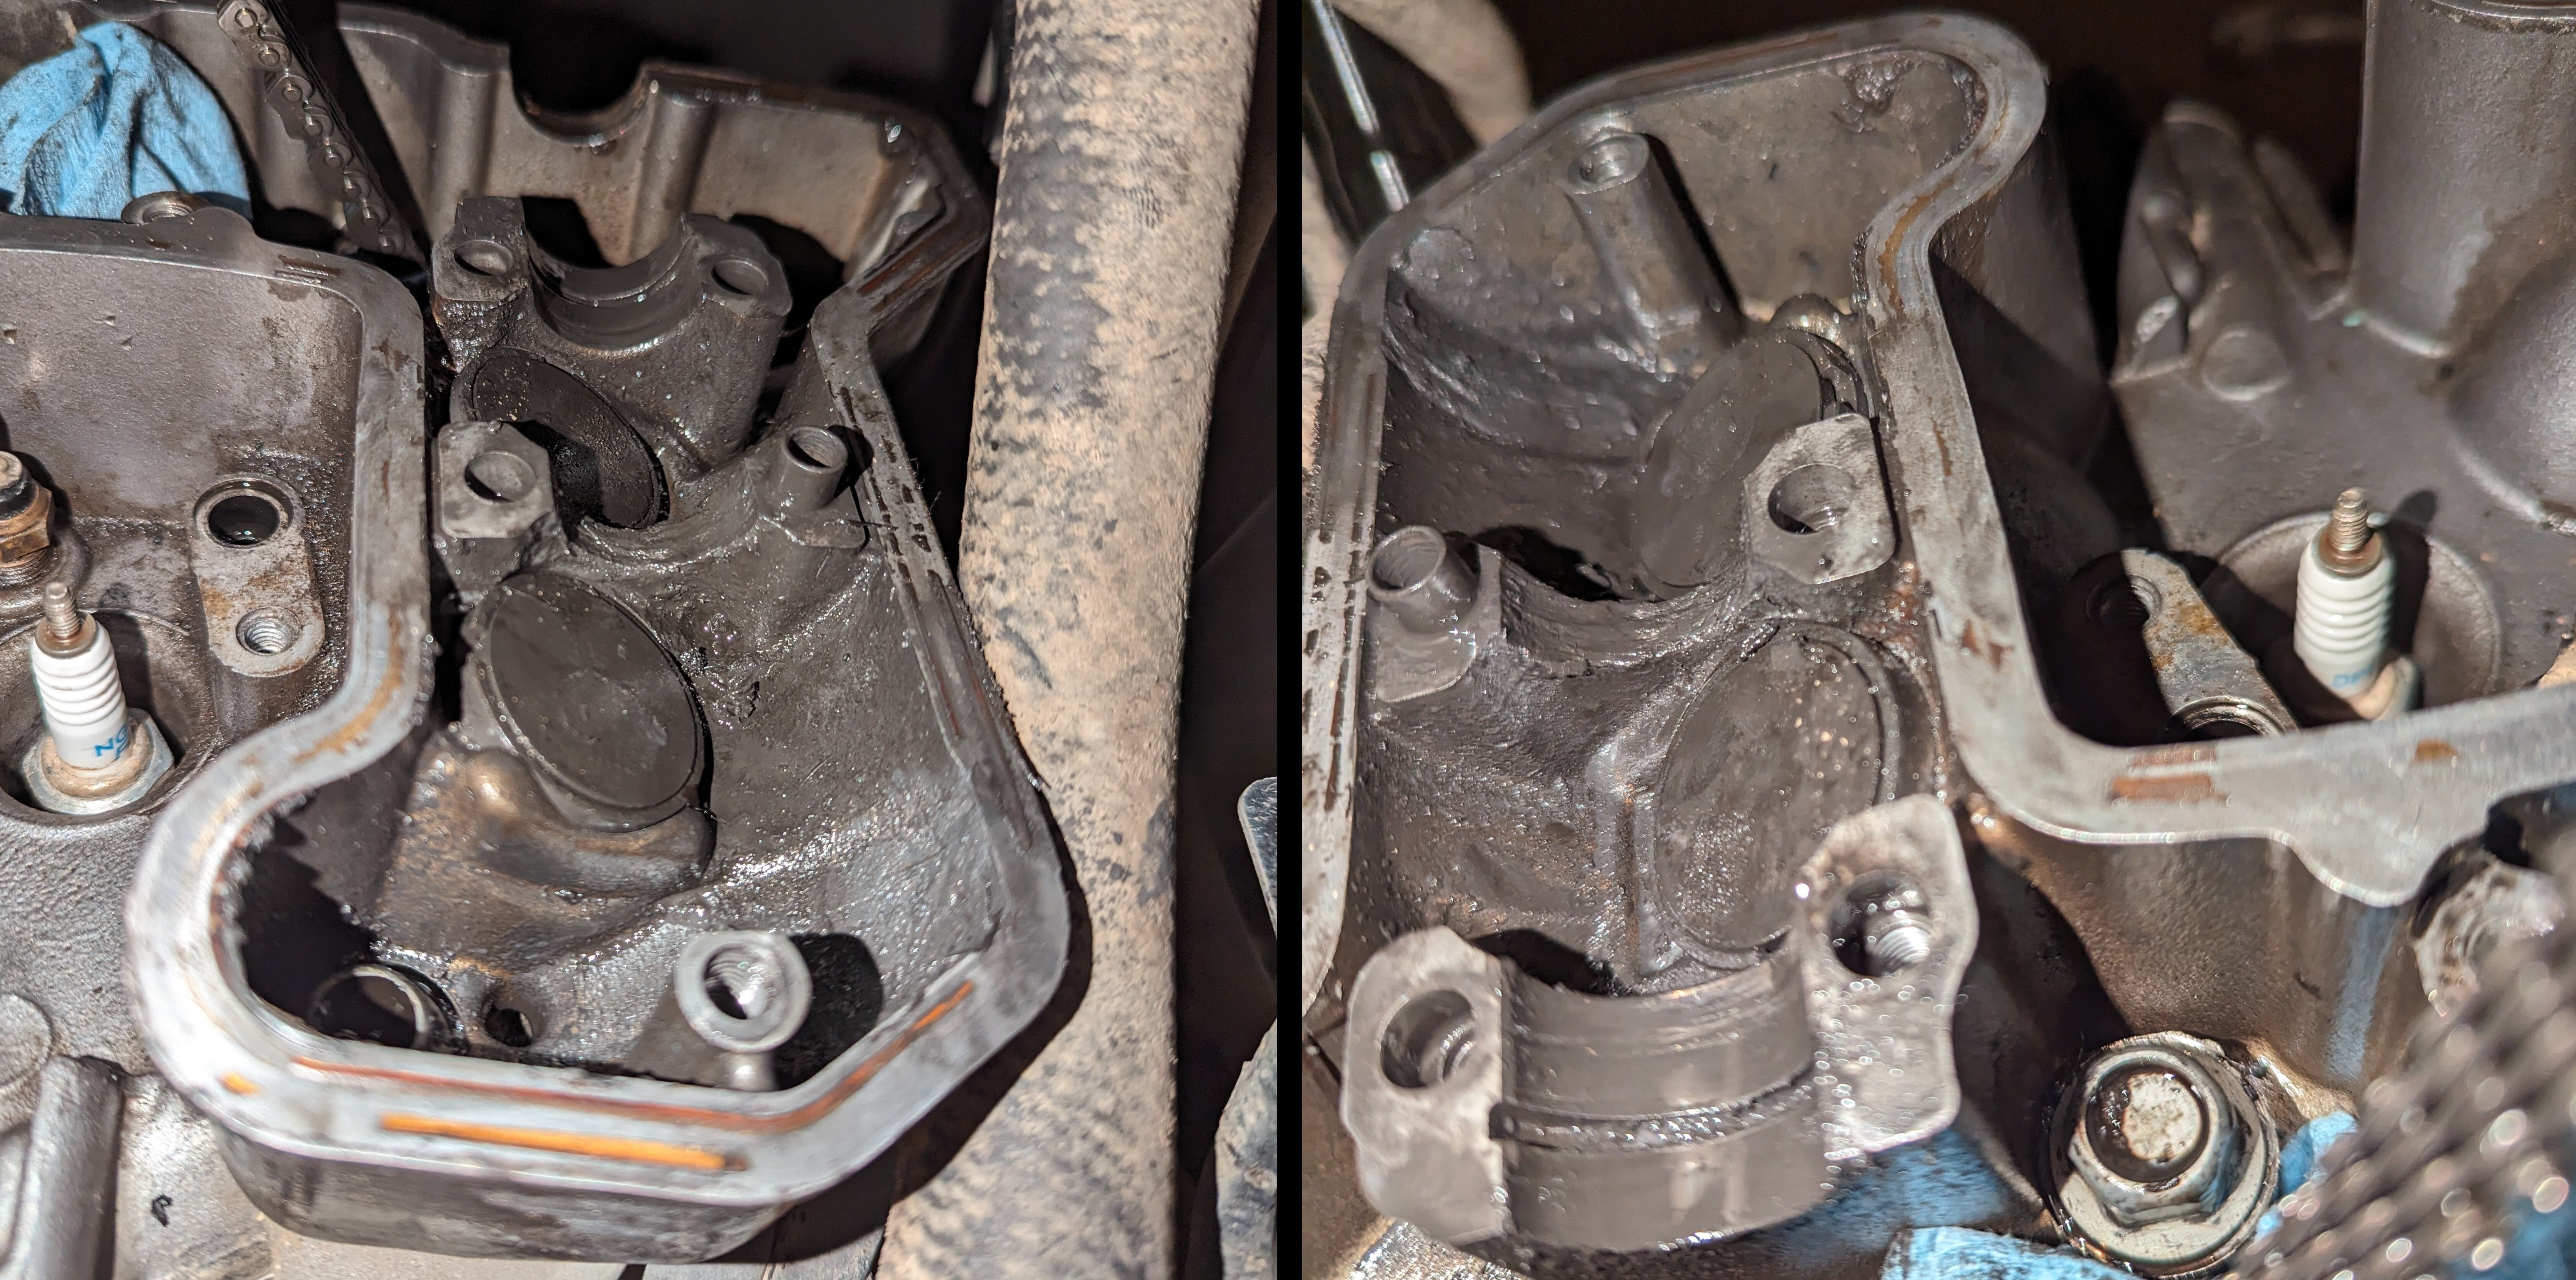
Conducting an internal inspection on a motorcycle engine is no small task, and it’s essential to have a reliable repair manual at hand to navigate the complexities of the engine internals safely. In my experience, the Gen 2 KLR 650 Clymer Repair Manual is considered a must. 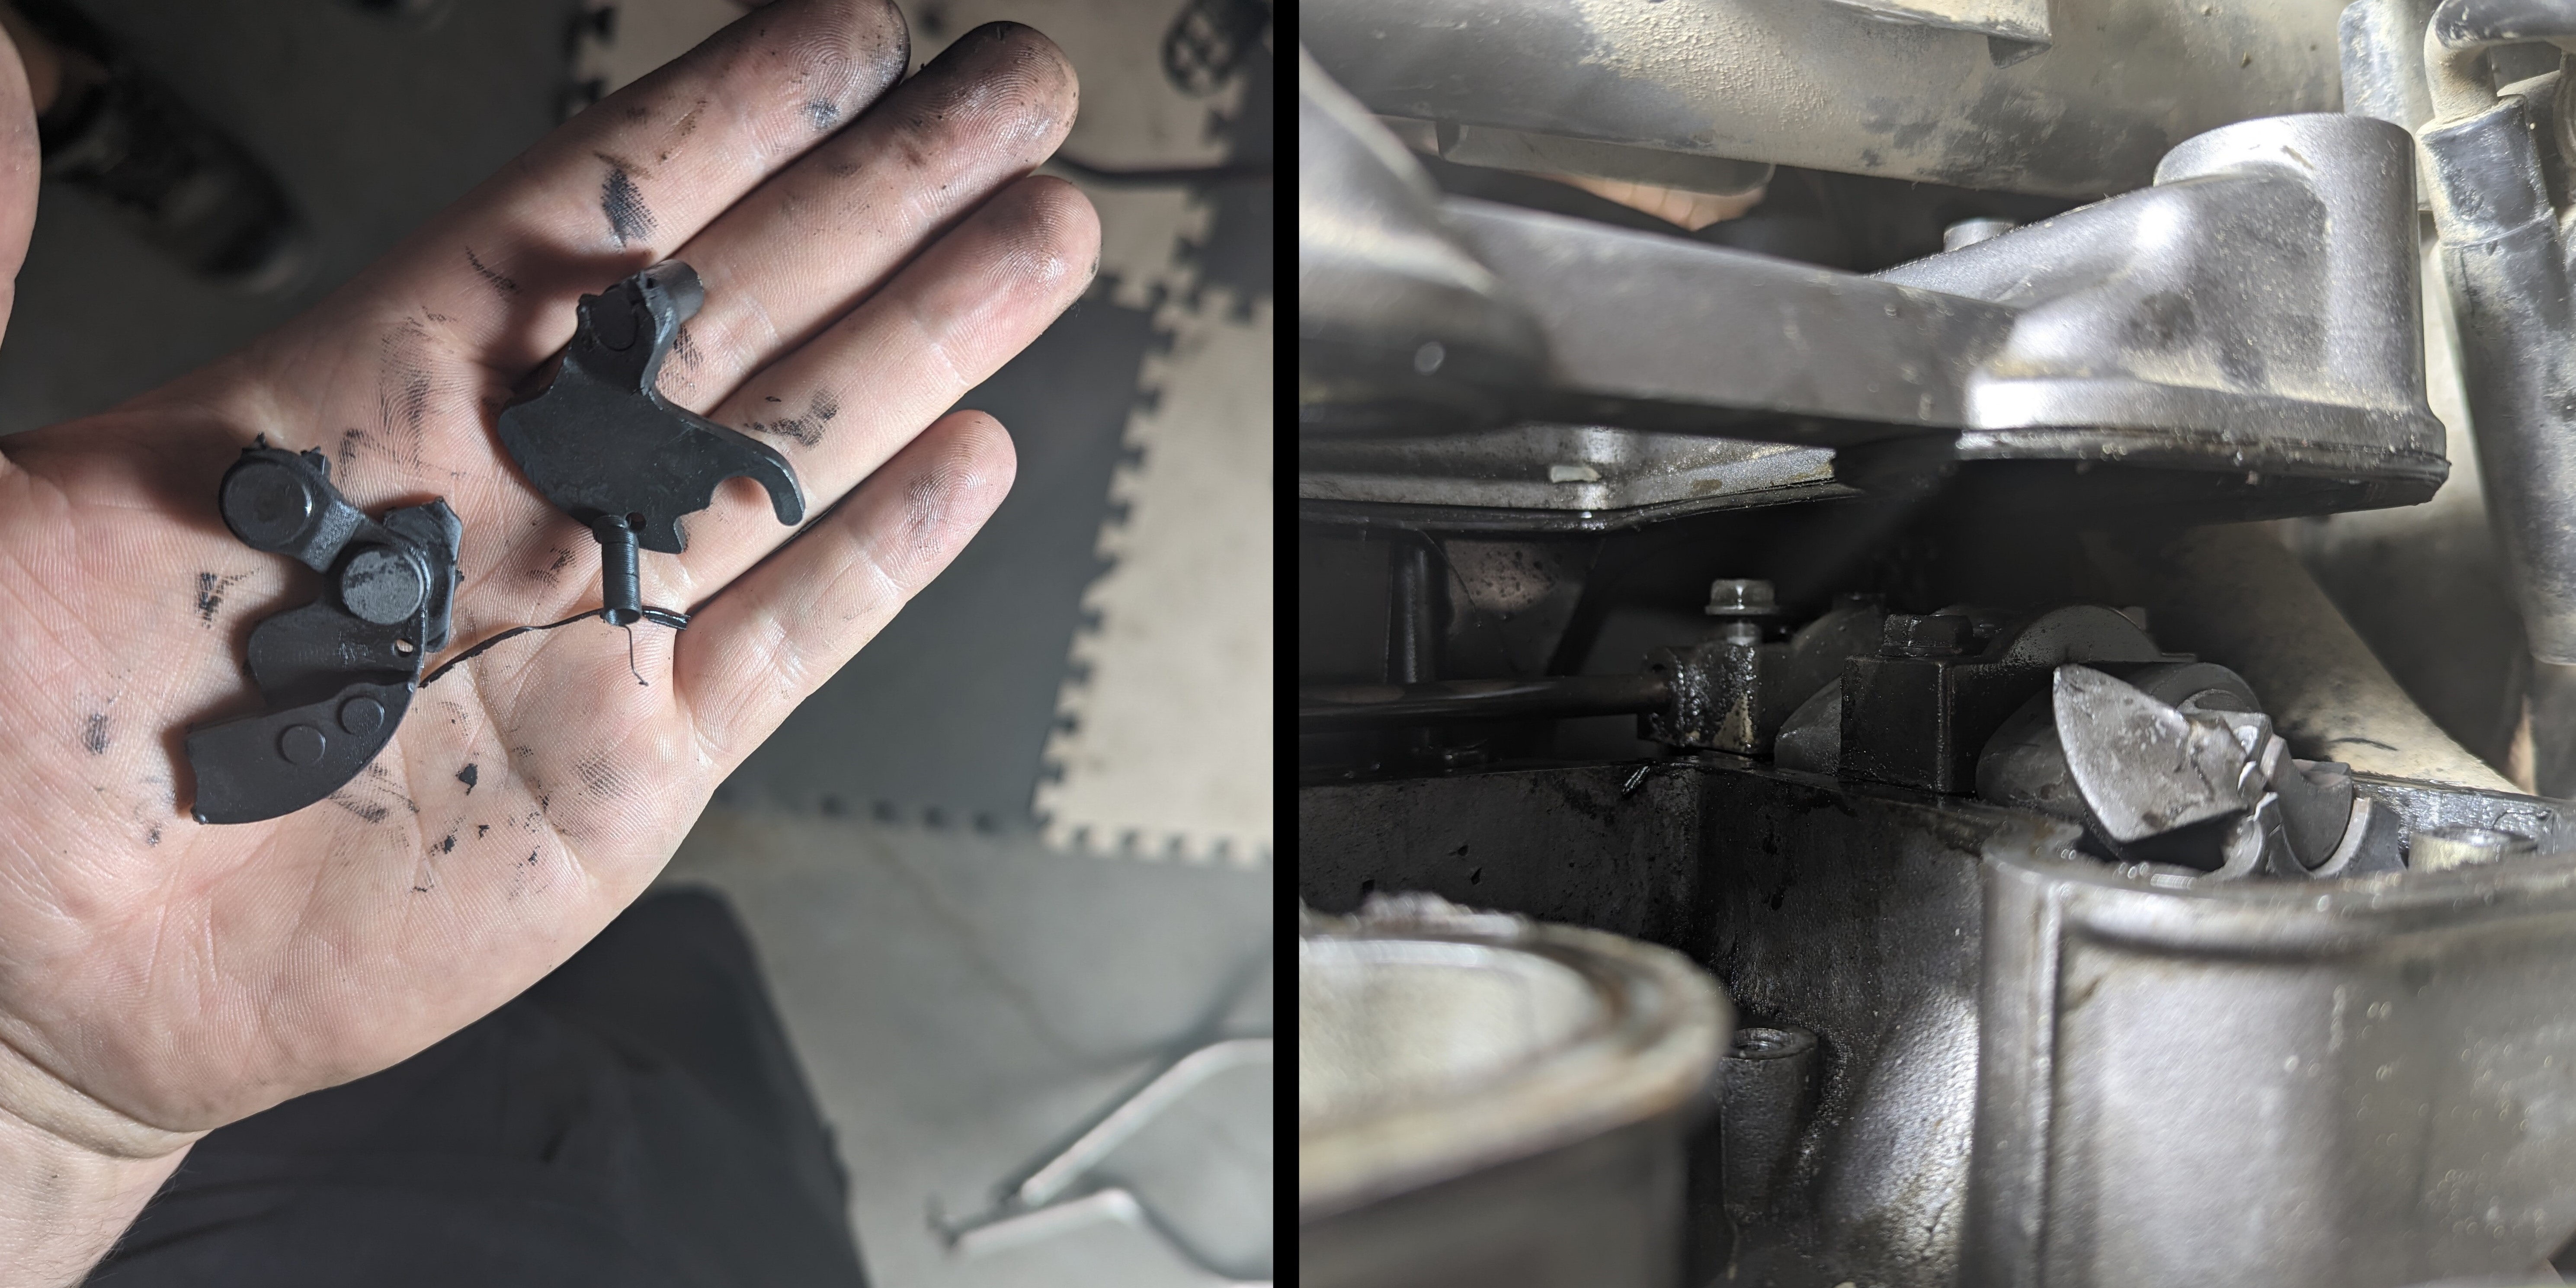 Upon removing the cylinder head cover, the broken Kawasaki Automatic Compression Release (KACR) mechanism was readily visible. The KACR, designed to reduce cylinder compression during engine start-up, had broken apart. Additionally, the camshaft cap bolts on the side opposite that of the KACR had loosened off, likely due to presession forces.
 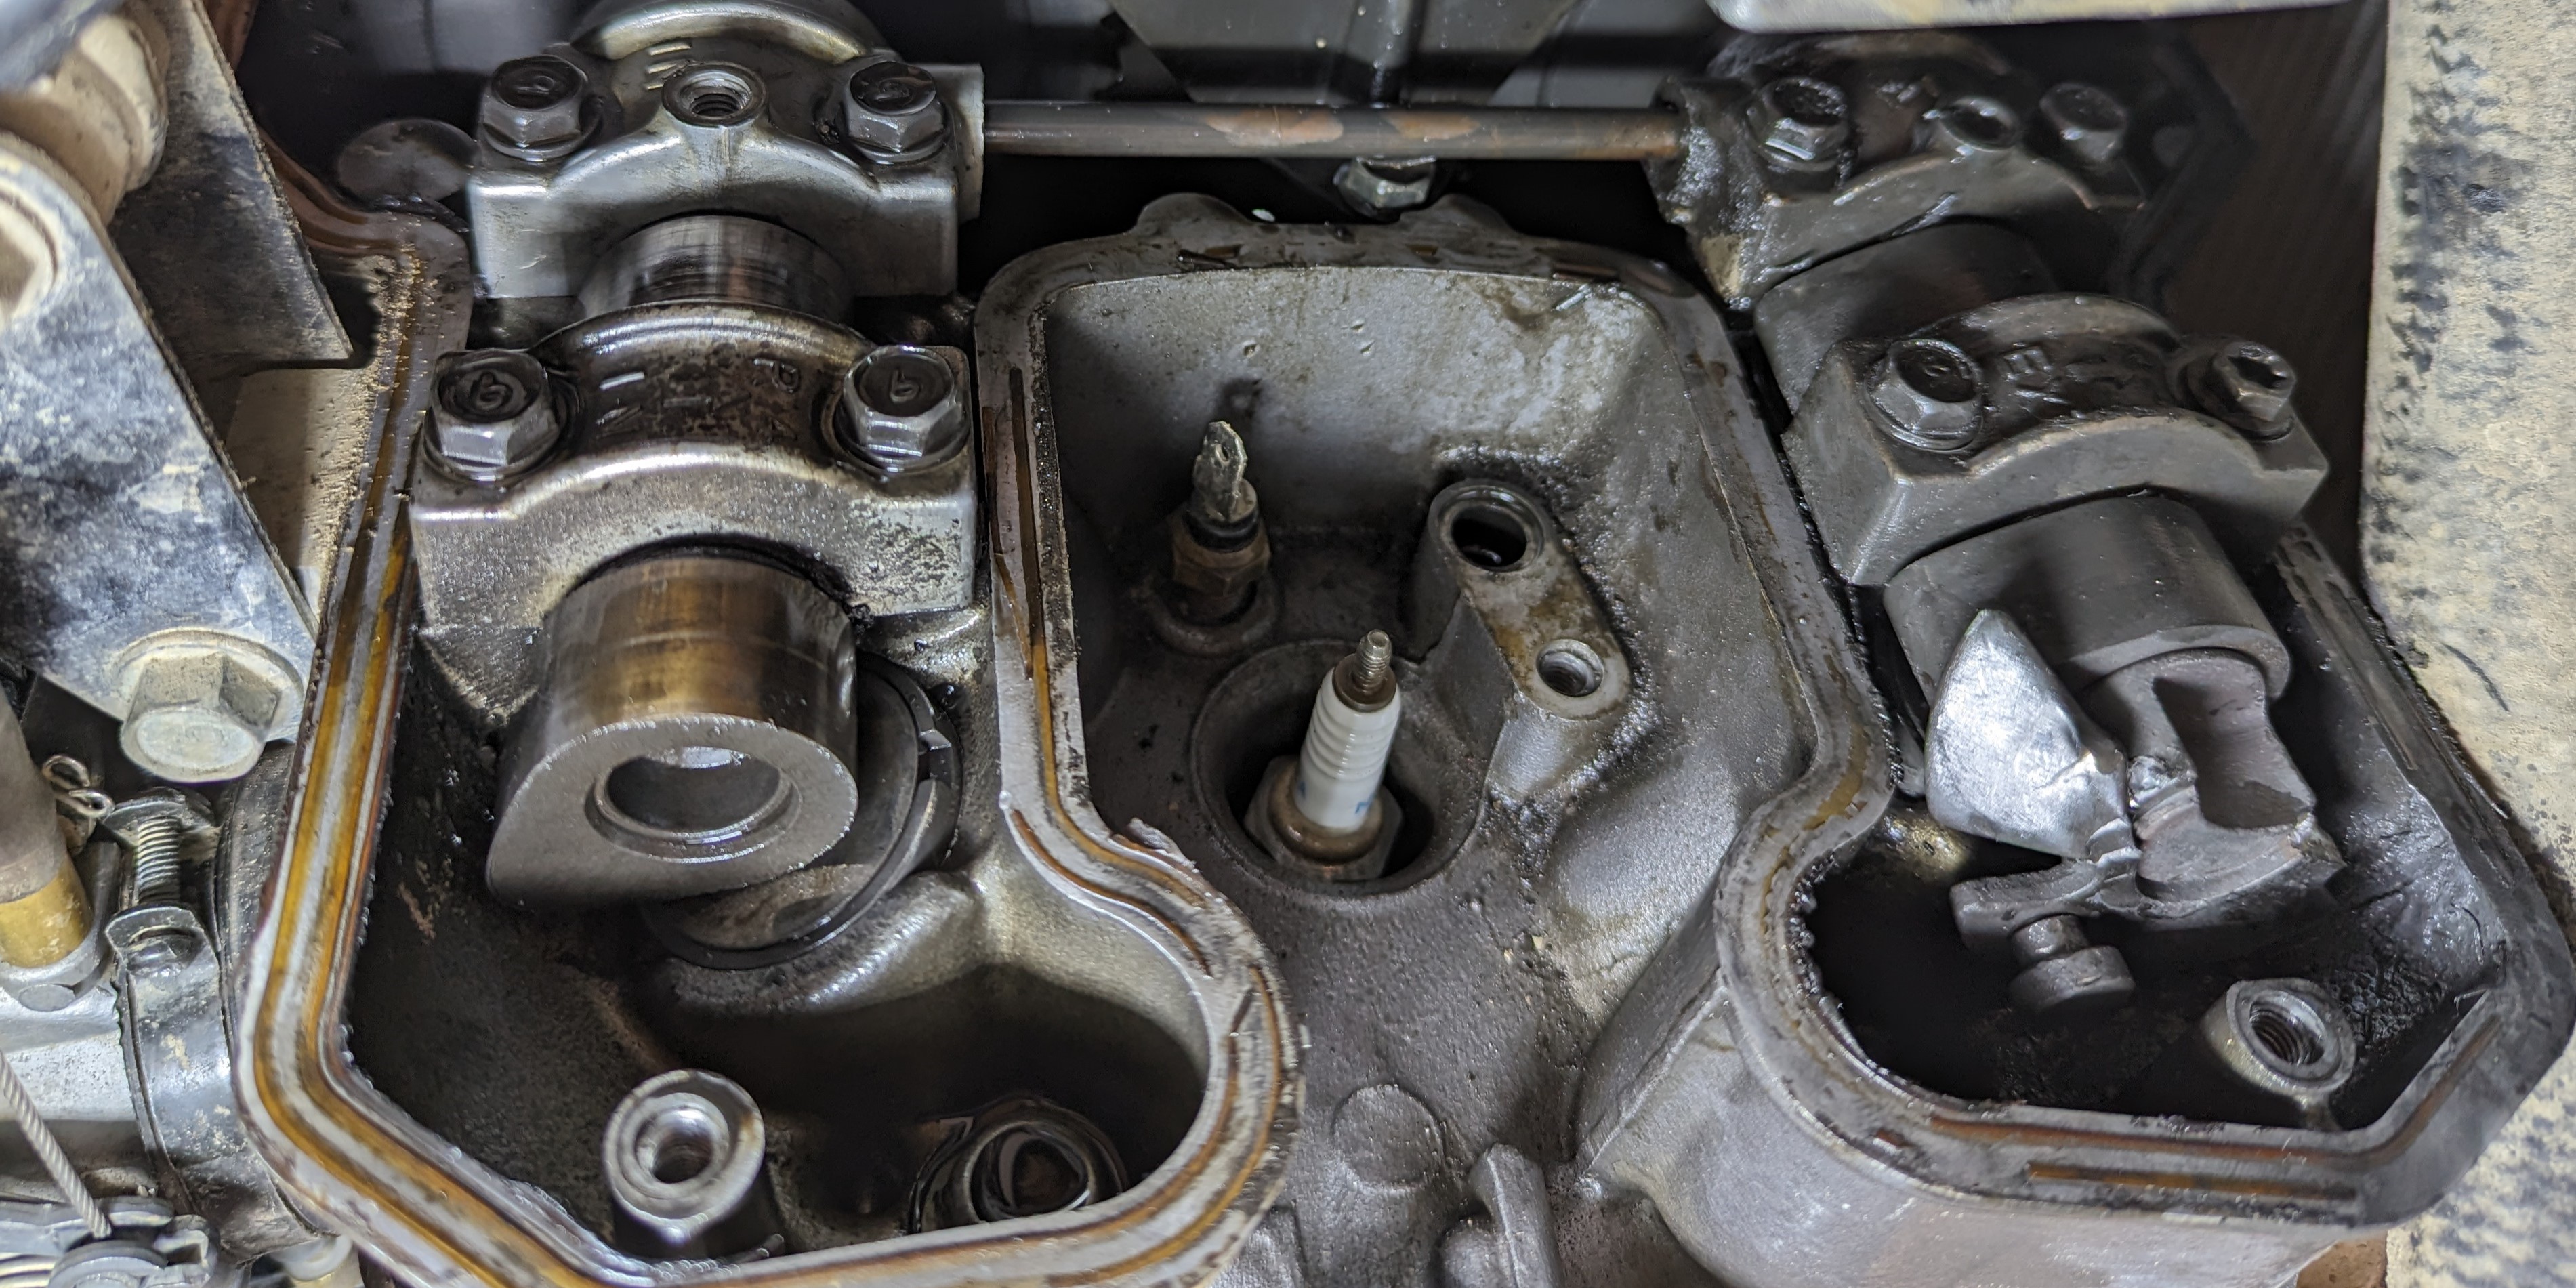 At this point, one of two scenarios may have occurred:
- The KACR may have spontaneously shattered during rapid rotation, resulting in an imbalanced shaft. This imbalance caused excessive friction, leading to increased oil consumption and eventually causing the camshaft to loosen.
- Alternatively, one of the bolts gradually loosened over time, causing the camshaft to rotate unevenly. This led to excessive forces and, under different circumstances, may have caused noticeable vibration. Eventually, this led to increased oil consumption and the gradual seizure of the engine until the forces exceeded the KACR mechanism’s capacity.
‘New’ Parts
 $100 on Kijiji goes a long way…
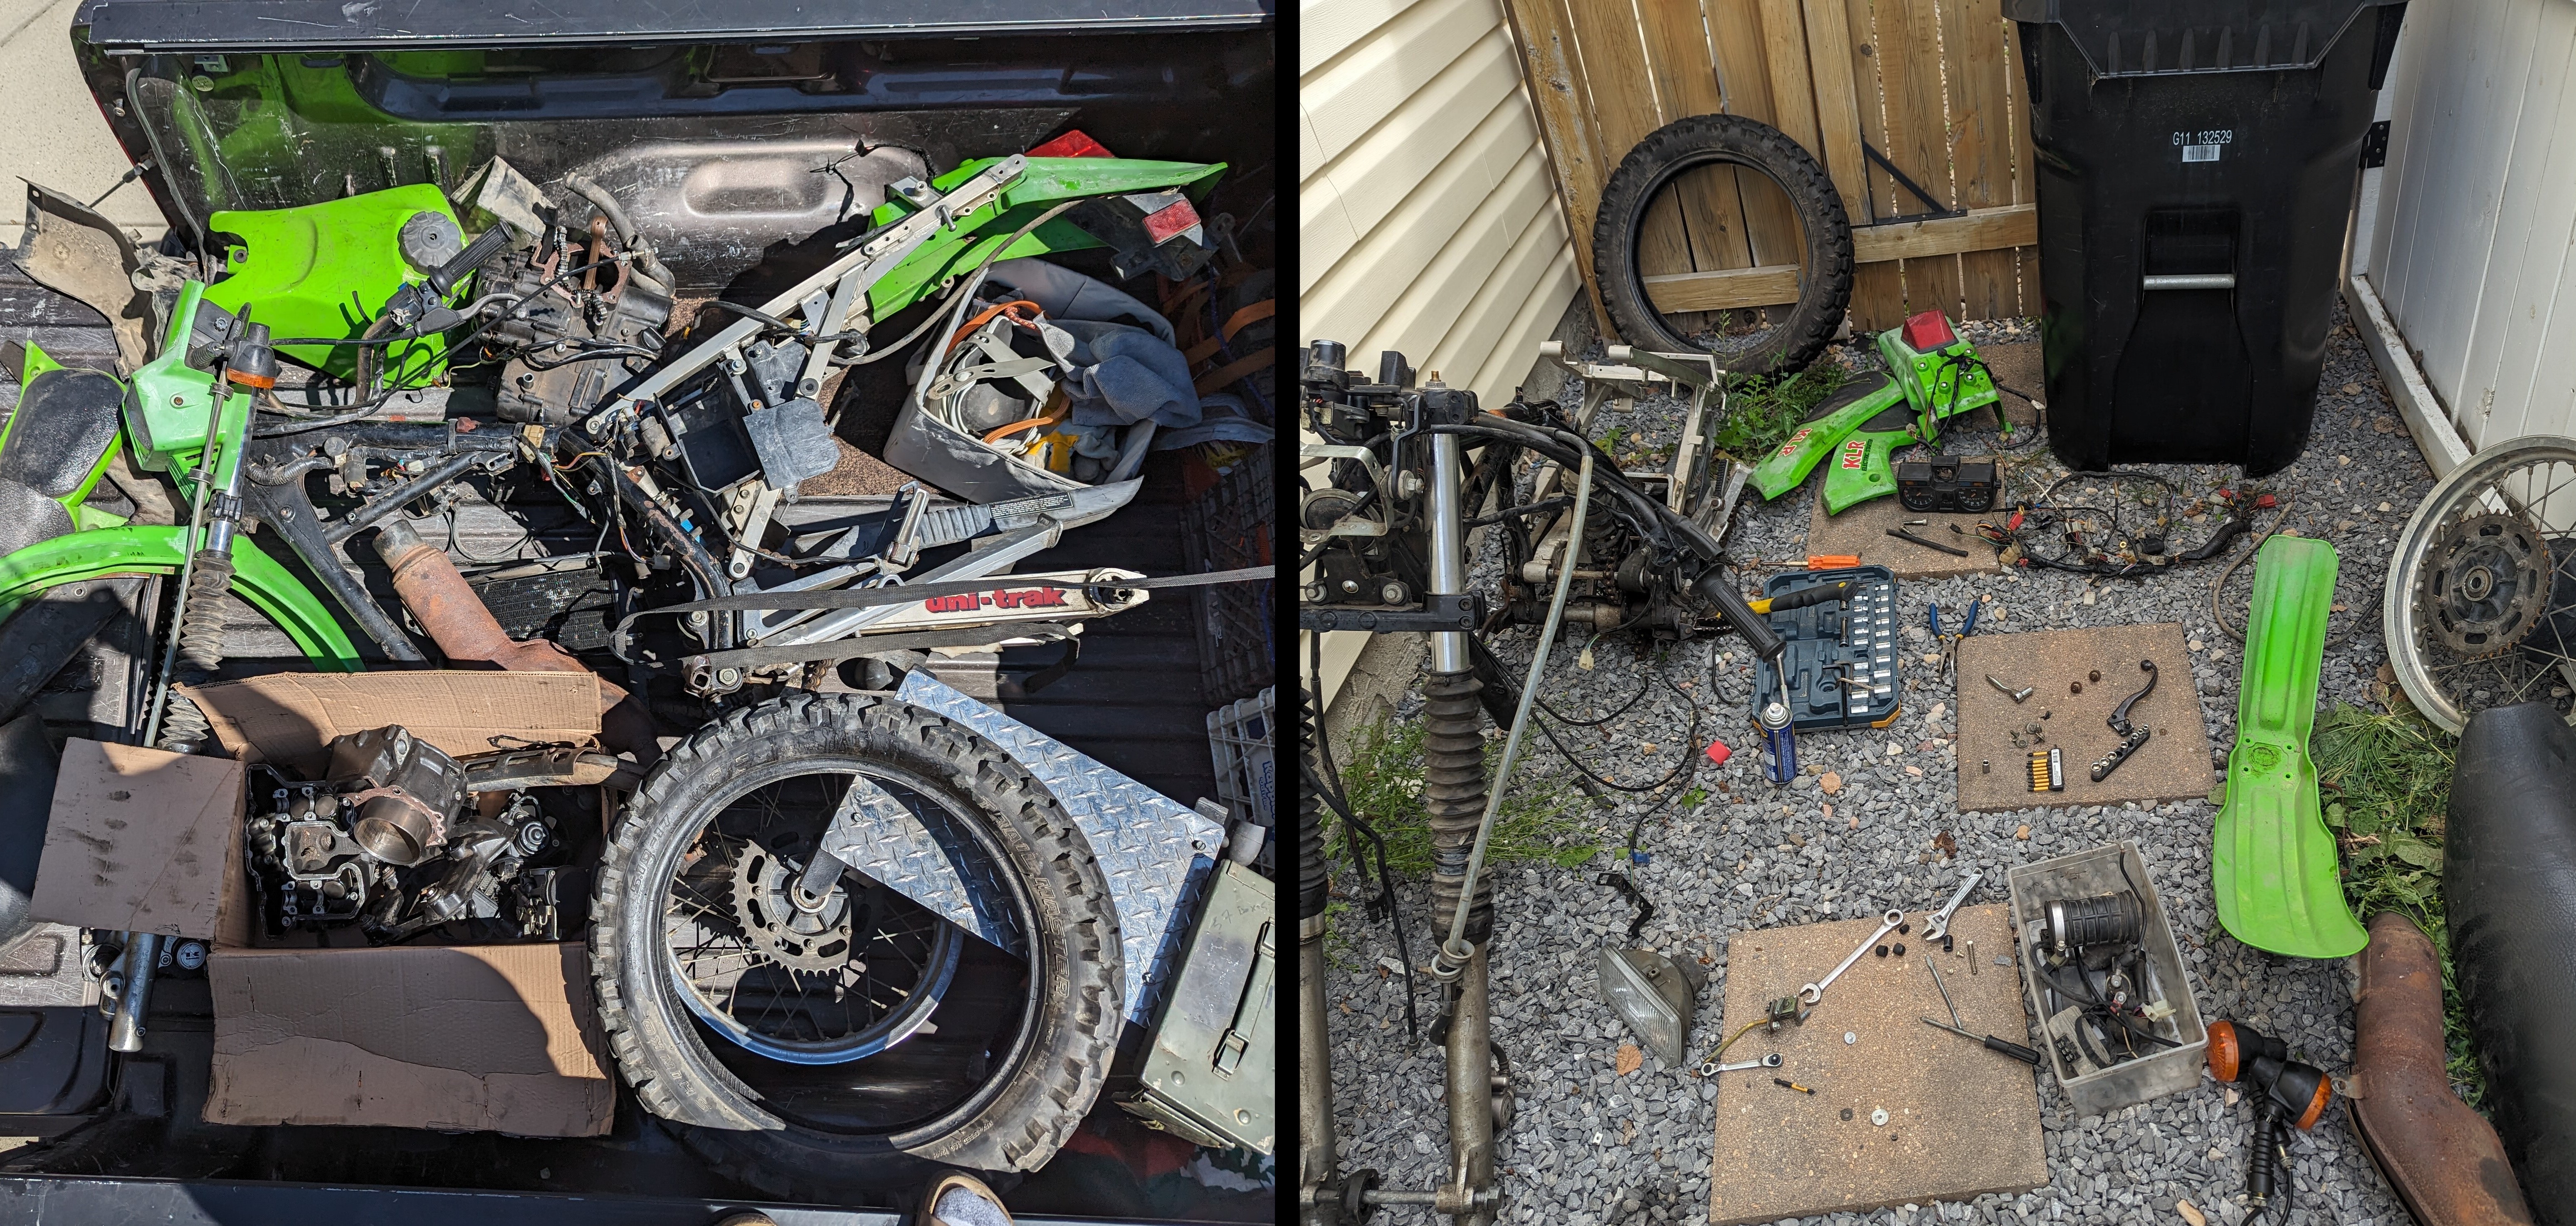 Remarkably, I found a guy on Kijiji with a 1985 Kawasaki KL600 that had lower engine failure, meaning that the top end parts were likely in working condition.
It cost me more in gas to pick up this truck full of parts, but this expense pales in comparison to the cost of getting a new top end from Kawasaki ($3500) or a rebuild from a local motorcycle shop ($1800 + labor).
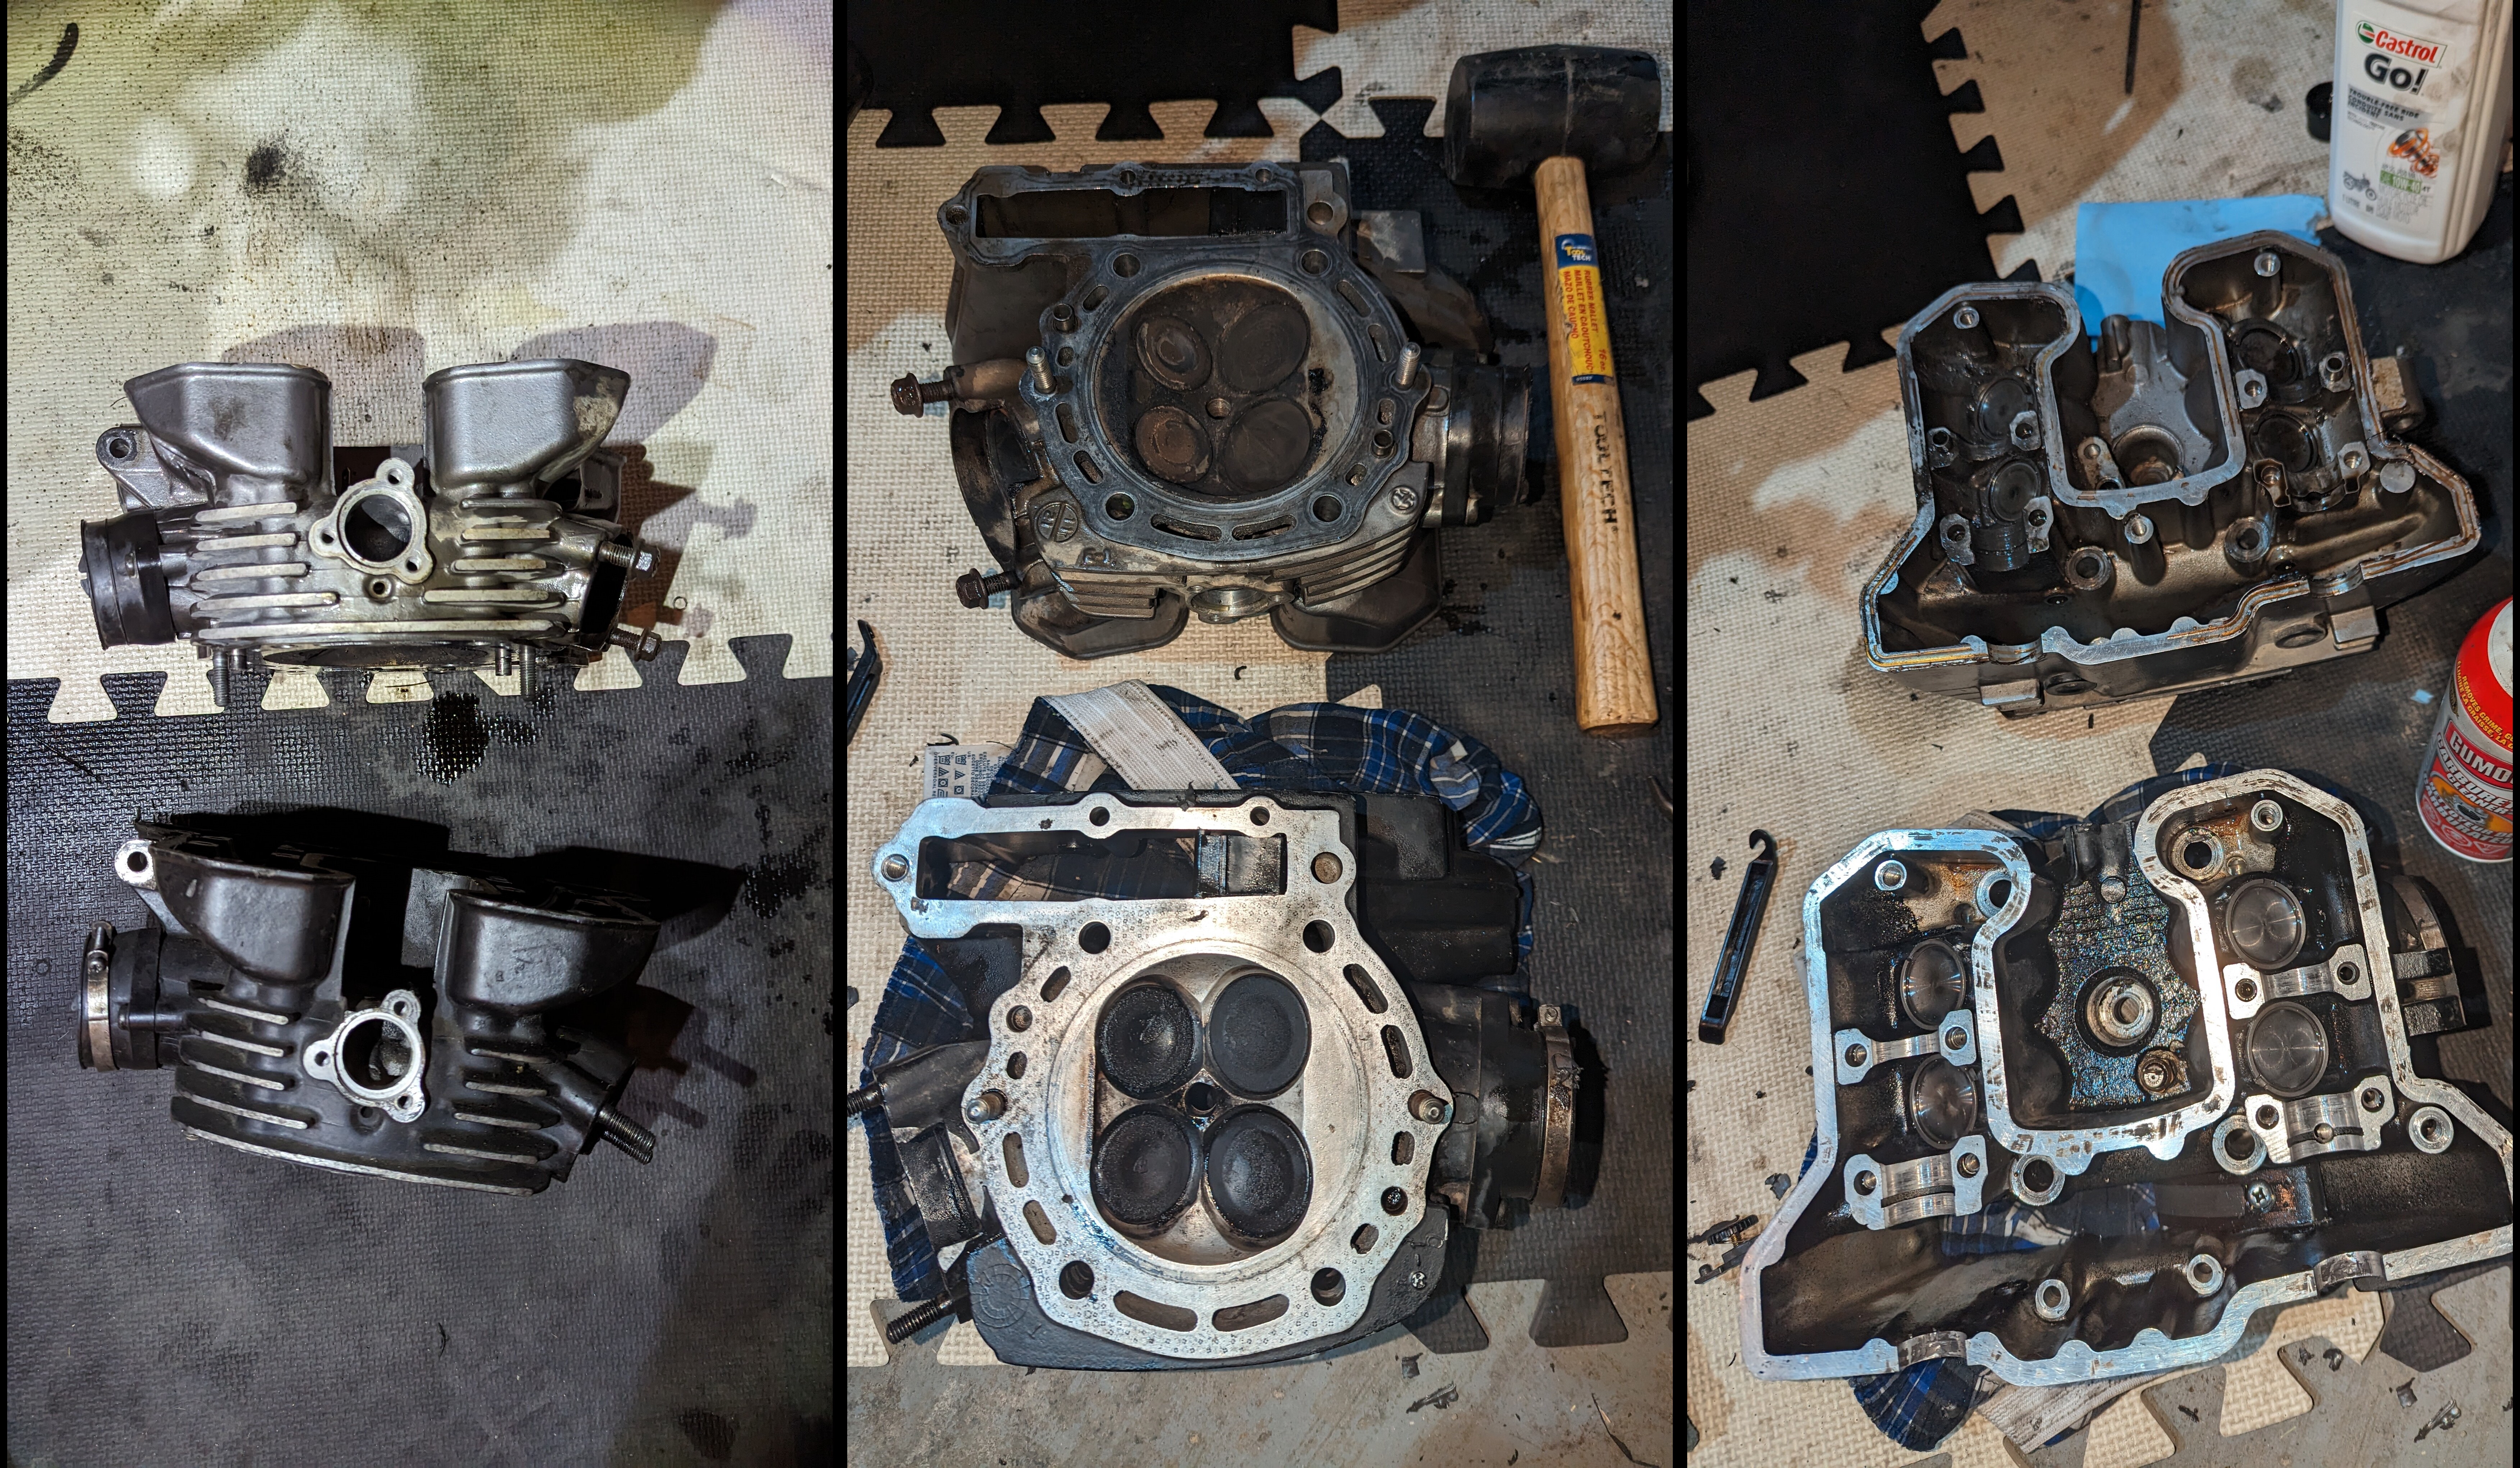 It’s amazing to consider that these engines were manufactured over 20 years apart and have interchangable engine components! This serves as a testament to the adage “if it ain’t broke, don’t fix it.”
Rebuilding
During my engine rebuild process, I delved into various YouTube videos and online forums, in addition to consulting my repair manual. Here are some valuable insights I gathered that I wish I had known before embarking on this repair job.
Cam Head Caps
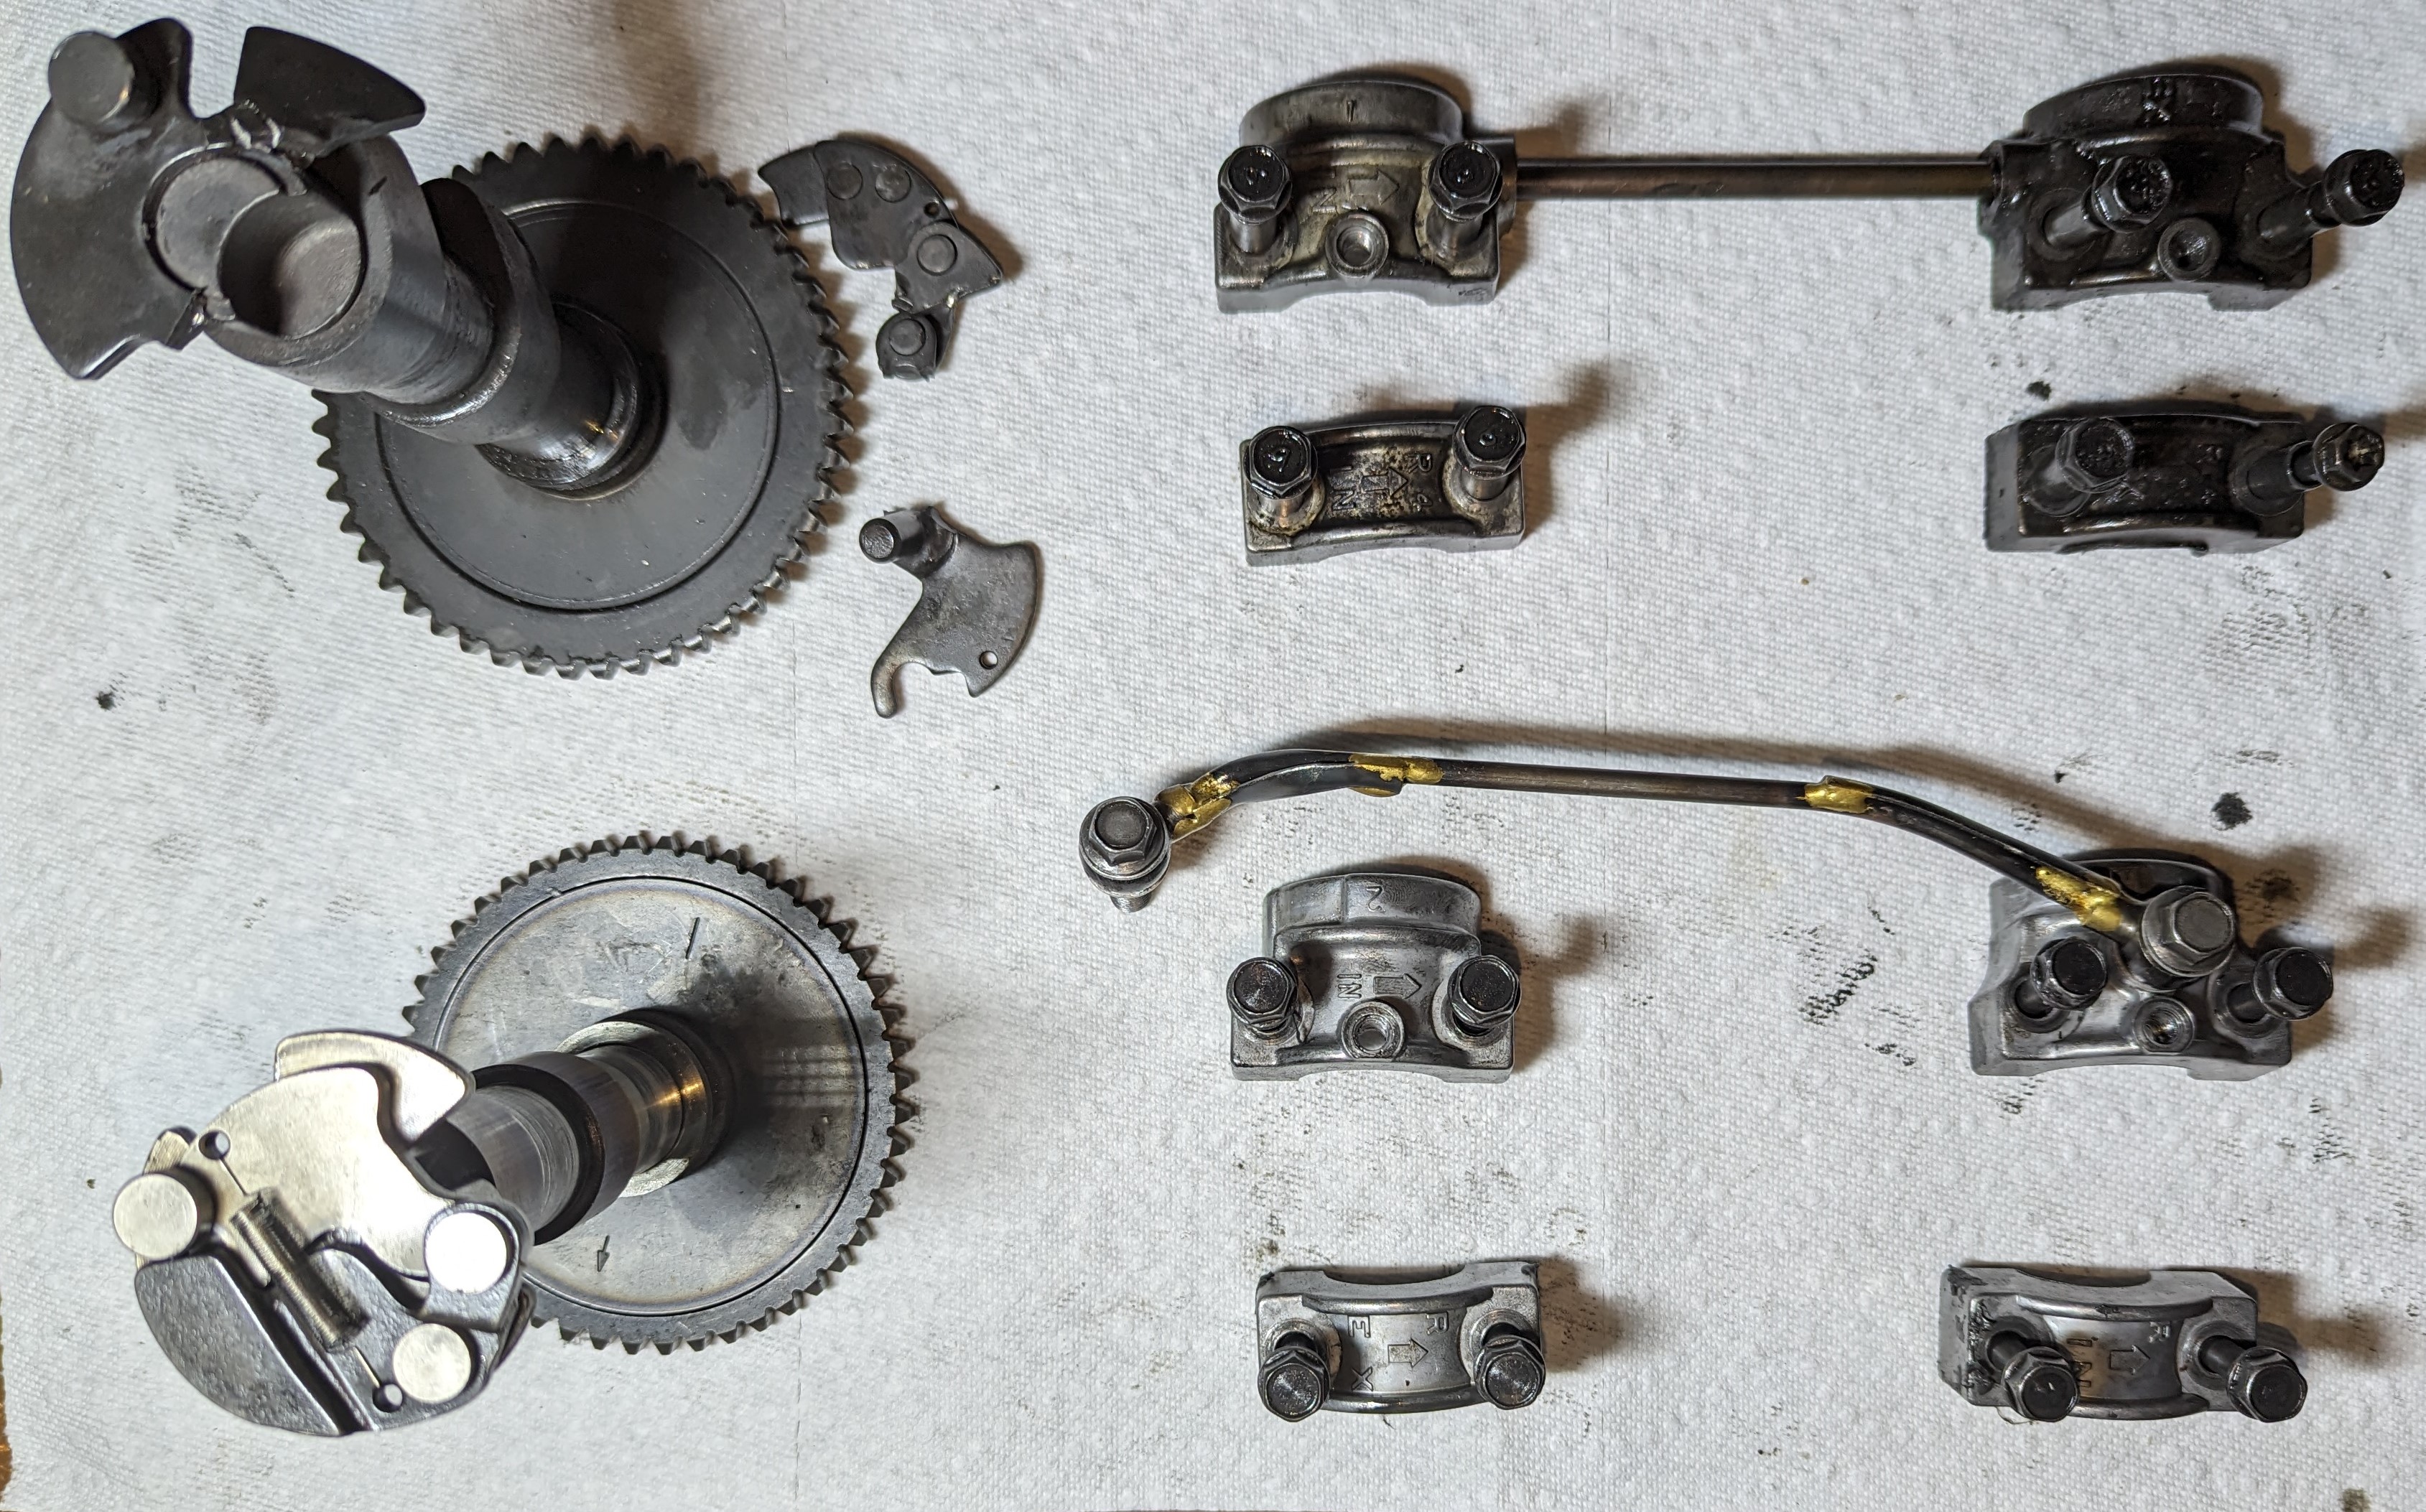 The cam head caps are machined together with the cylinder head under specific tolerances. Attempting to mix and match the camshaft caps will lead to improper fitment, alignment issues, and certain damage to the engine. It’s crucial to keep them organized and with their original cylinder head.
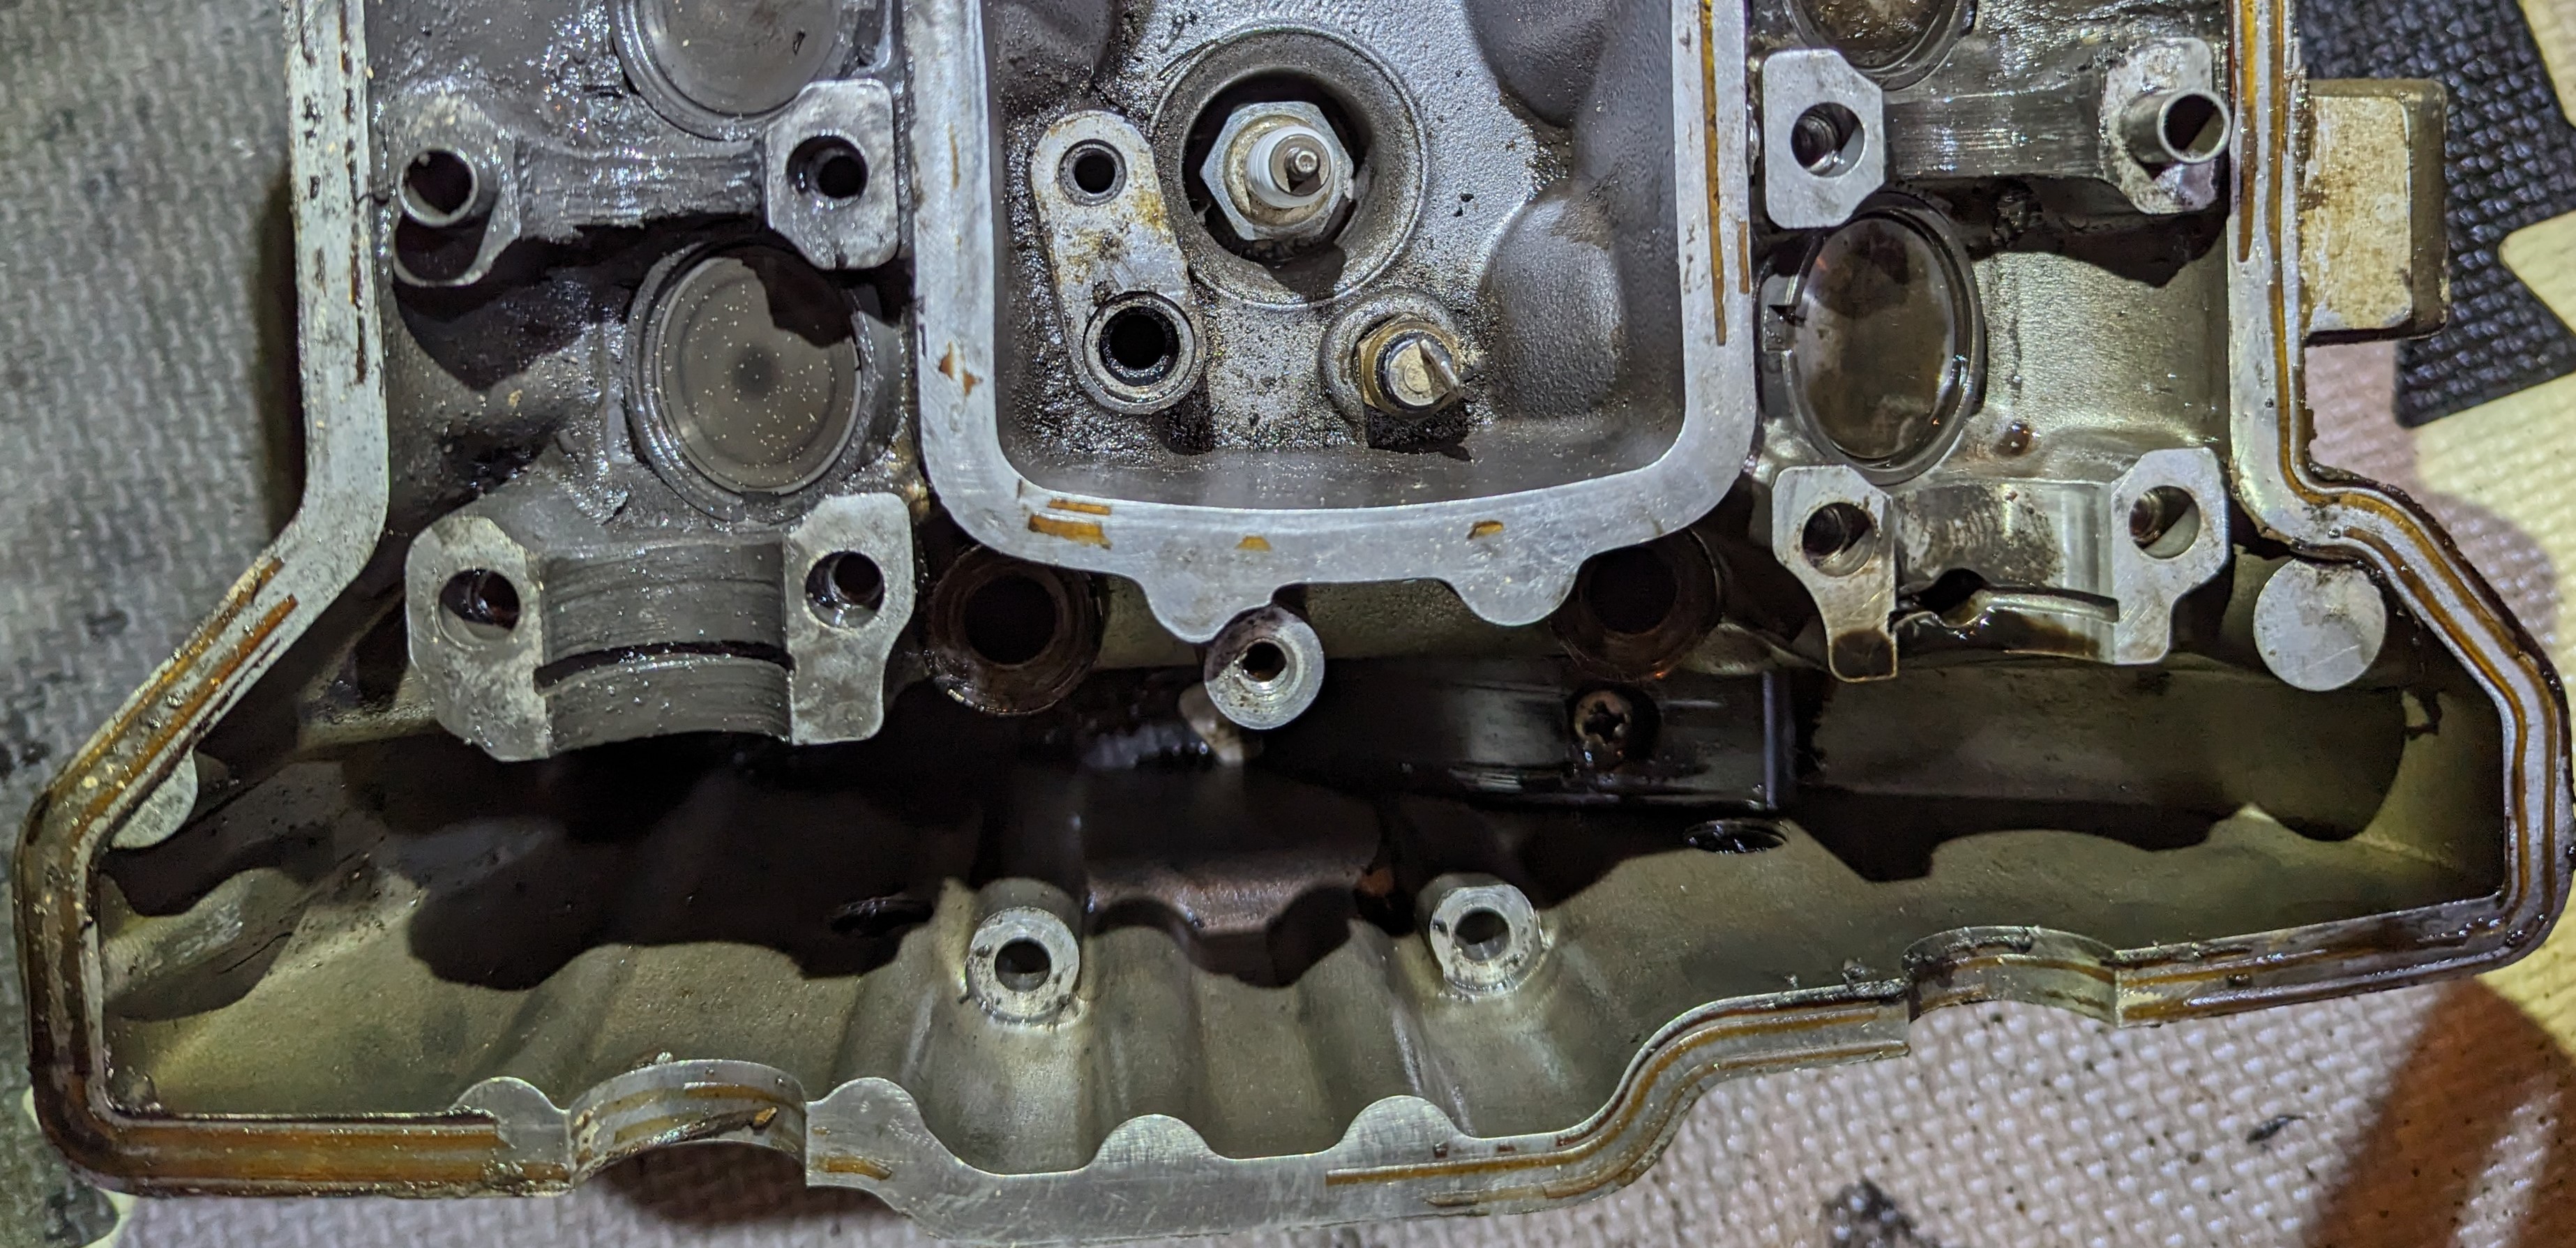
Cleaning
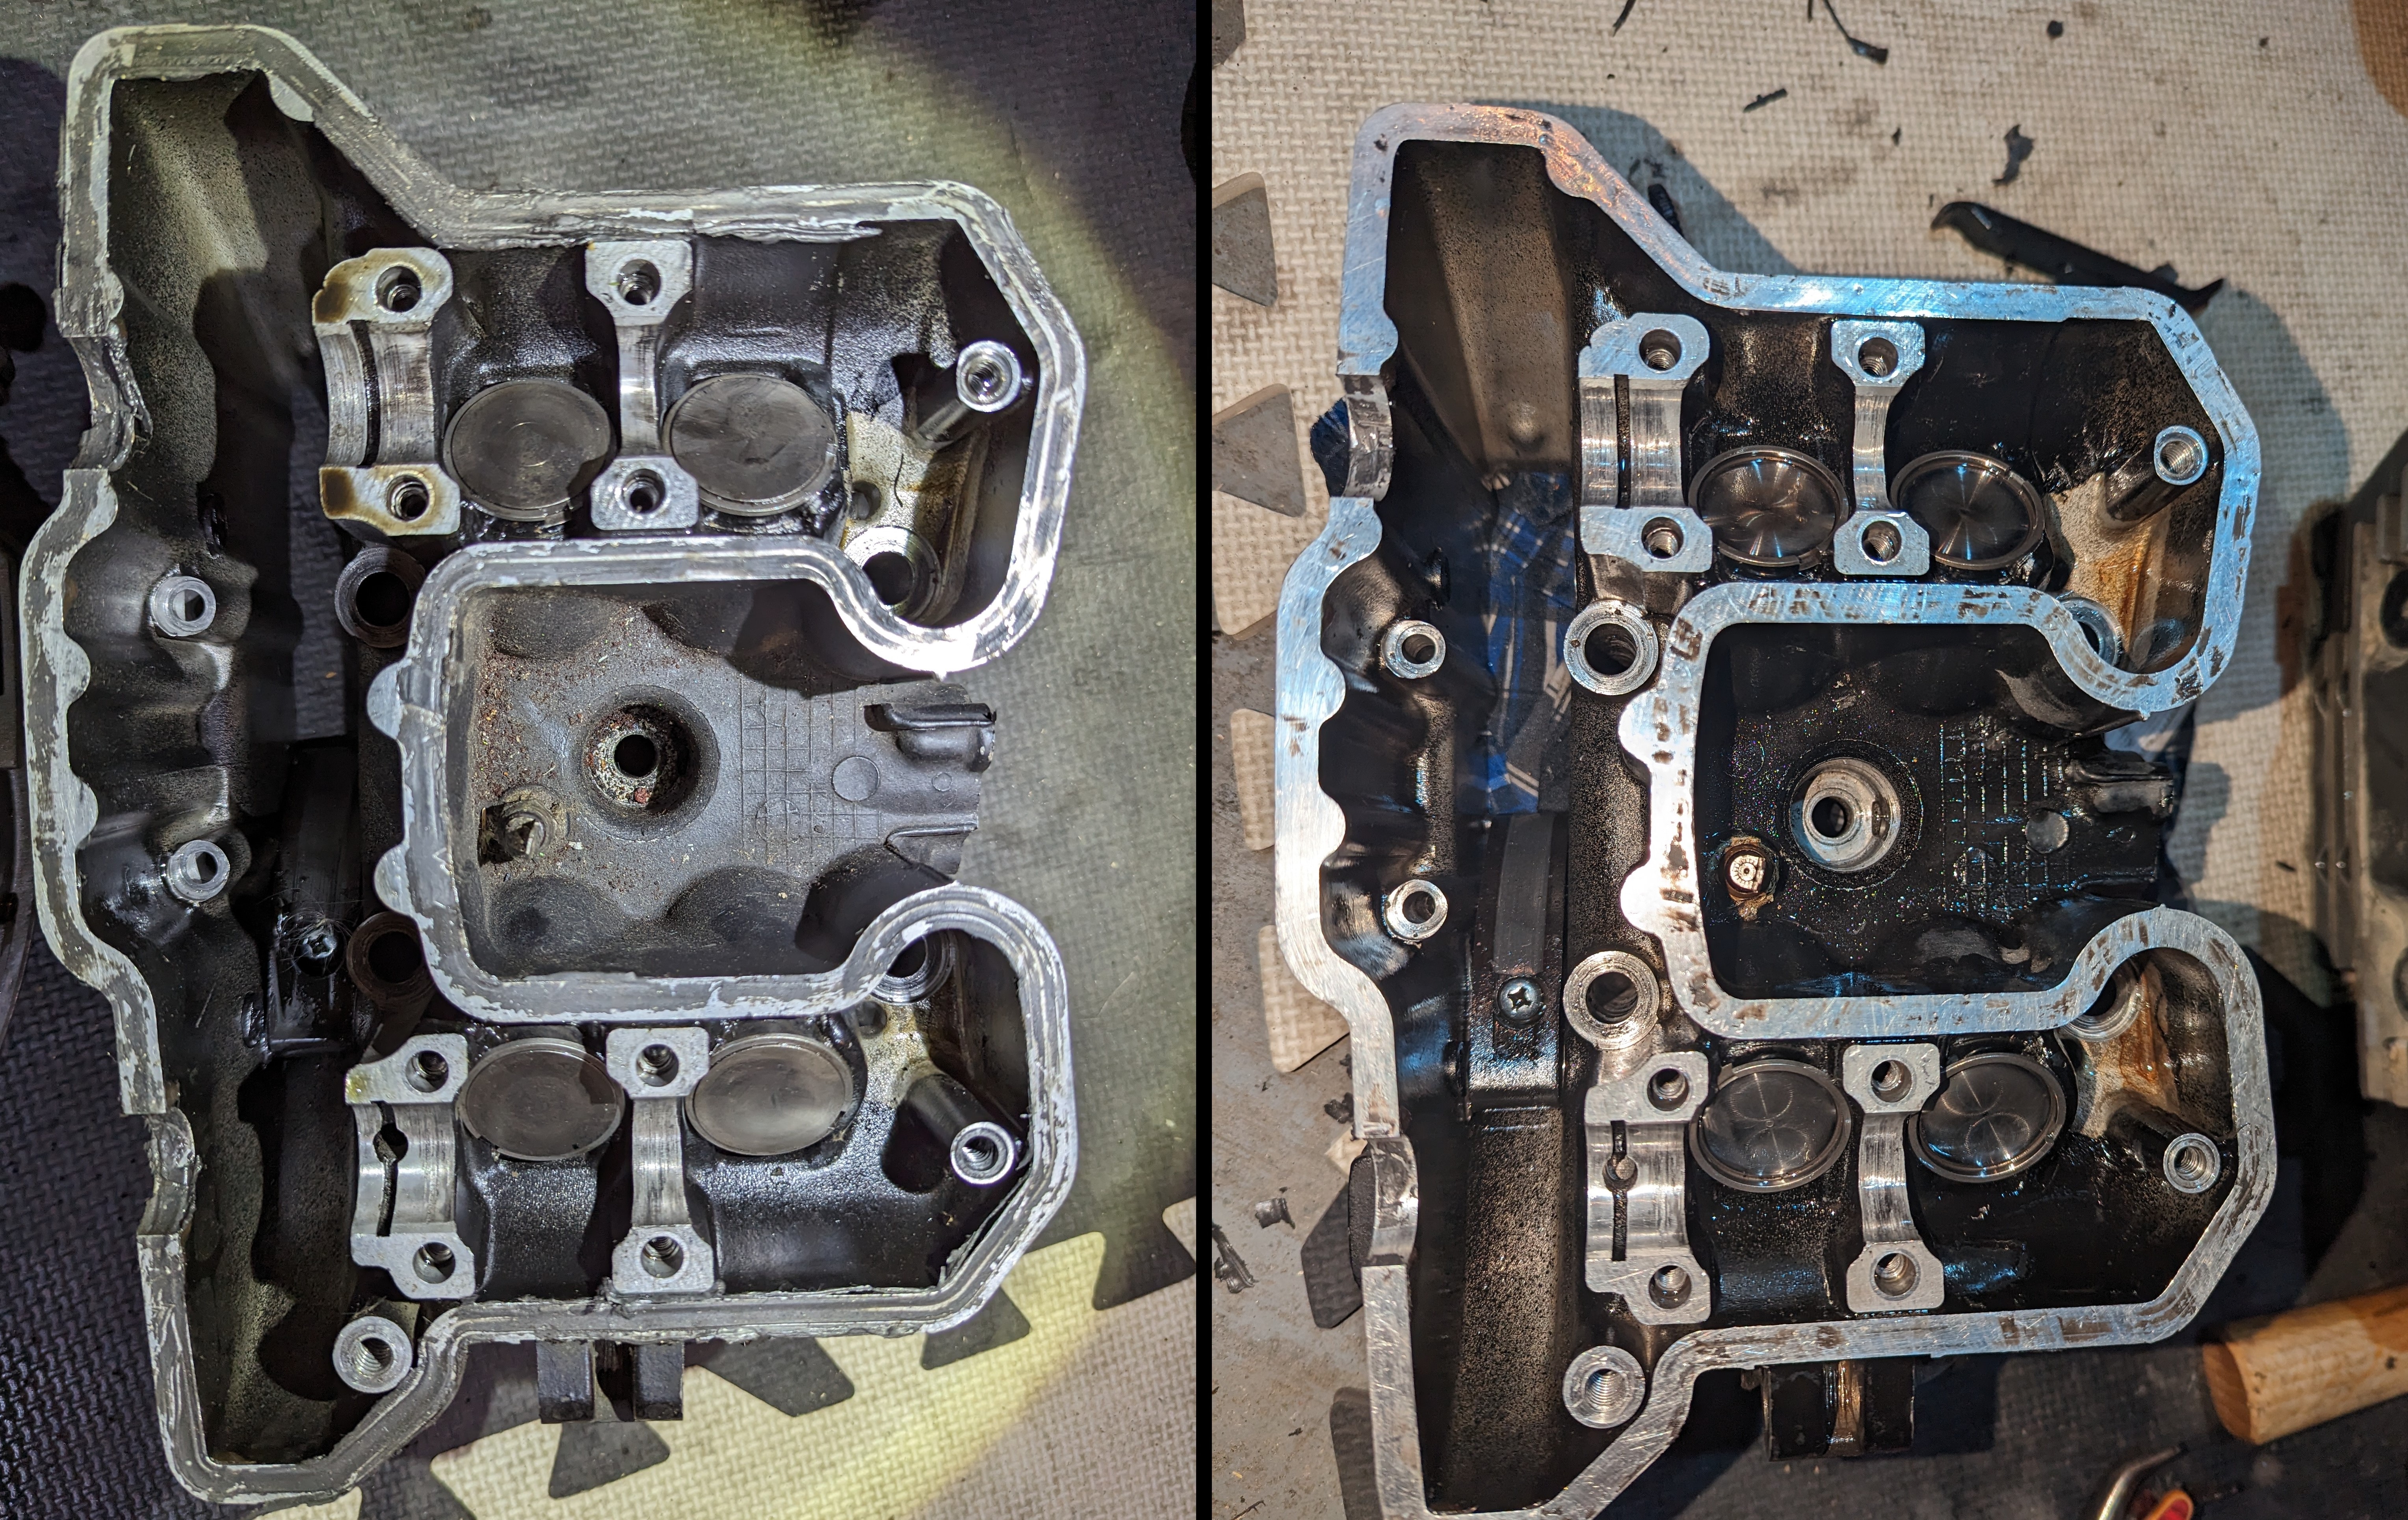 While cleaning the cylinder head mating faces, I discovered that the choice of scraper and cleaning chemical had minimal impact. Ultimately, I found that scraping with a fingernail yielded the best results, regardless of the cleaning solution used.
 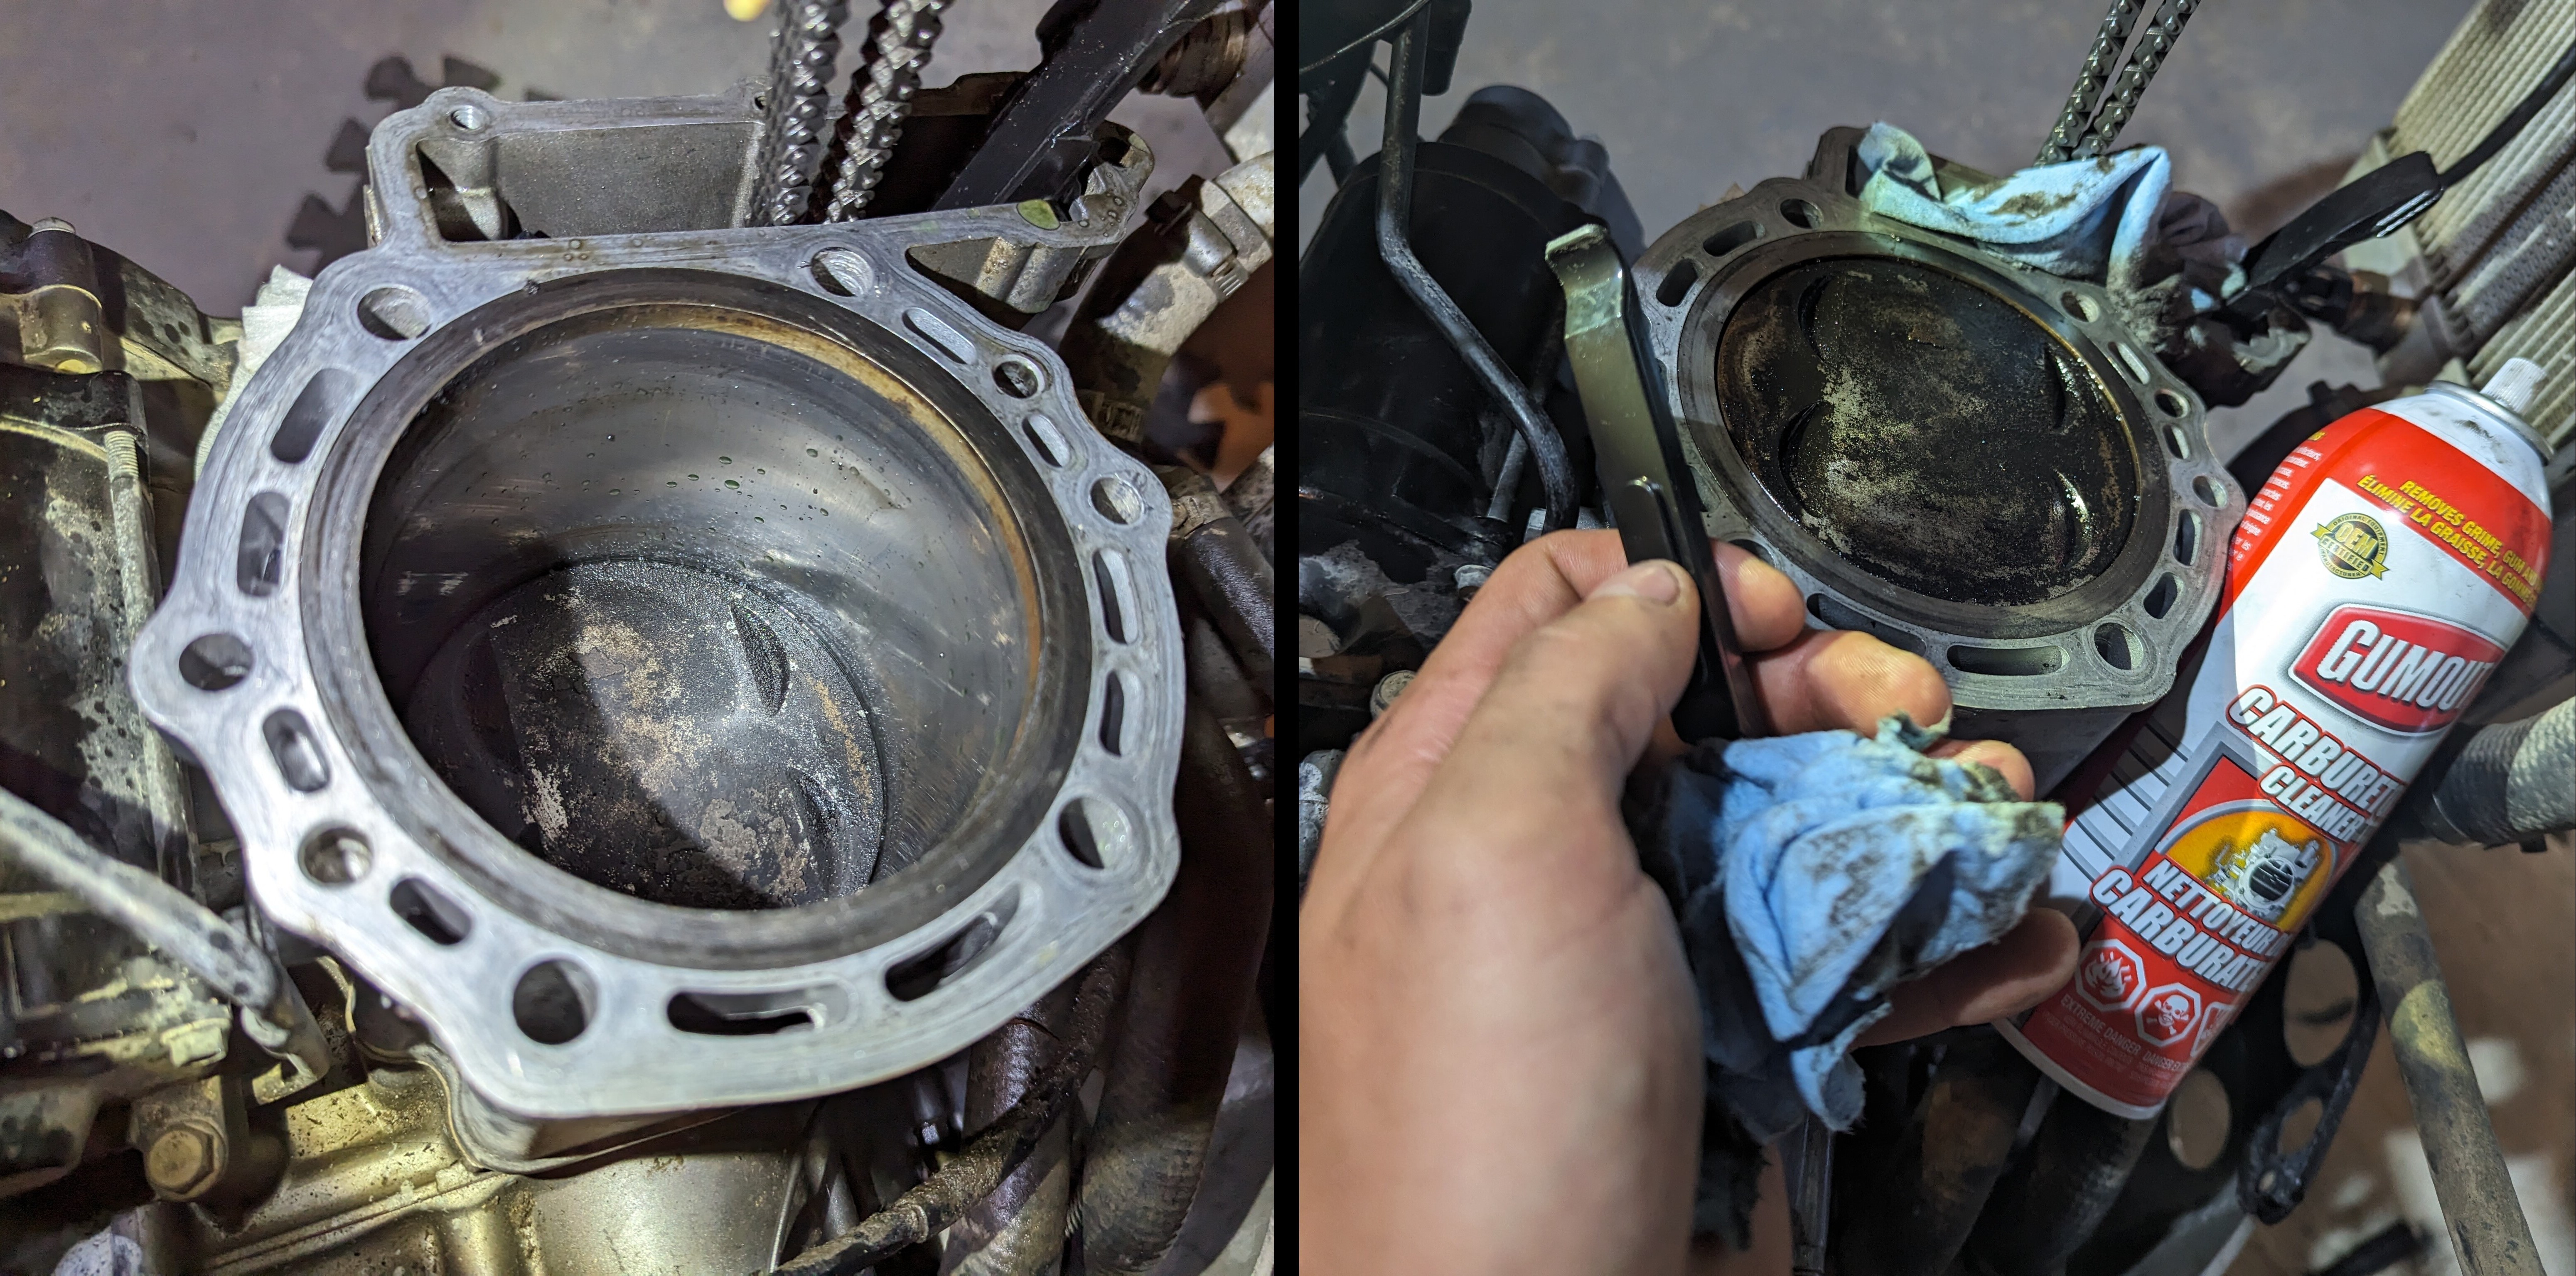 Similar to the mating faces, I experimented with various cleaning chemicals and scraping methods to clean the piston head, but ultimately found that they all yielded similar results. The bulk of the cleaning I would simply attribute manual effort.
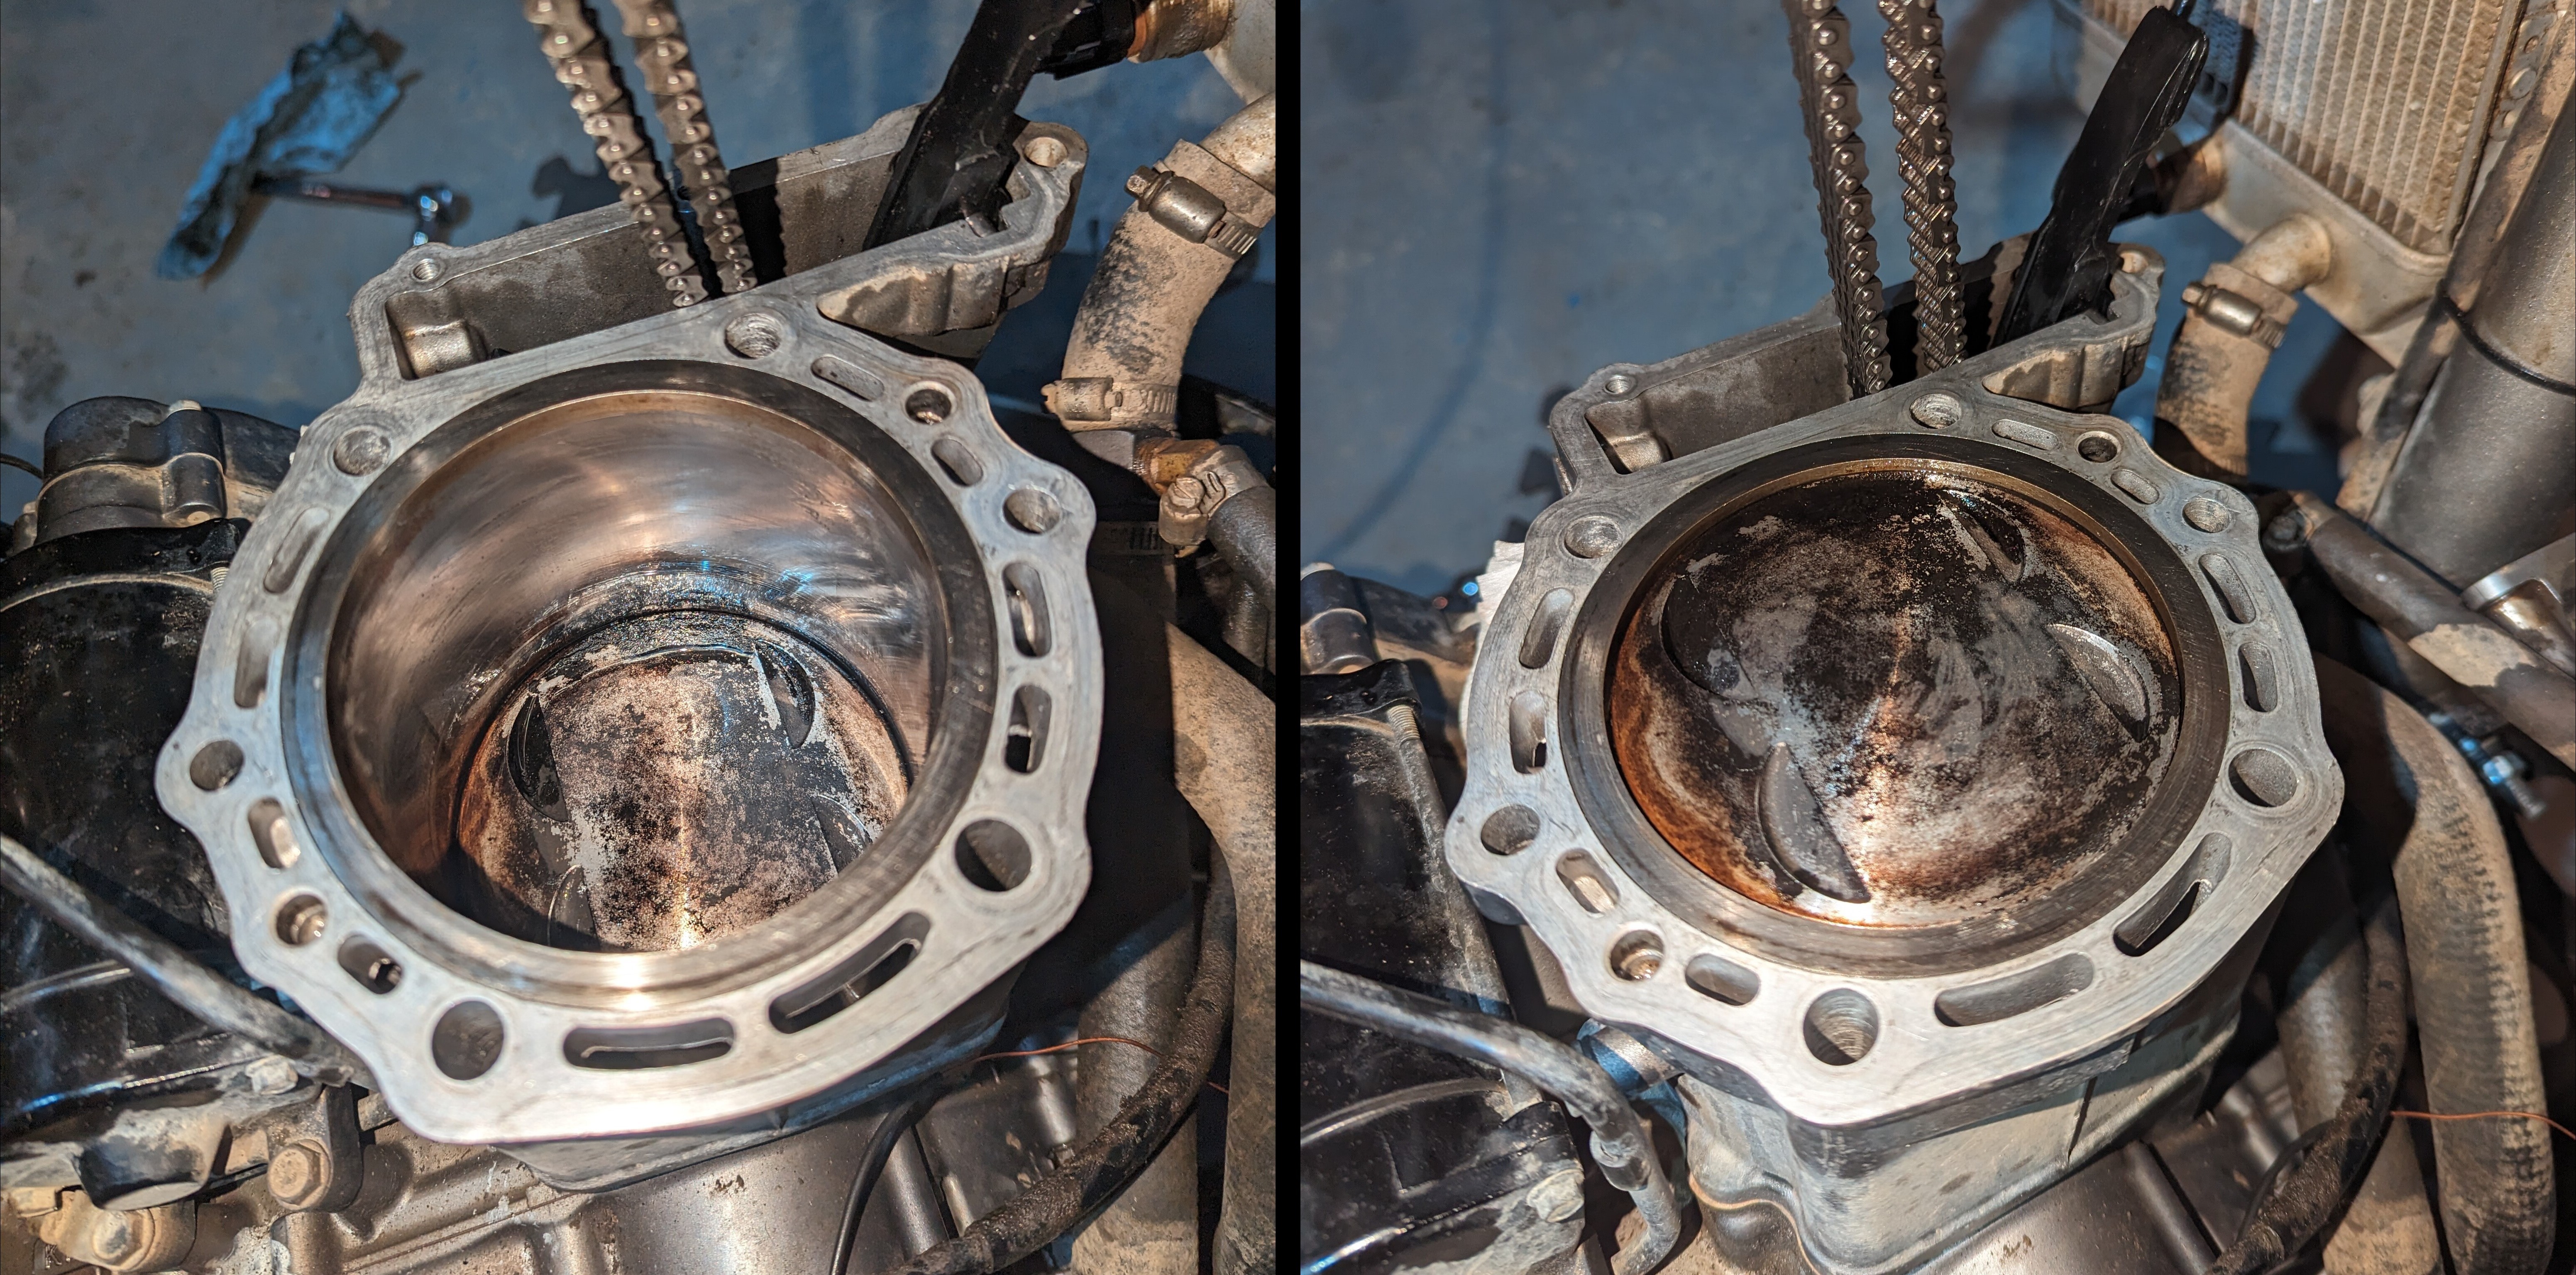
SIlicon Sealant
 Assuming the mating surfaces are clean, less is more when it comes to the RTV silicon. A thin beas around the entire mating surface is prefered to create a tight and uniform seal between the cylinder head and the engine block.
Thread Prep
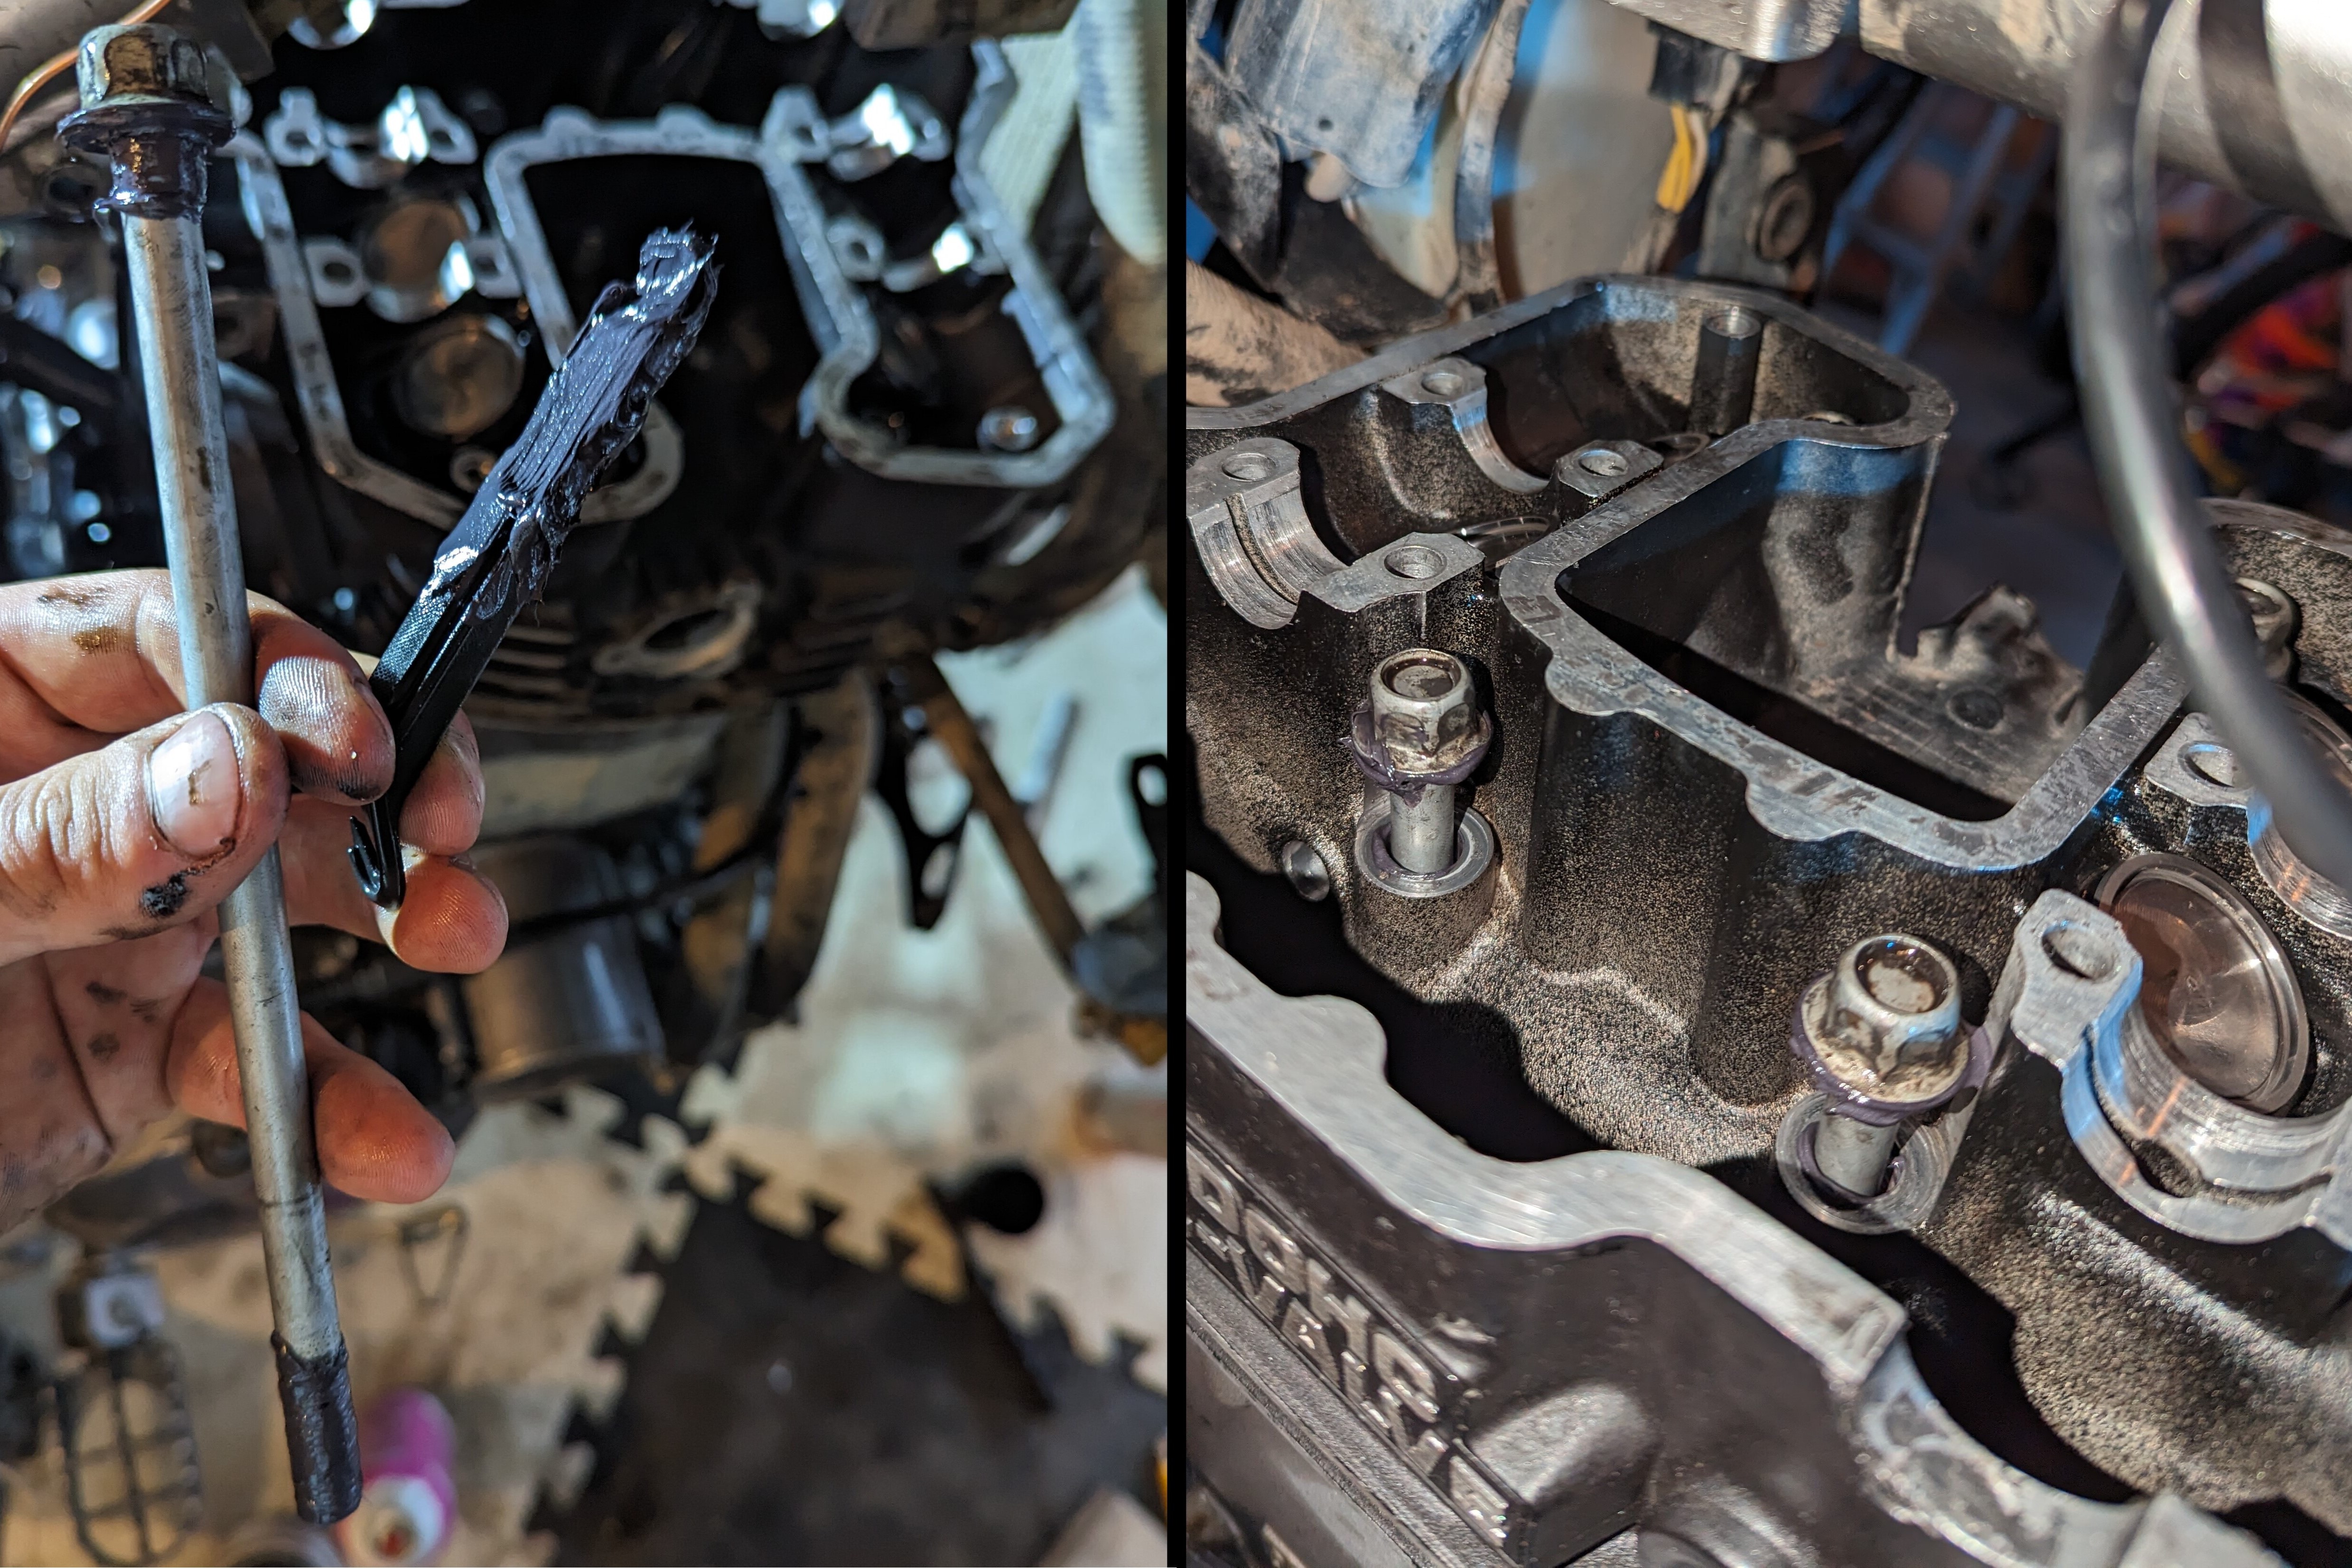 When installing the 4 cylinder head bolts, apply molybdenum disulfide grease to the bolt threads and seating surface on the heads to ensure proper lubrication.
Additionally, when the upper engine mounting brackets are reinstalled, the threadlock should be applied only to the bolt mounted to the engine, not the two bolts through the frame.
Crush Washers
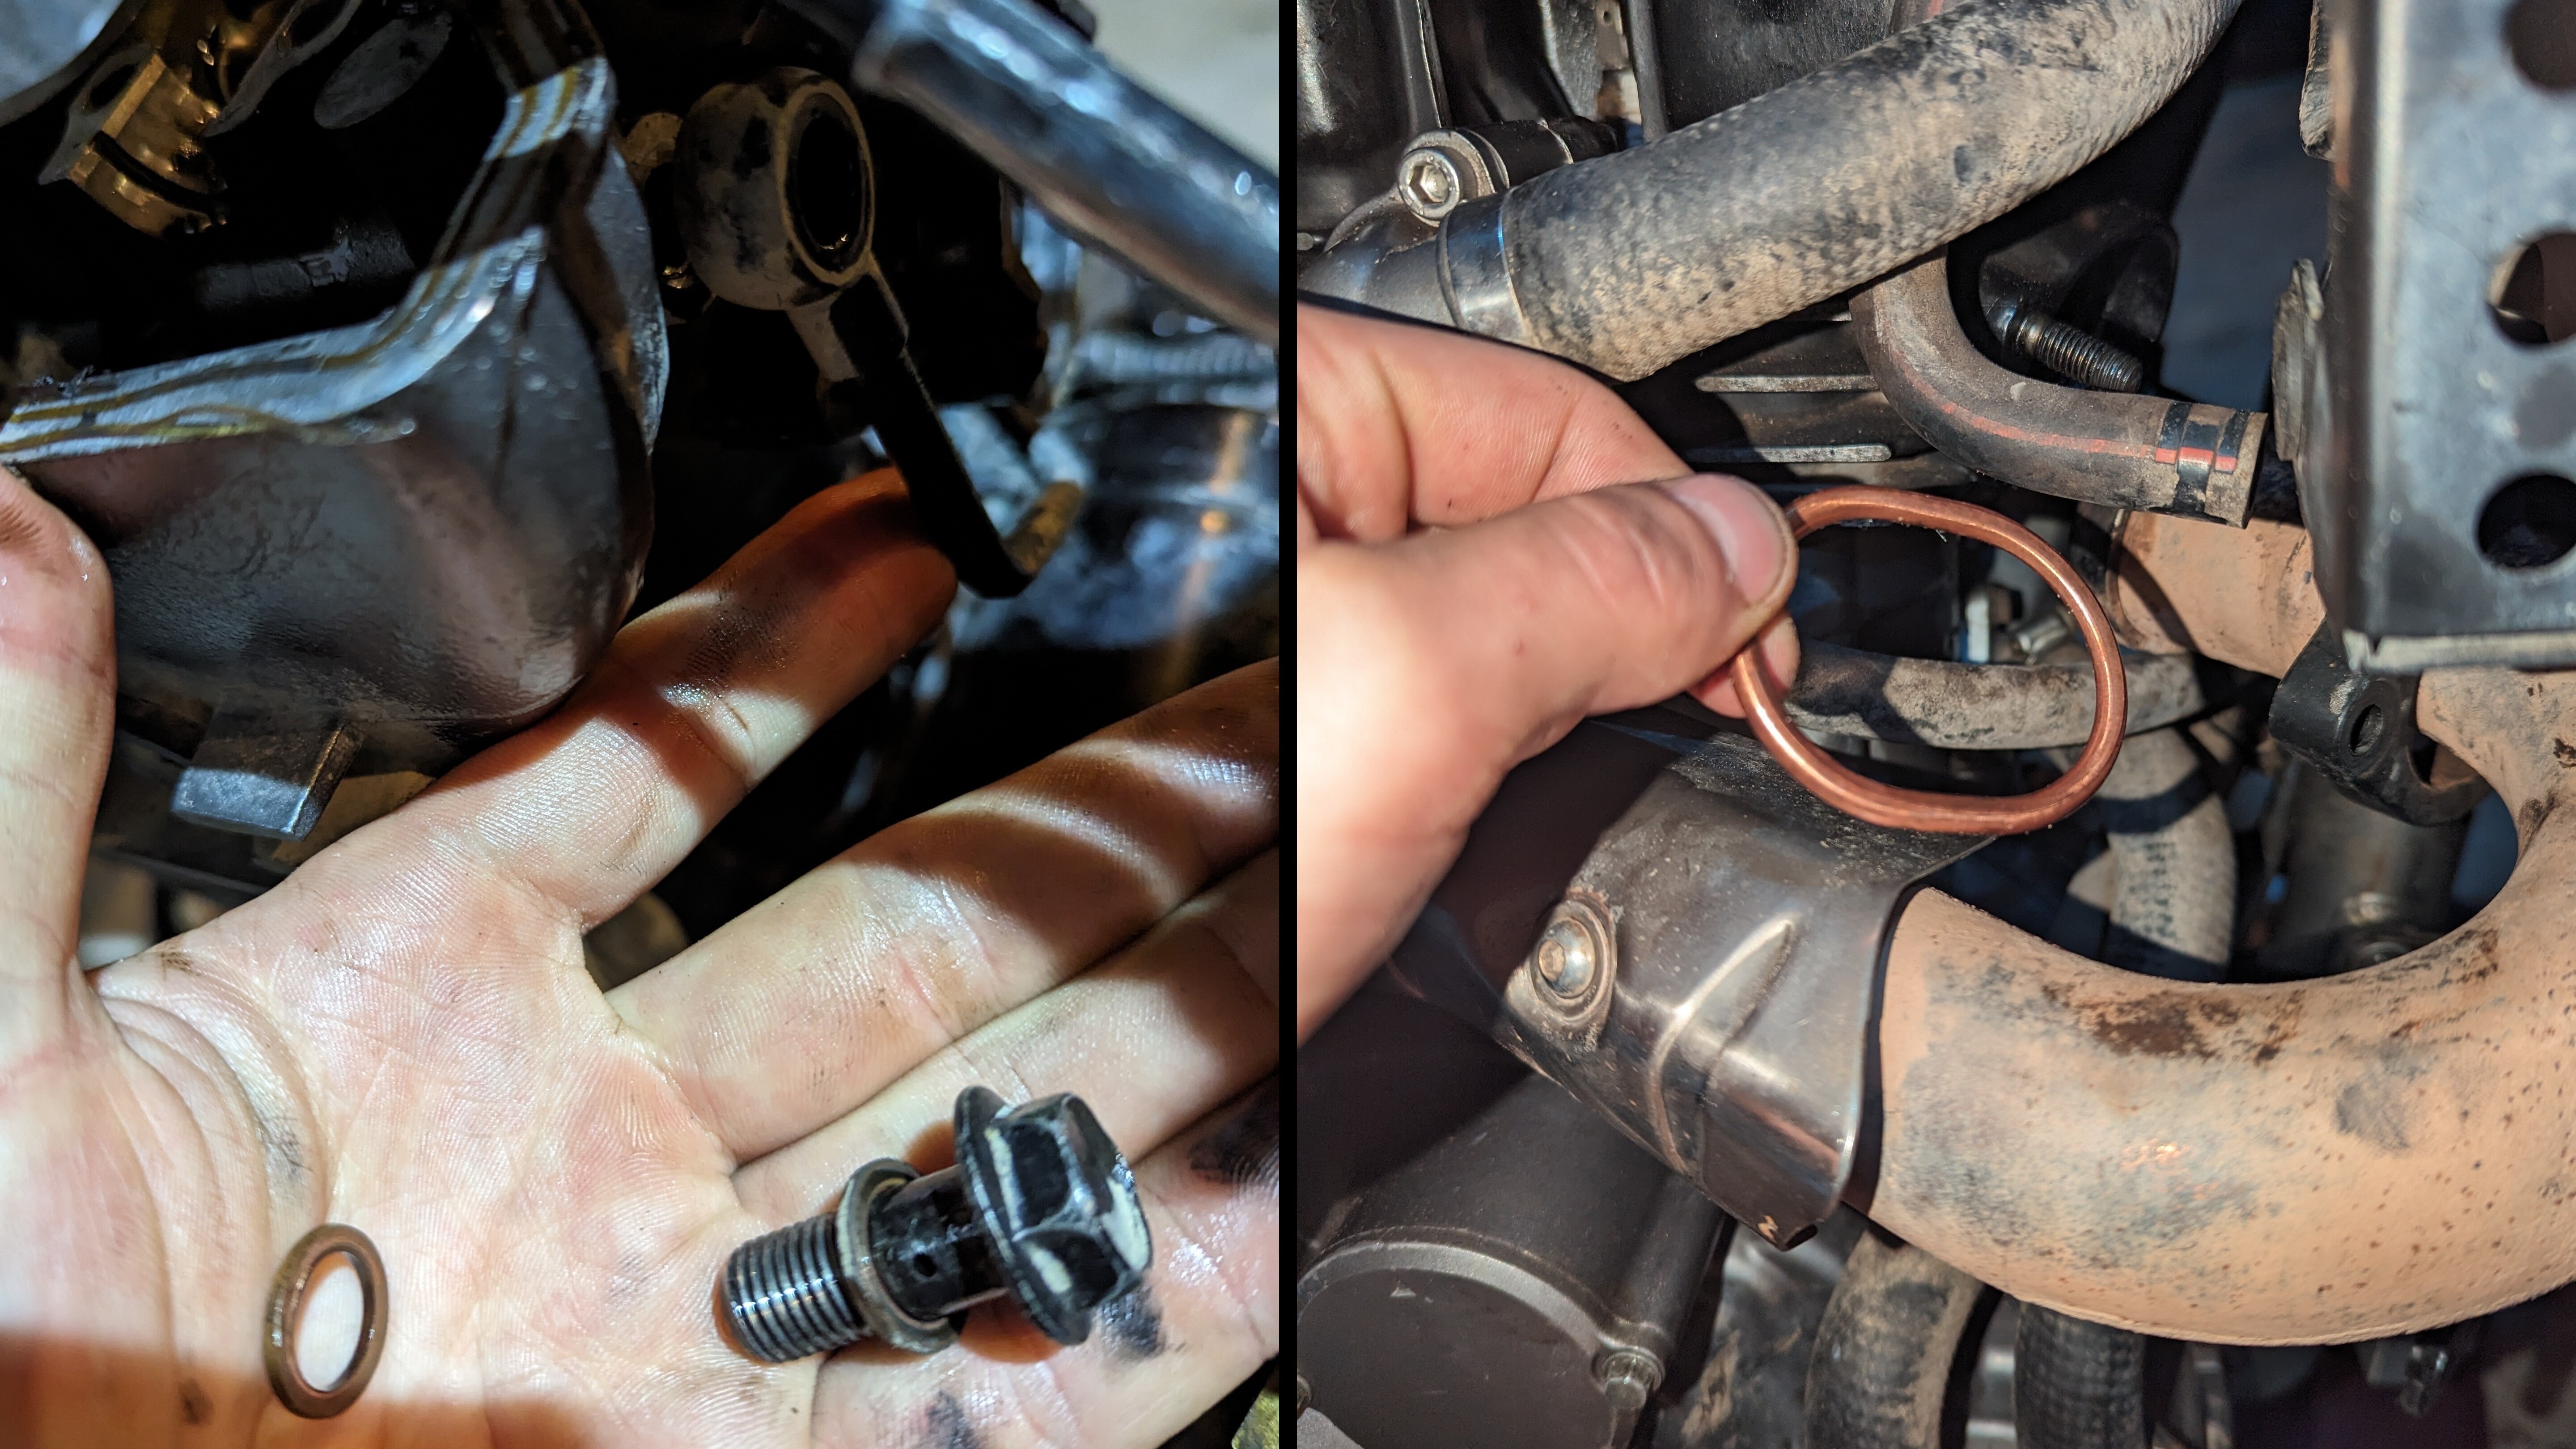 Copper crush washers form a tight seal between mating surfaces by deforming upon installation. However, once compressed, they cannot be reused on different surfaces. Therefore, in applications such as the banjo bolt oil delivery system and exhaust manifold connection, these crush washers require replacements.
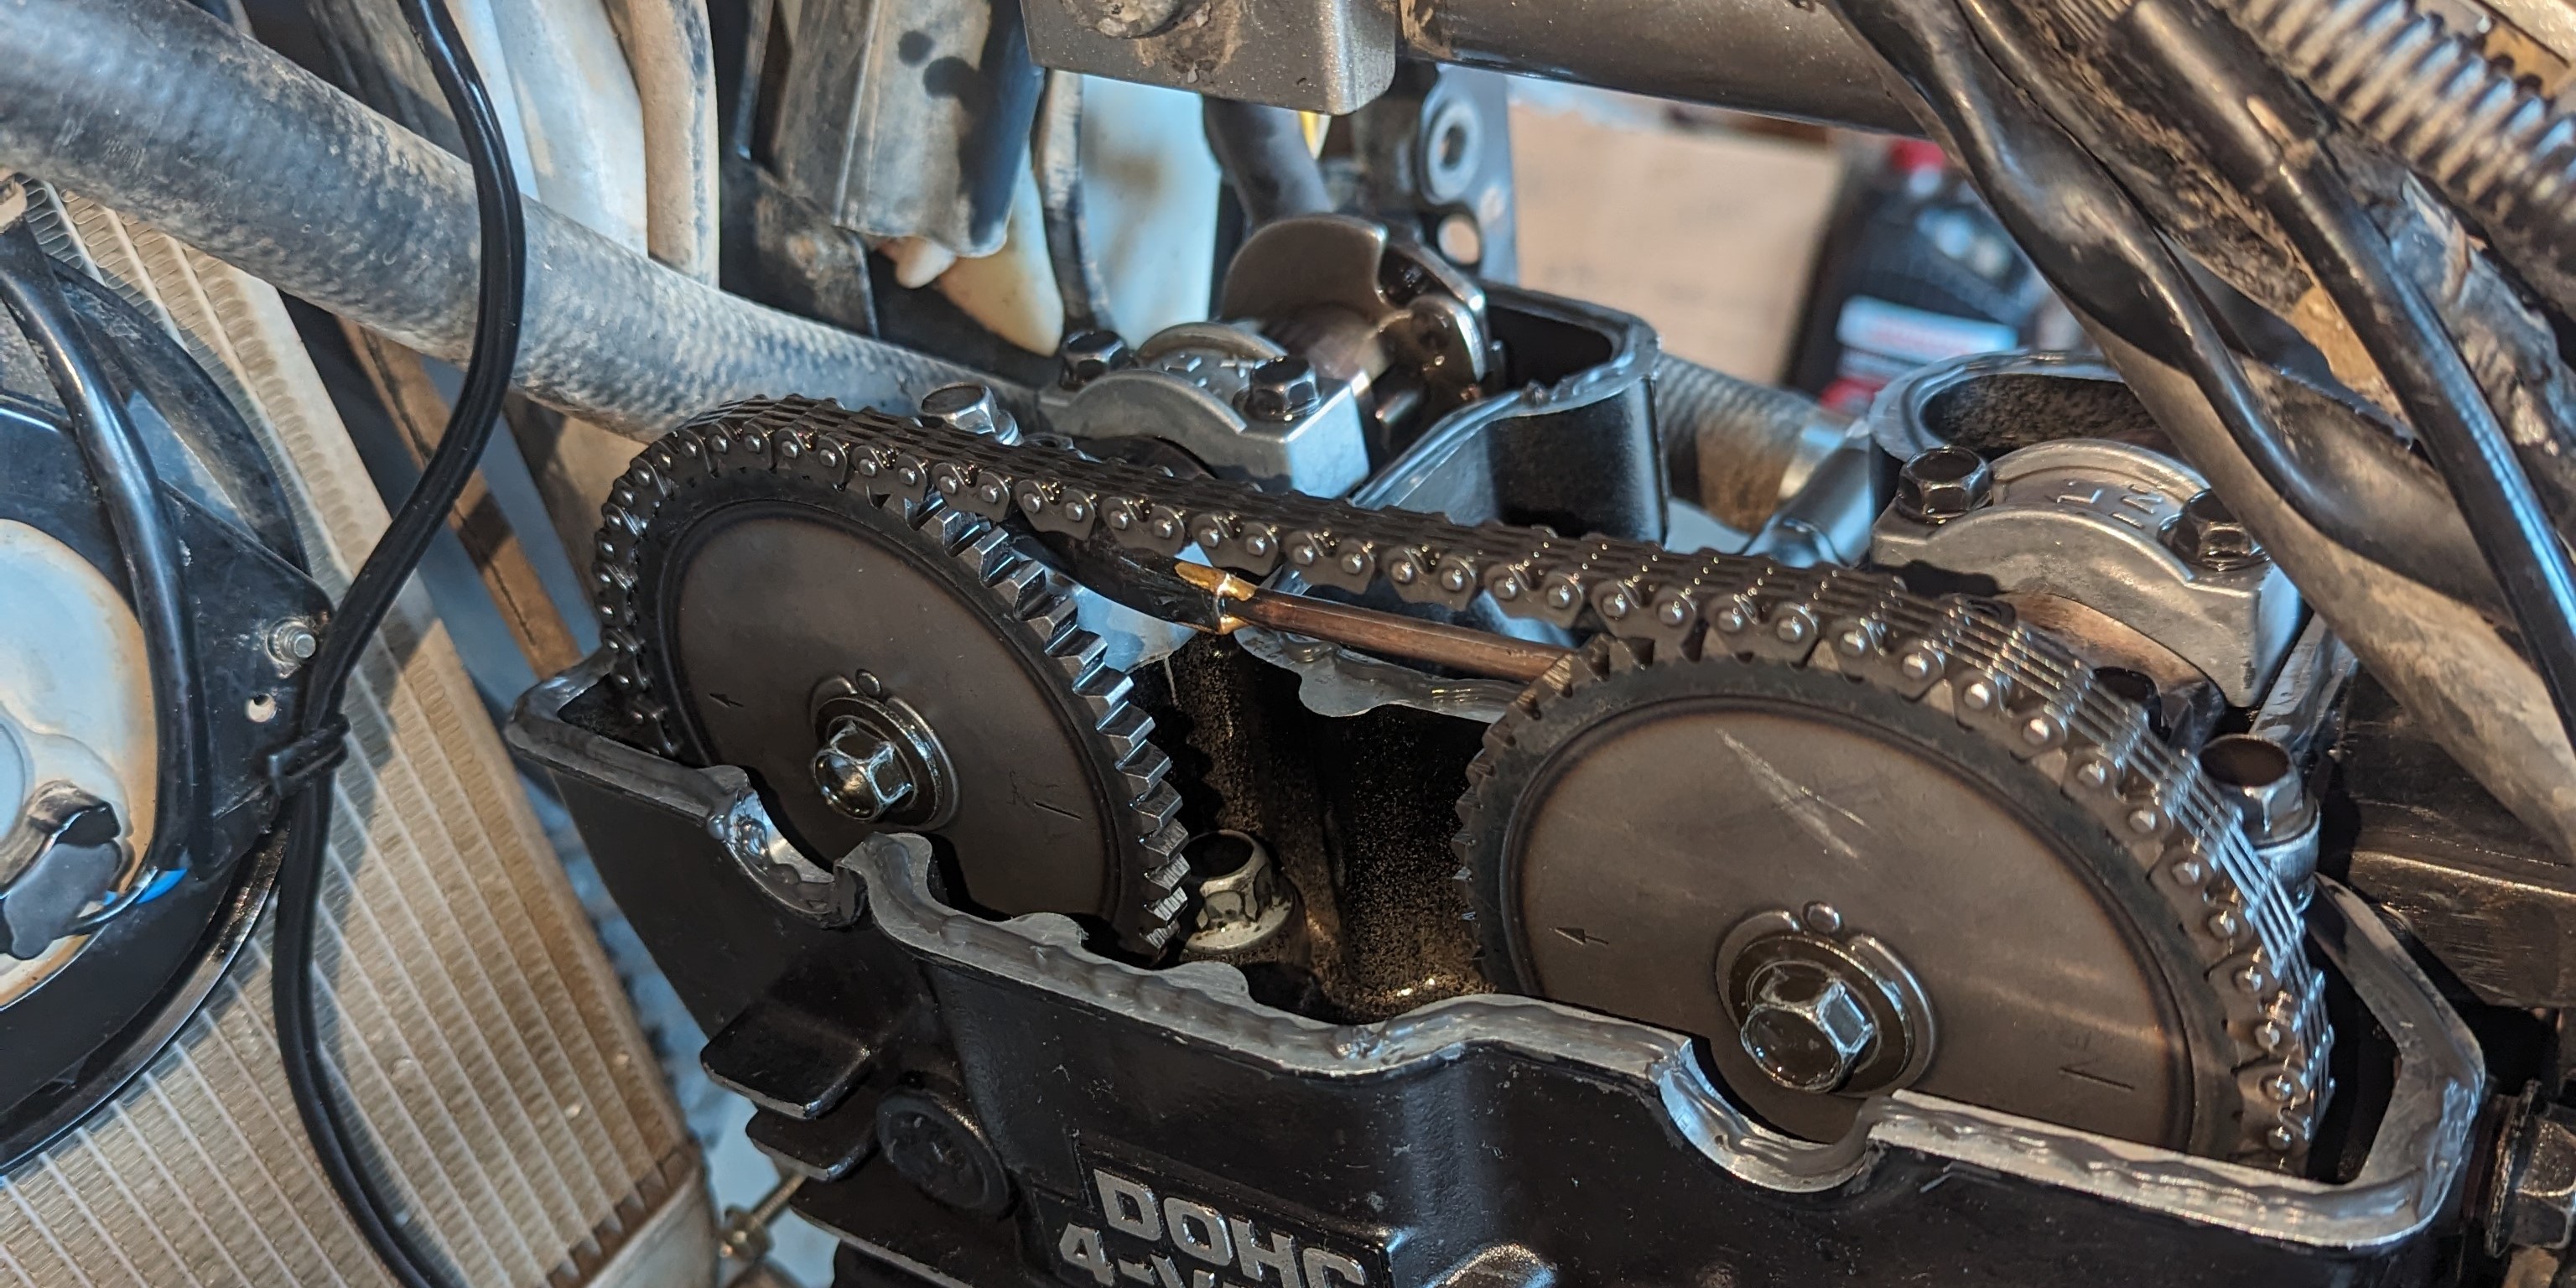
Timing Alignment
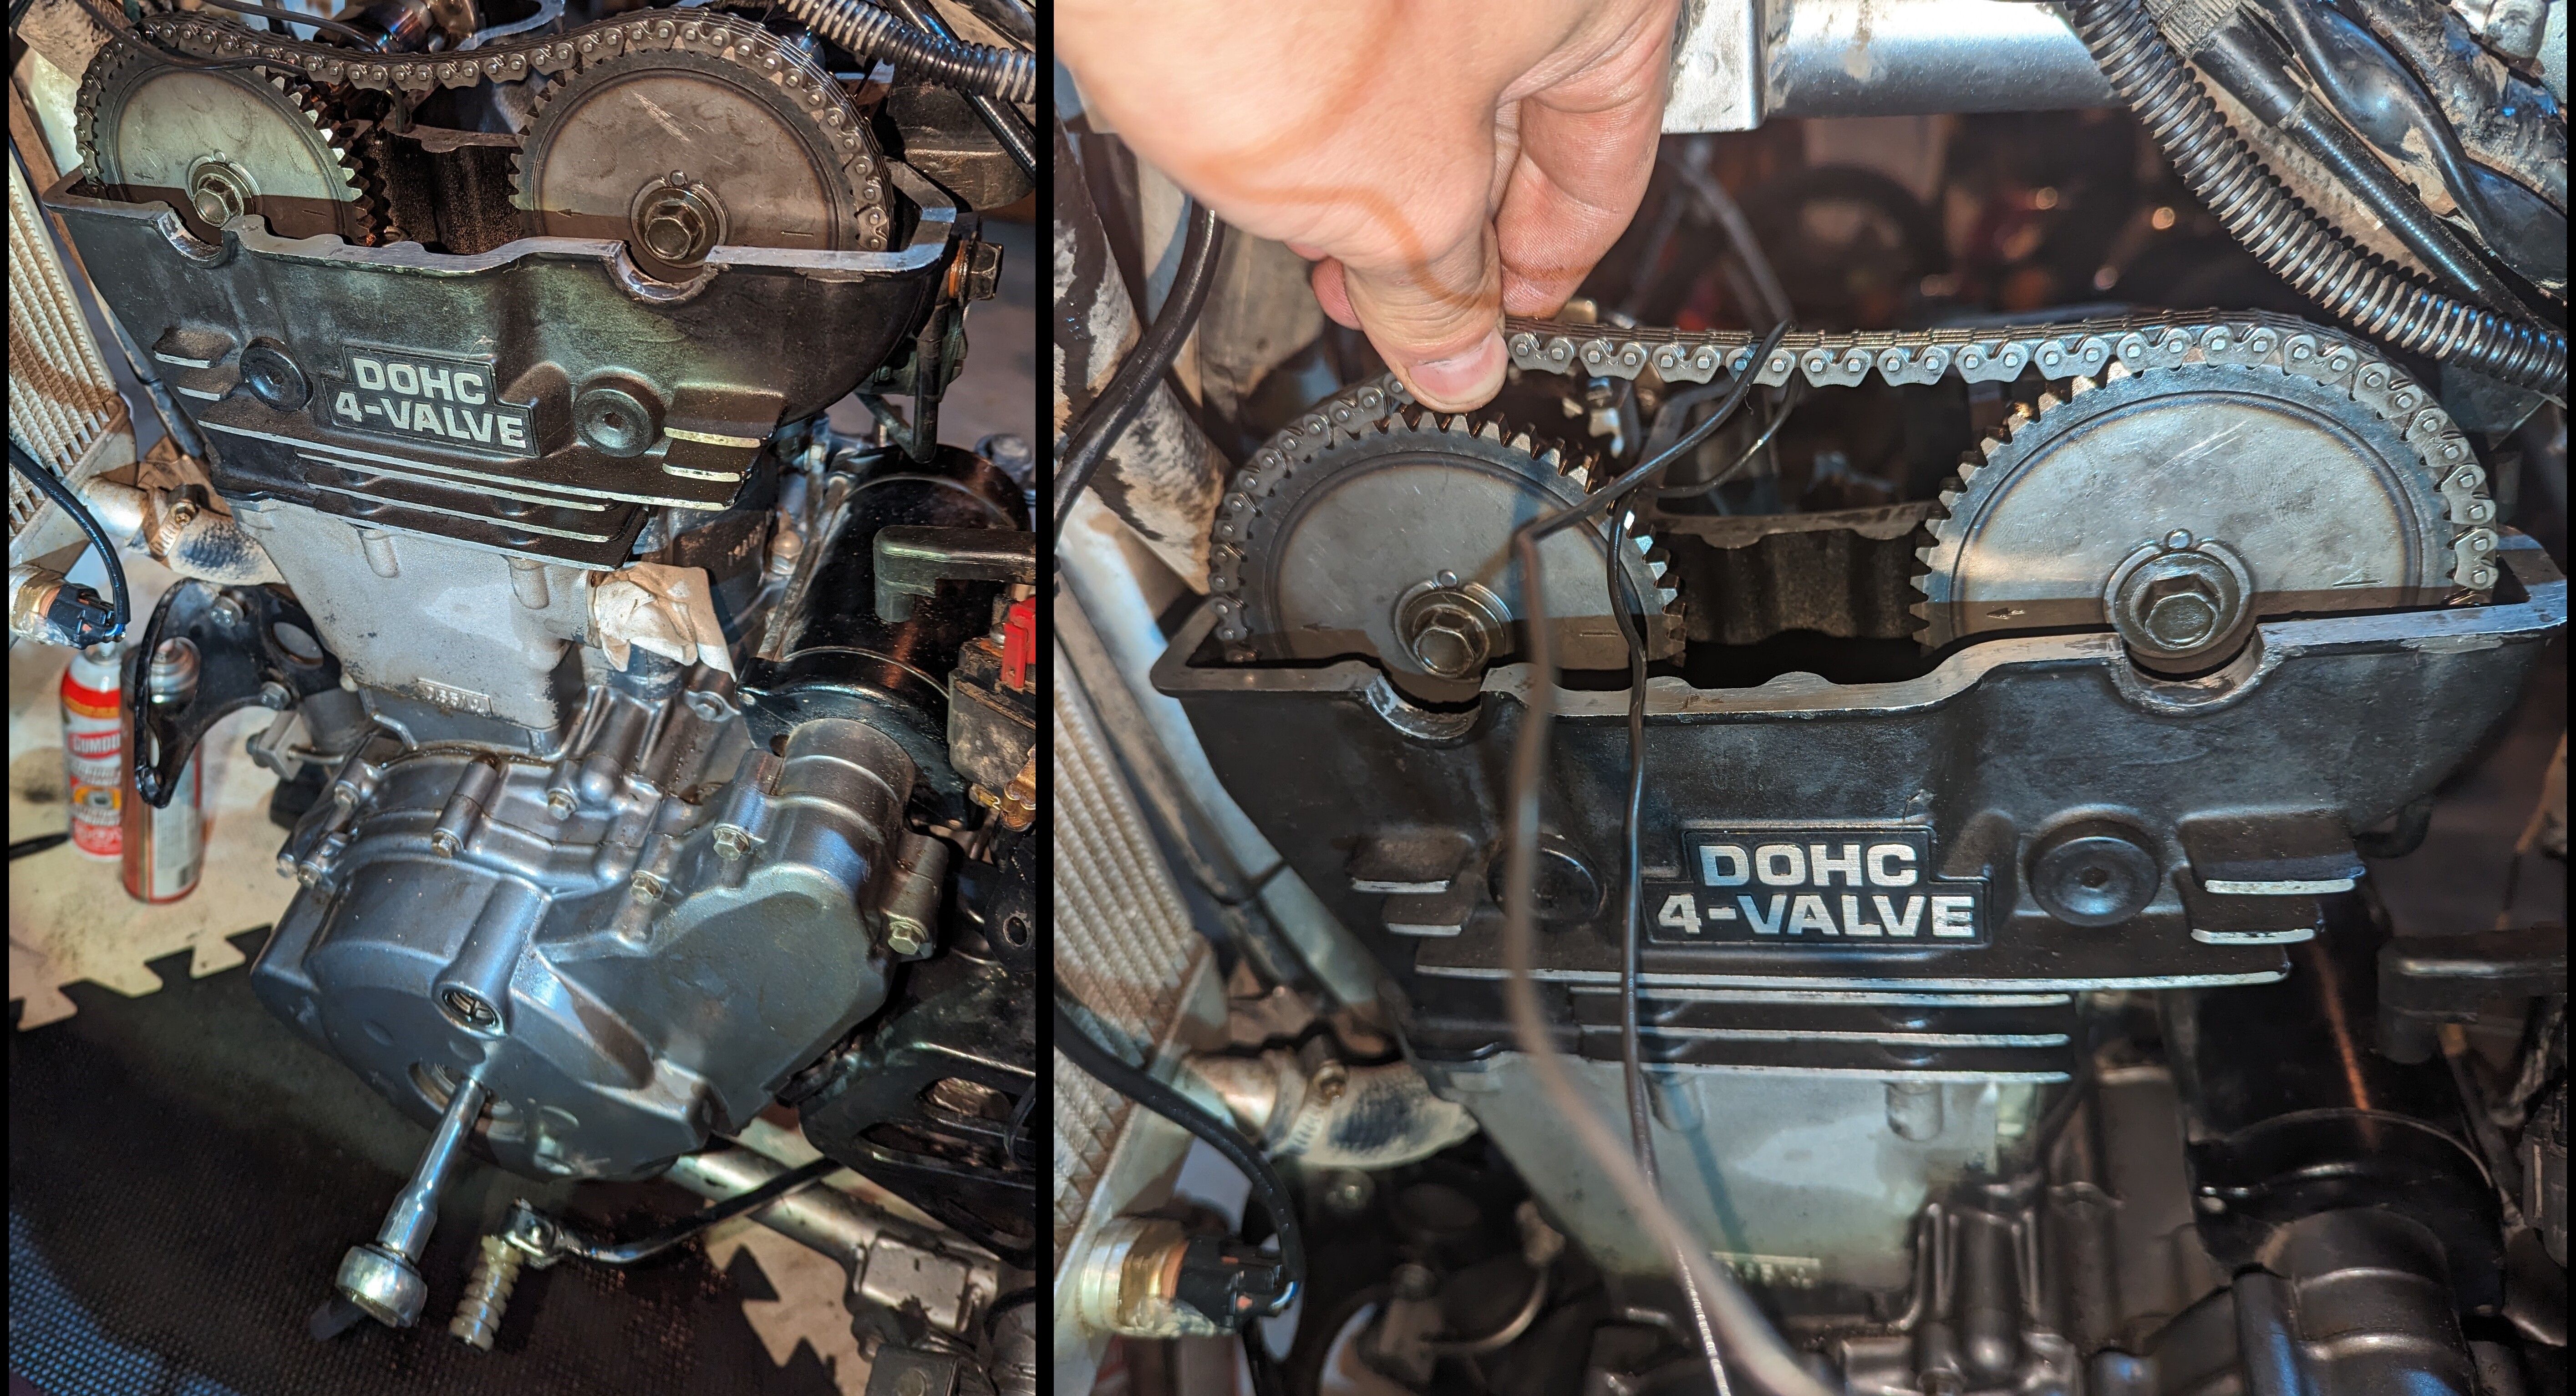 When adjusting the timing, having a second person is invaluable for managing the slack on the chain, particularly towards the rear, which greatly simplifies the process of resetting the timing. With one person holding the timing chain taut on the front side, the other person can focus on sequentially rotating each camshaft into alignment and then reinstalling the chain tensioner without worry of the chain slipping.
Tensioner
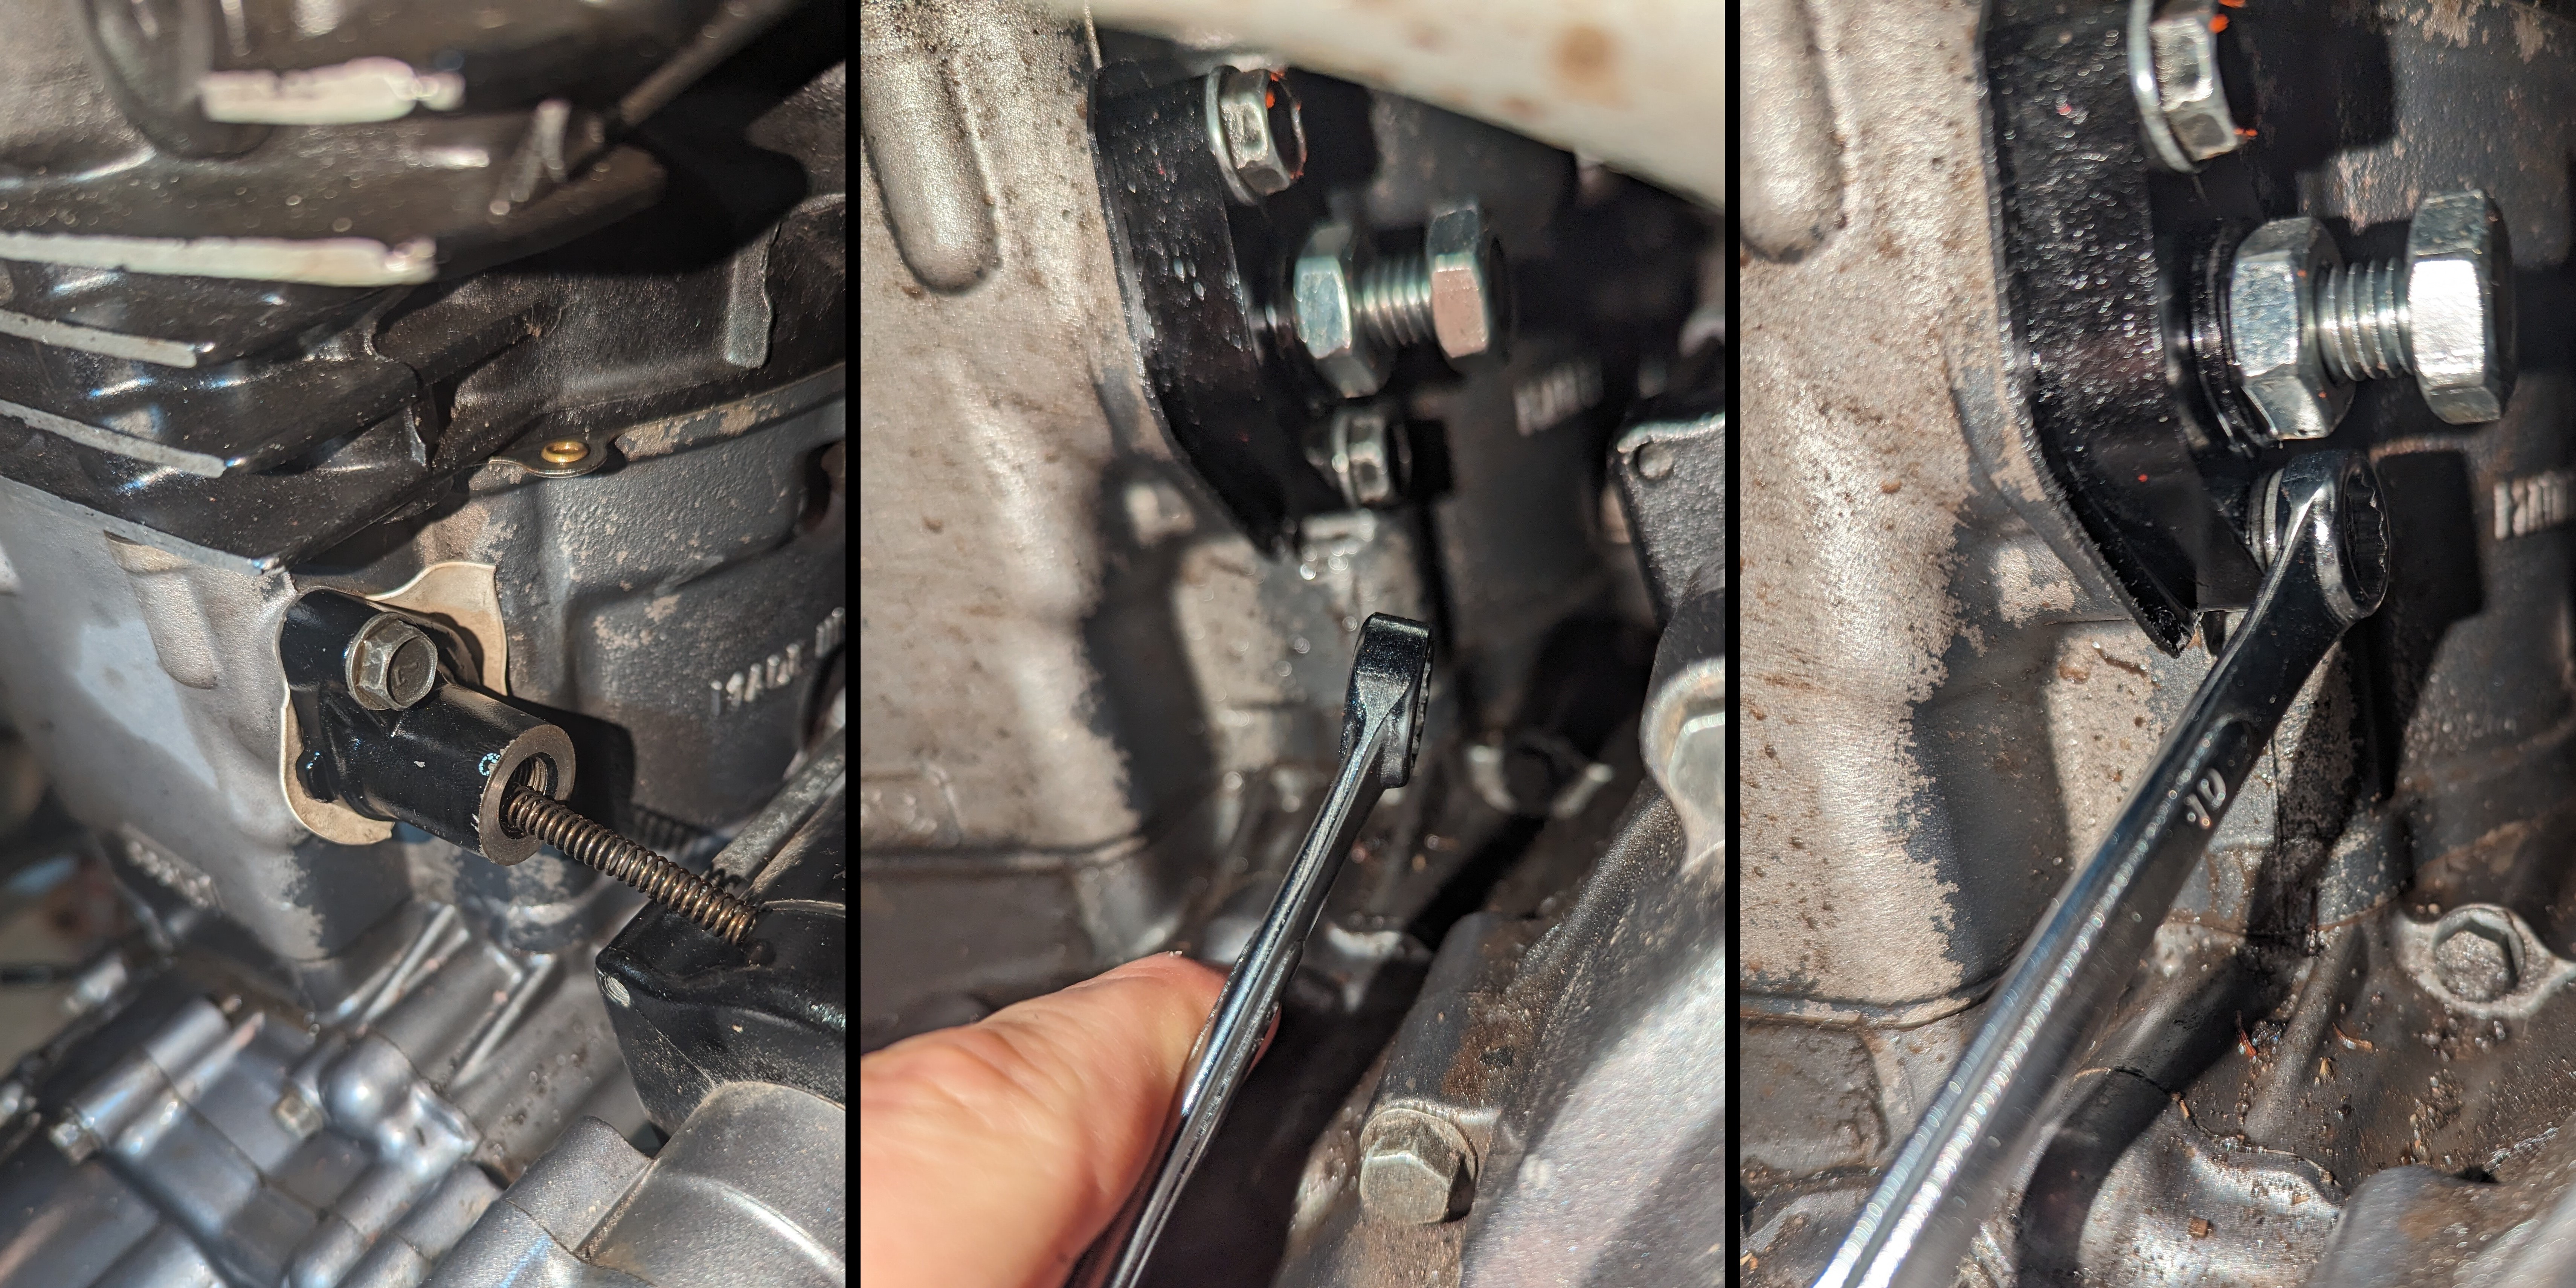 When installing the chain tensioner, a straight, open-face, or socket, wrench won’t reach the lower bolt holding due to its location. I was only able to acess it with an offset closed-faced 10mm wrench.
Thermo-Bob
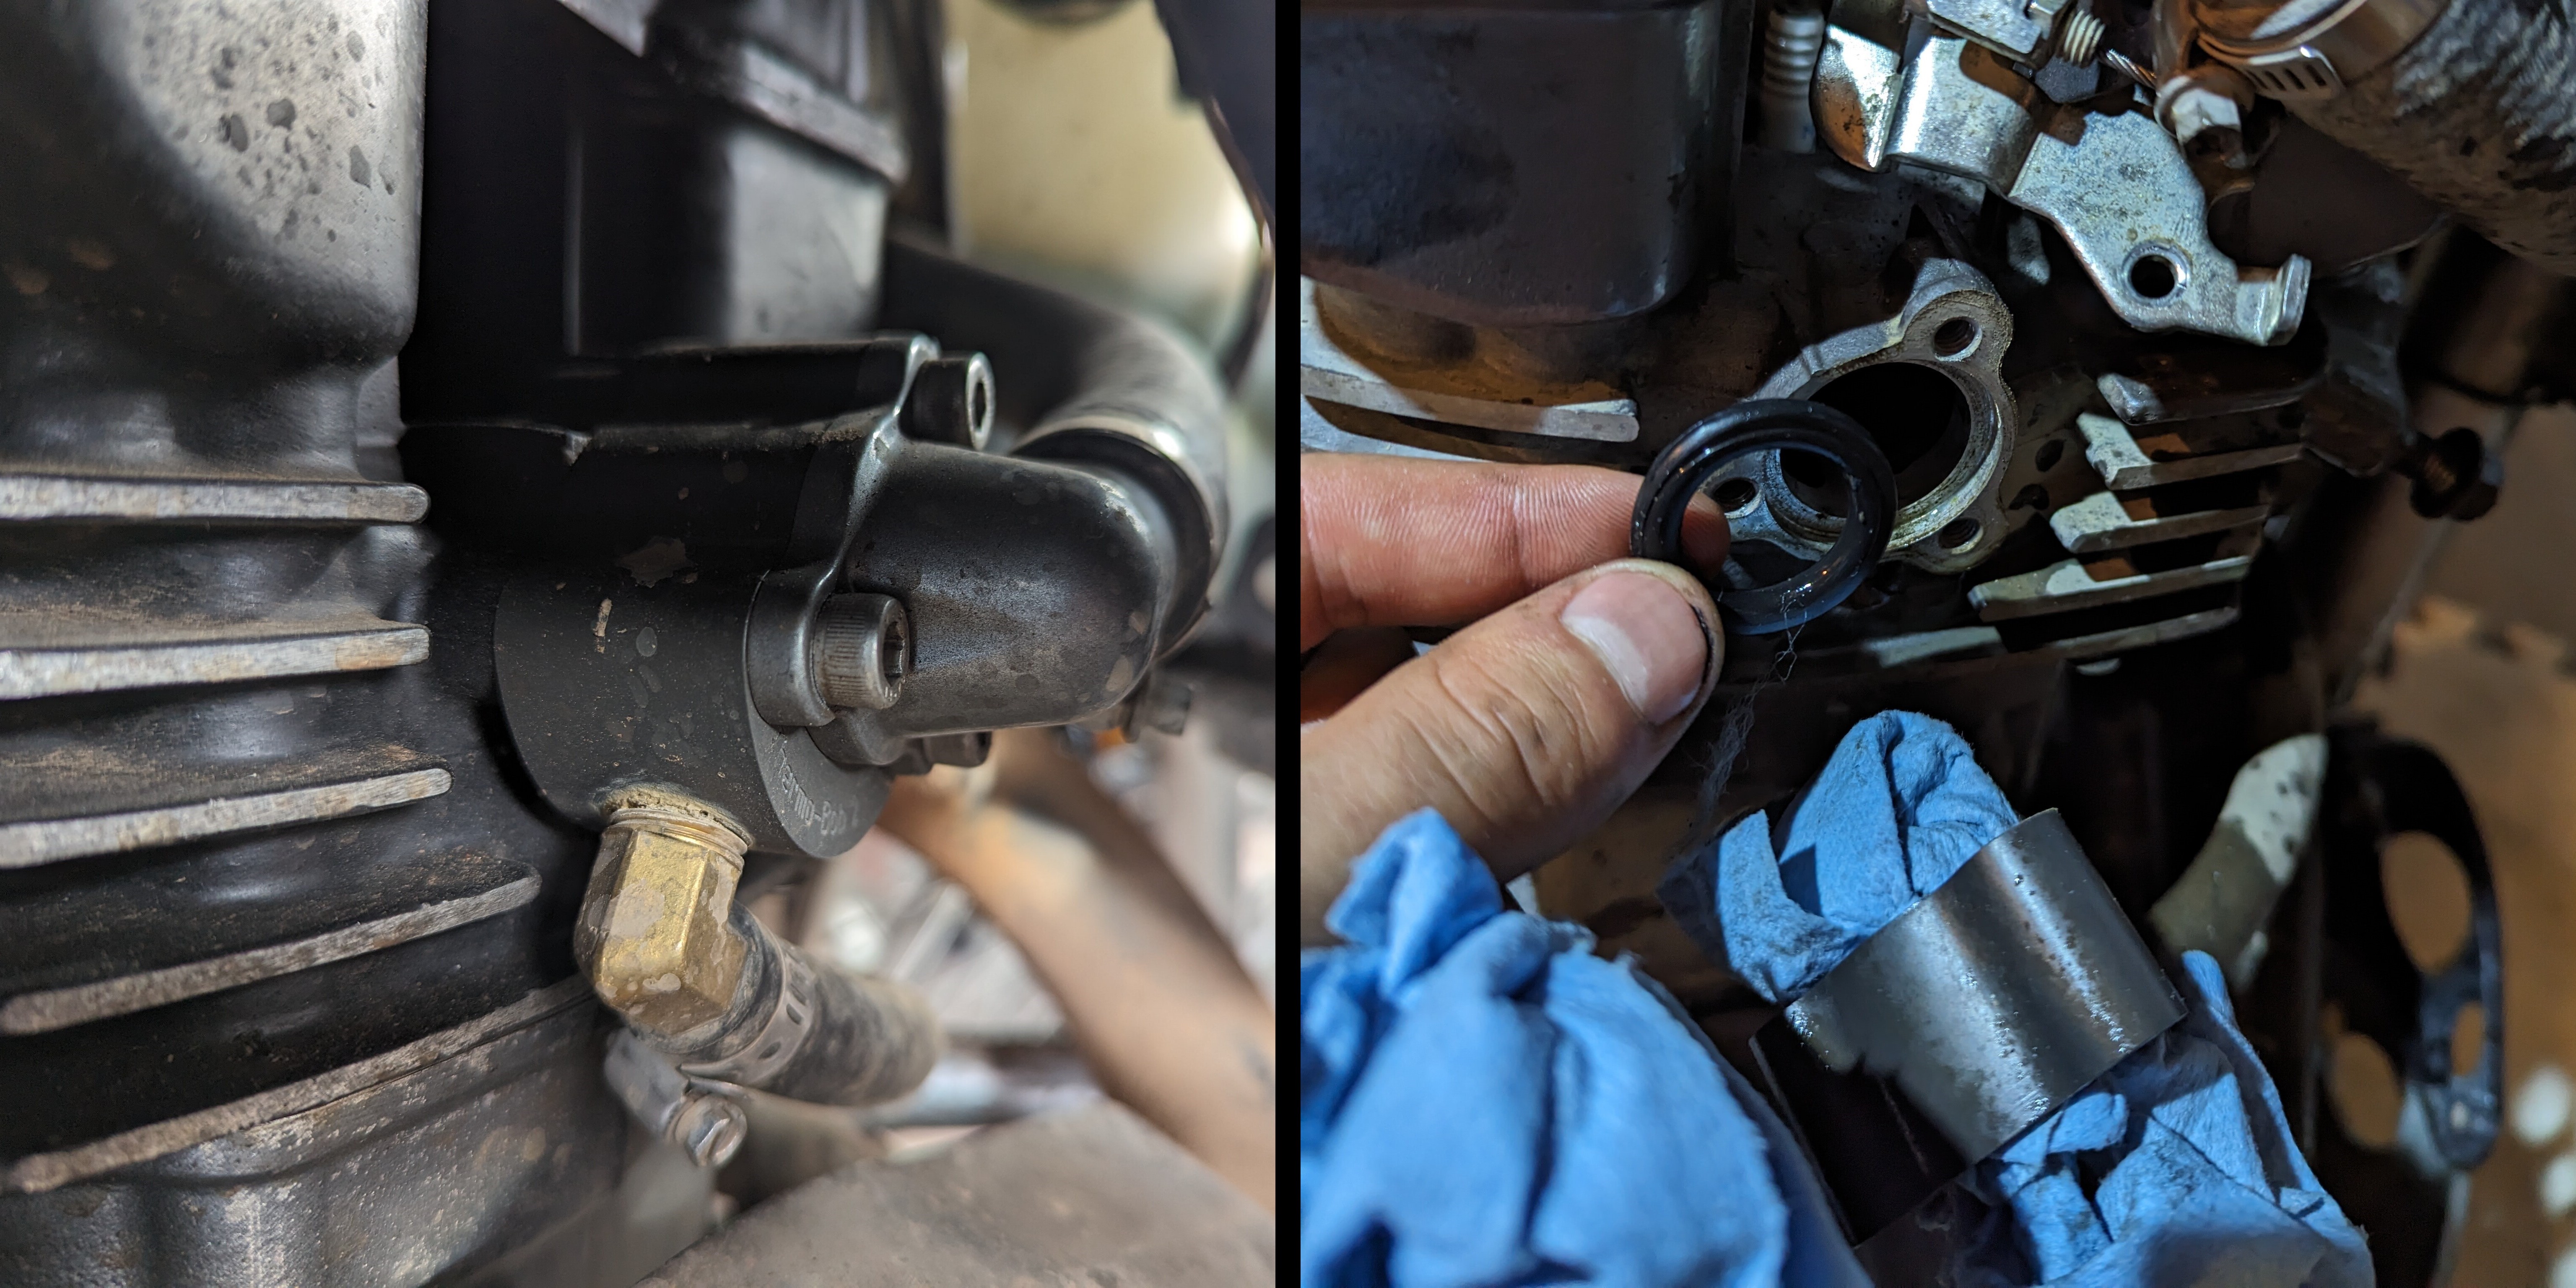 Putting together the coolant lines and Thromobob can be a bit tricky since it’s easy to assemble it backwards. A good photo goes a long way here.
 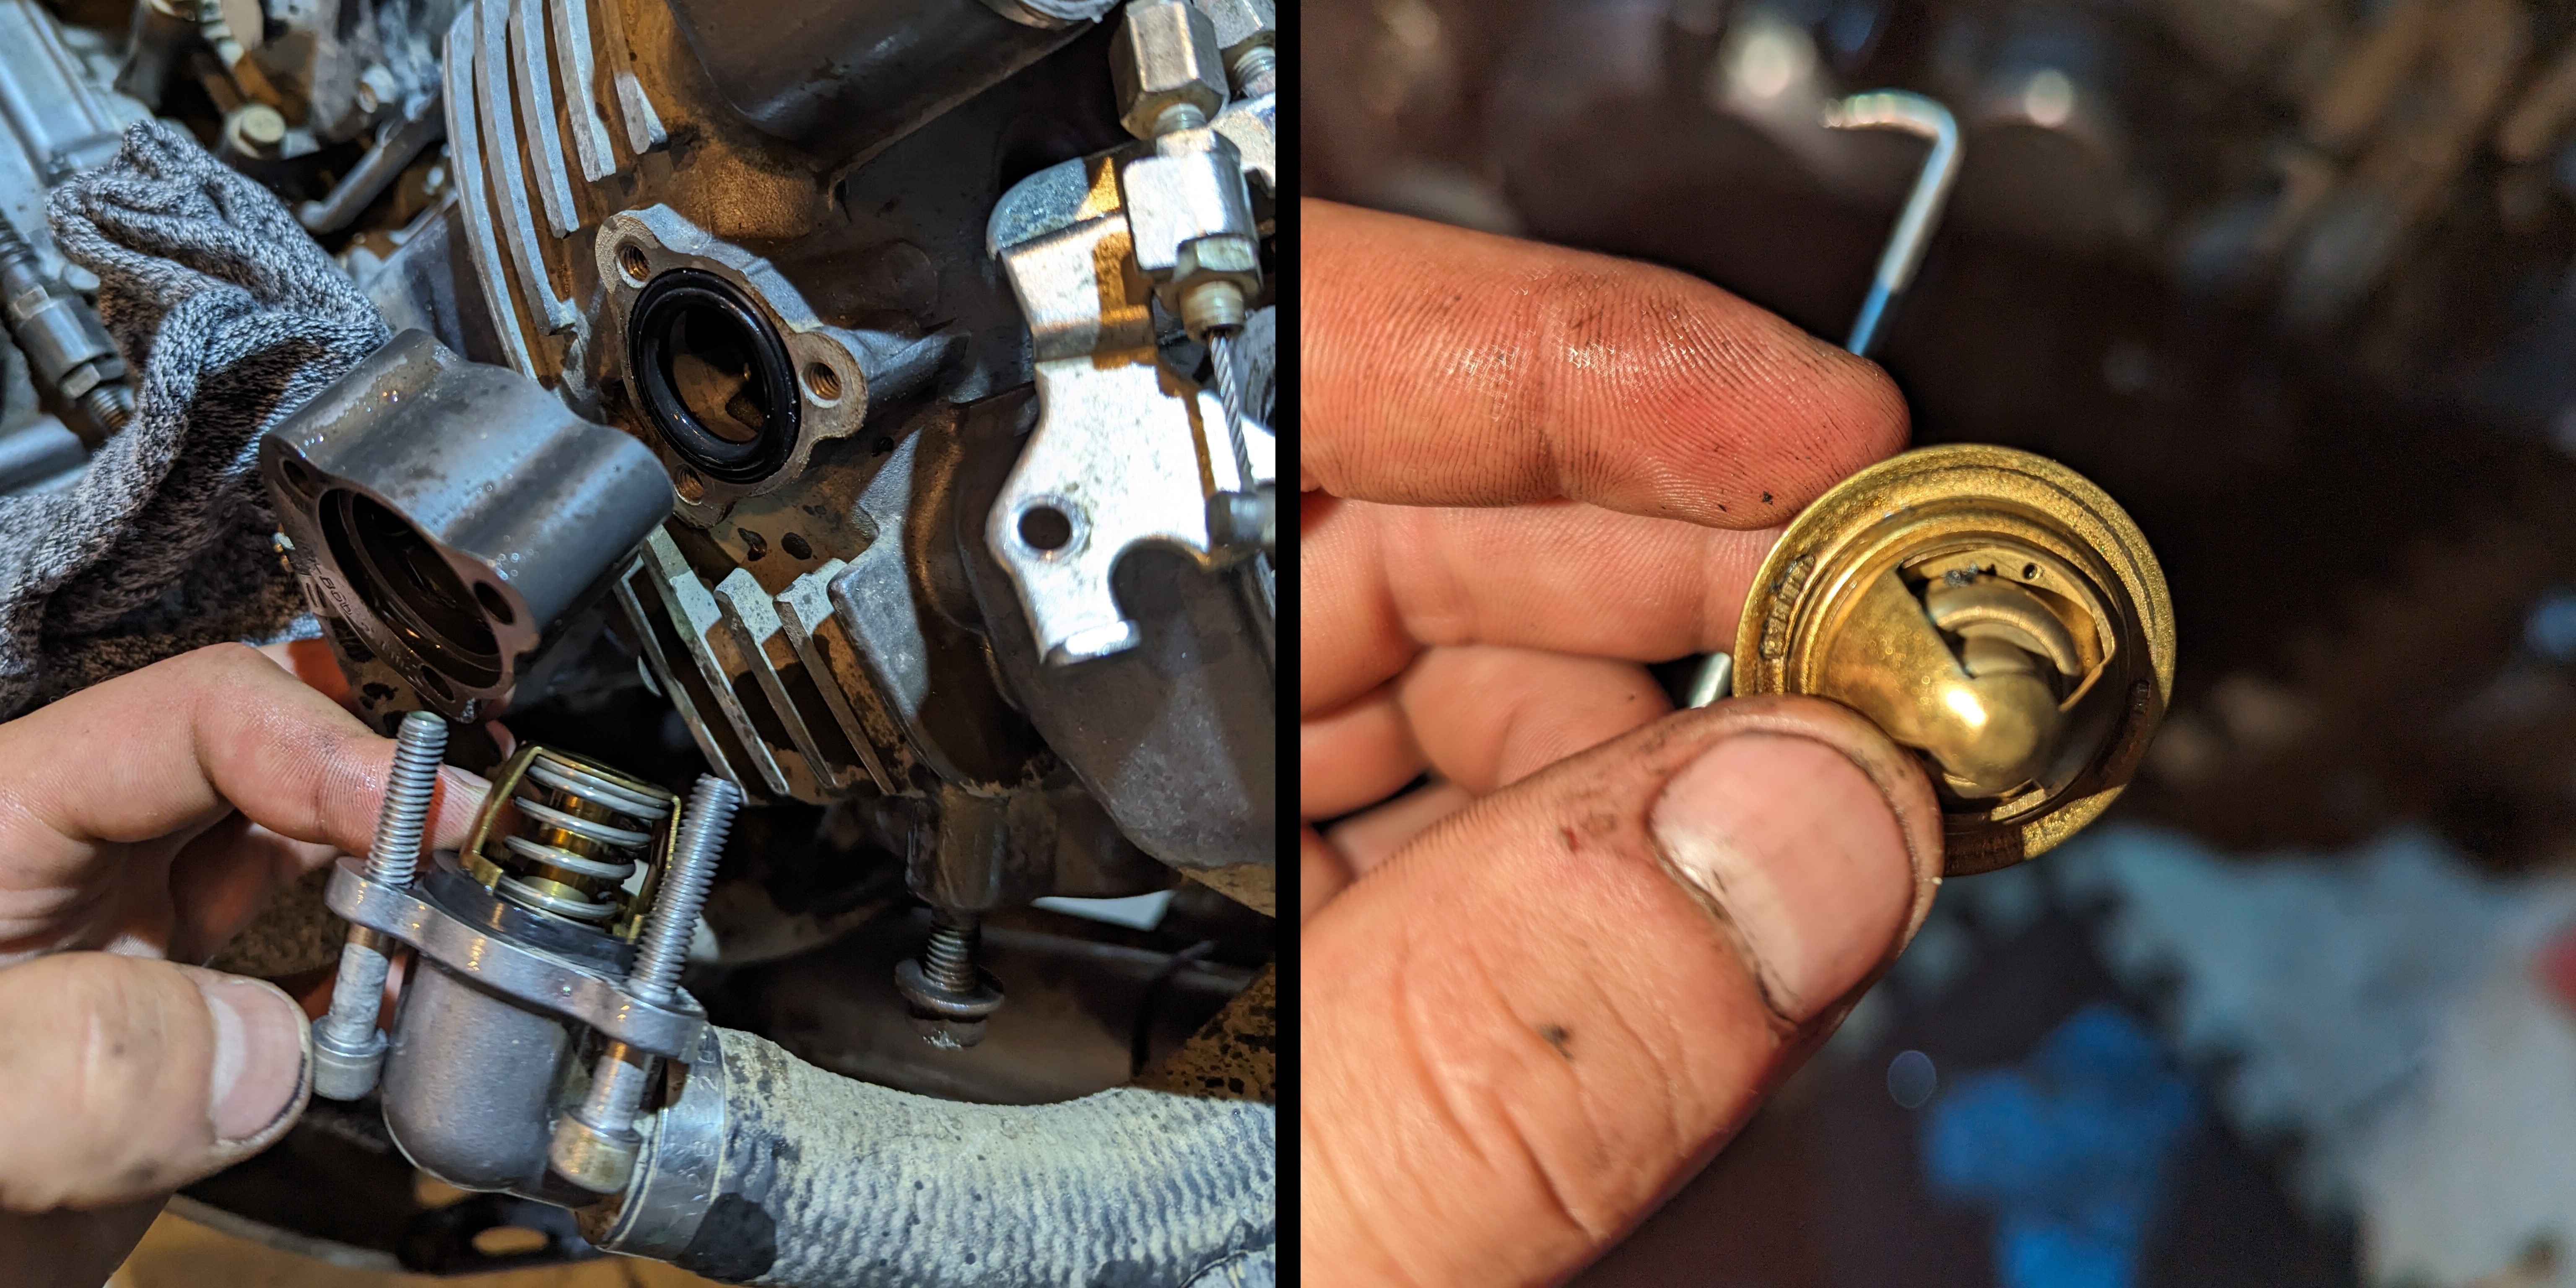 When inspecting the thermostat on my Thermo-Bob I noticed a small piece of rubber clogging one of the bleed holes. Worth checking out while apart.
SIlicon Sealant
Assuming the mating surfaces are clean, less is more when it comes to the RTV silicon. A thin beas around the entire mating surface is prefered to create a tight and uniform seal between the cylinder head and the engine block.